Watermarking Images with Automator and Acorn
Pretend you have a folder of images on your desktop, named "Originals". You want to open up these images and add a custom image you've made, which will act as a watermark. If you don't have one handy, you can use the Flying Meat logo: FlyingMeatWatermark.png. Save that image next to your Originals directory.
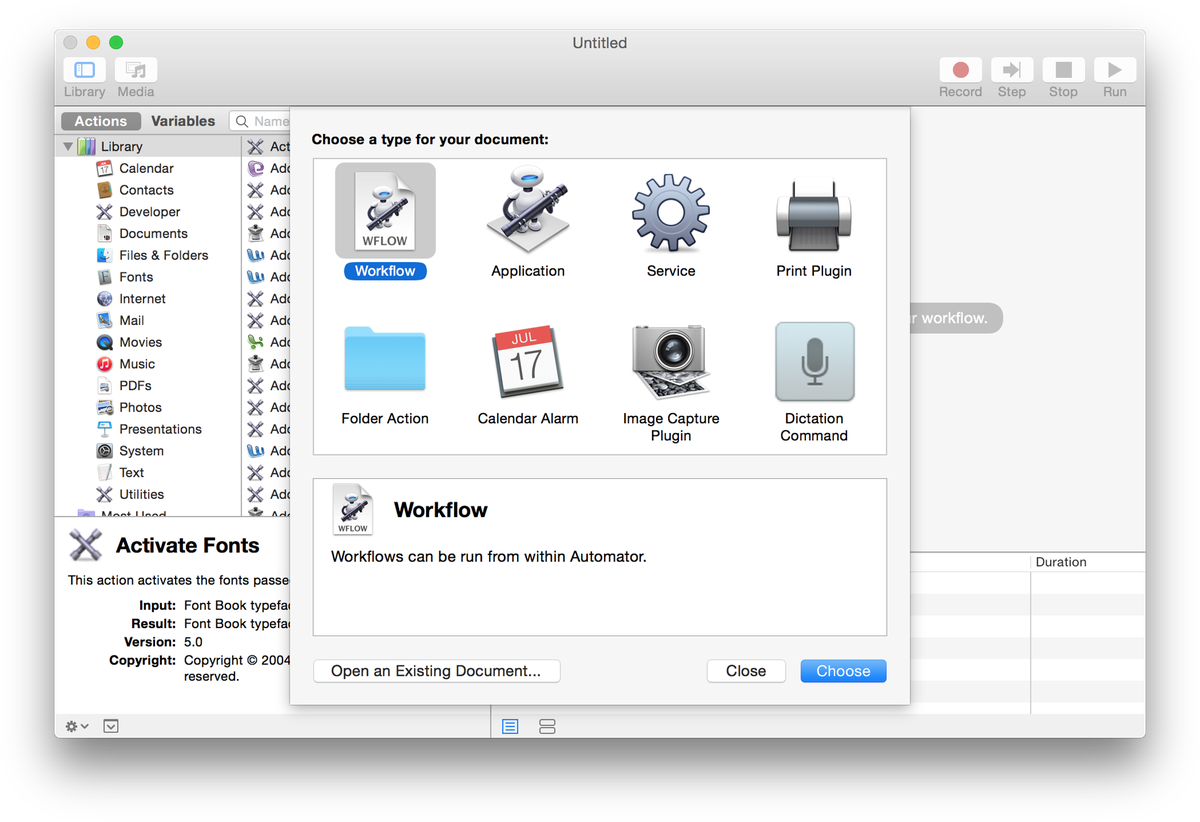
Now that the files are ready, it's time to launch Automator (located in your Applications folder) and make a new workflow:

Choose the "Workflow" option.
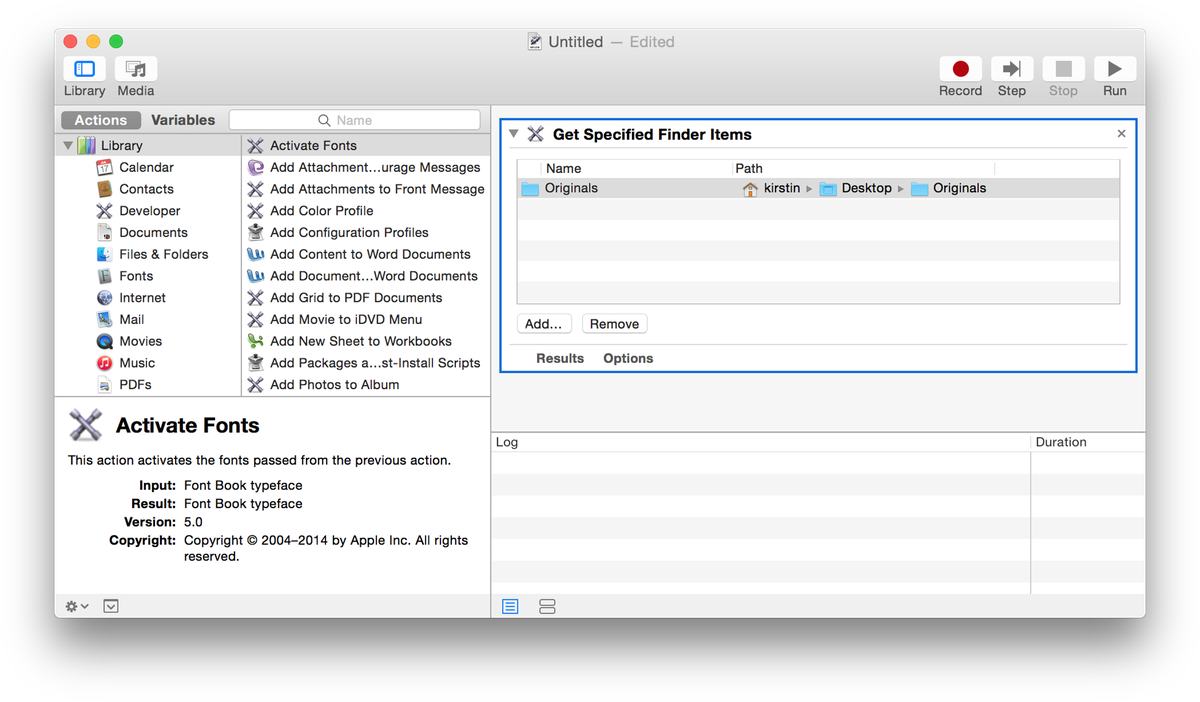
Next, drag and drop your Originals folder to the area in your Automator window that says "Drag actions or files here to build your workflow". Your action should look similar to this now:

The next step is to add the Acorn action "Layer on Images". You can do this by searching for "Acorn" in the search field, or choosing "Photos" from the Library column and finding it in the next column to the right. Double click on the "Layer on Images" entry.
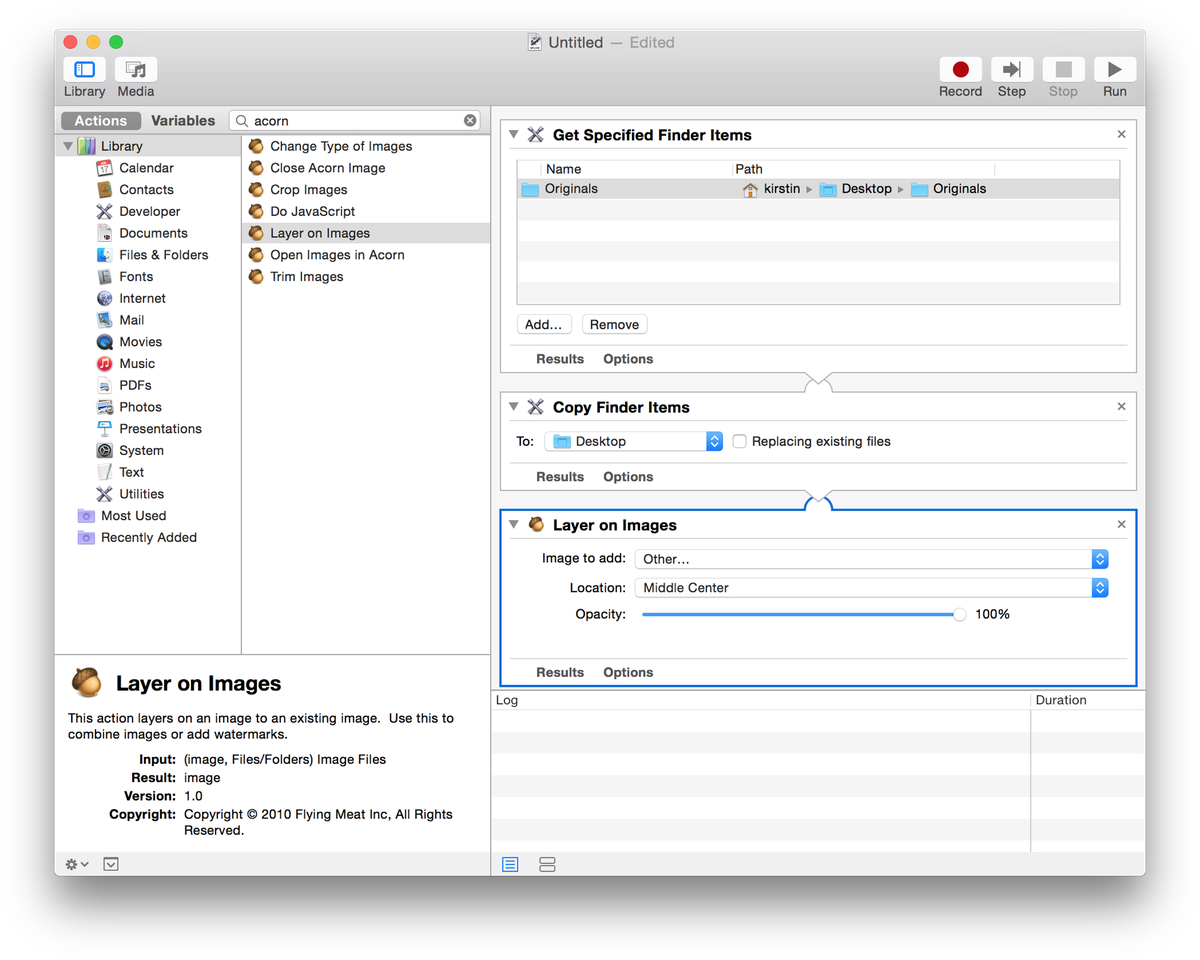
Before adding your action, Automator will ask you if you want to add a "Copy Finder Items" action. Since you likely want to keep your original images as they are, press the "Add" button. Your workflow should look like this now:

Now tell Automator what to use as a watermark. Click on the "Image to add" pulldown, and find the watermark image you'd like to use. For this example, choose "Bottom Left" for the "Location" pulldown to place the watermarks in the bottom left hand corner of the images. The configured action should now look like this:

Finally, save your Action, and then run it! A copy of the Originals folder will be made (most likely named "Originals 2"). Acorn will then open up each image in that folder, add the watermark to it, save the image, and close it. Success! And completed in a fraction of the time compared to doing this all by hand.
Automator Warning: If Automator gives you some sort of warning about the Action not working correctly, save your action and try again.