Creating a Seamless Tile
To create a seamless tile in Acorn, first you need an image to tile. It can be an object with a plain background or you can use Acorn's brush shapes.
Using Brushes to Create a Tile
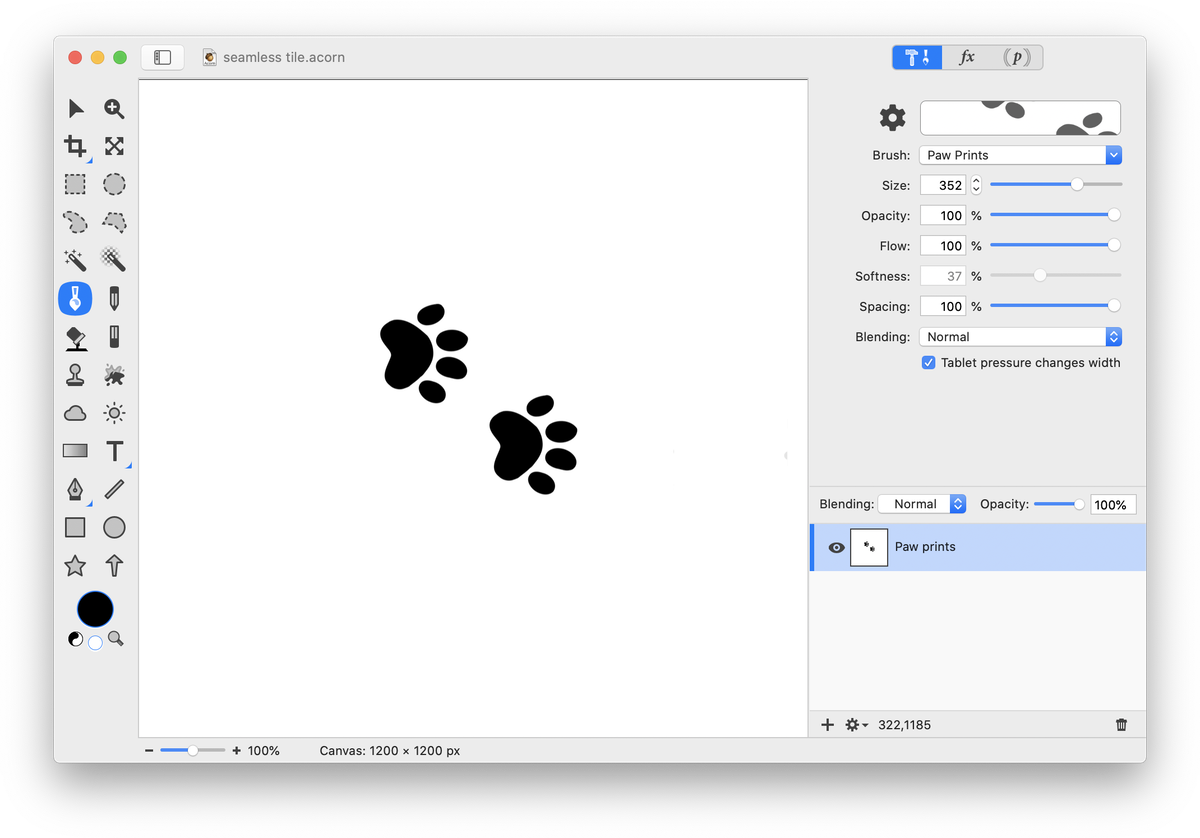
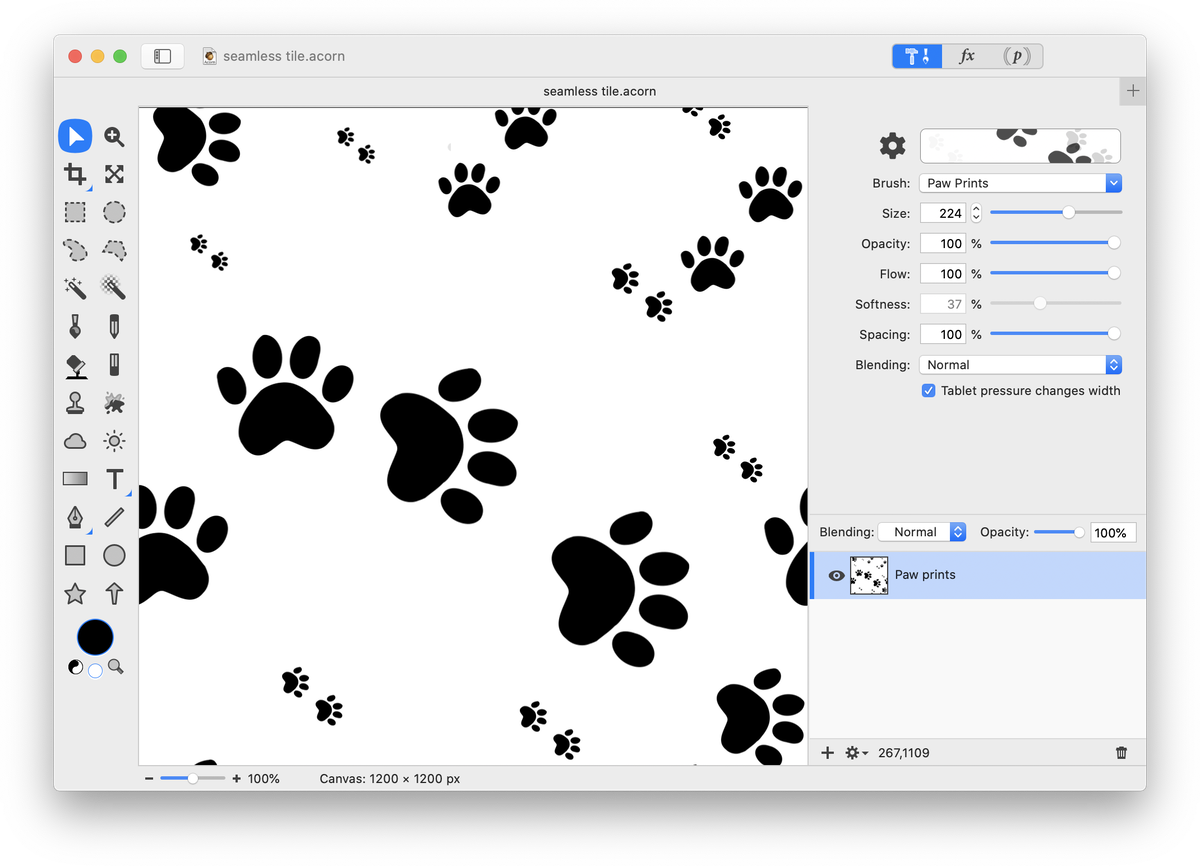
Create a new image in Acorn, File ▸ New. This example uses image dimensions of 1200 x 1200 pixels with a white background. Stamp a single shape onto the center of the image with your brush.
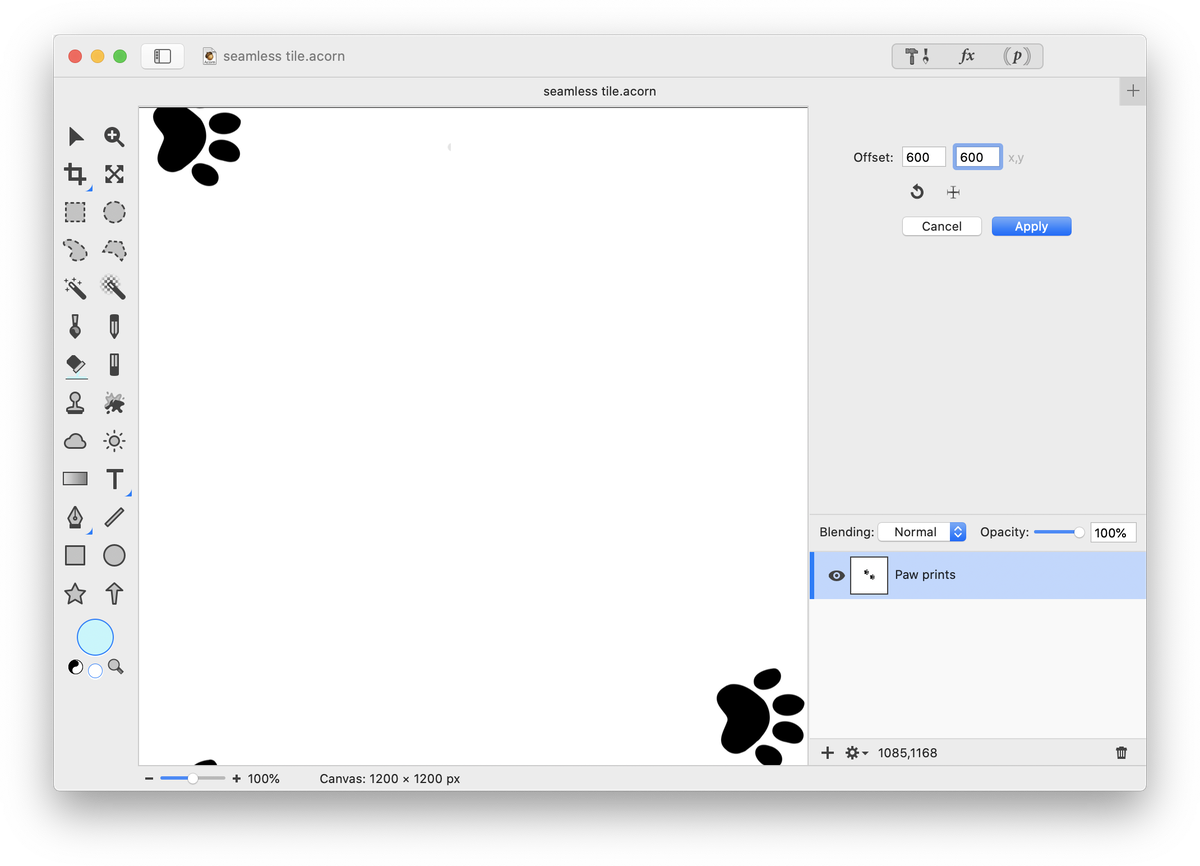
Now tile the paw prints. Go to Layer ▸ Rotate and Transform ▸ Offset and Wrap Layer. Enter the center dimensions of your image into the x,y fields in the inspector palette. Click 'Apply'.
Create a new layer, Layer ▸ New Layer and stamp another shape onto it. Play around with varying the direction and size of the prints. Apply the offset again using different x,y coordinates. You want the prints to be partially off the edge of the canvas. Here the offset was applied to 3 different layers:
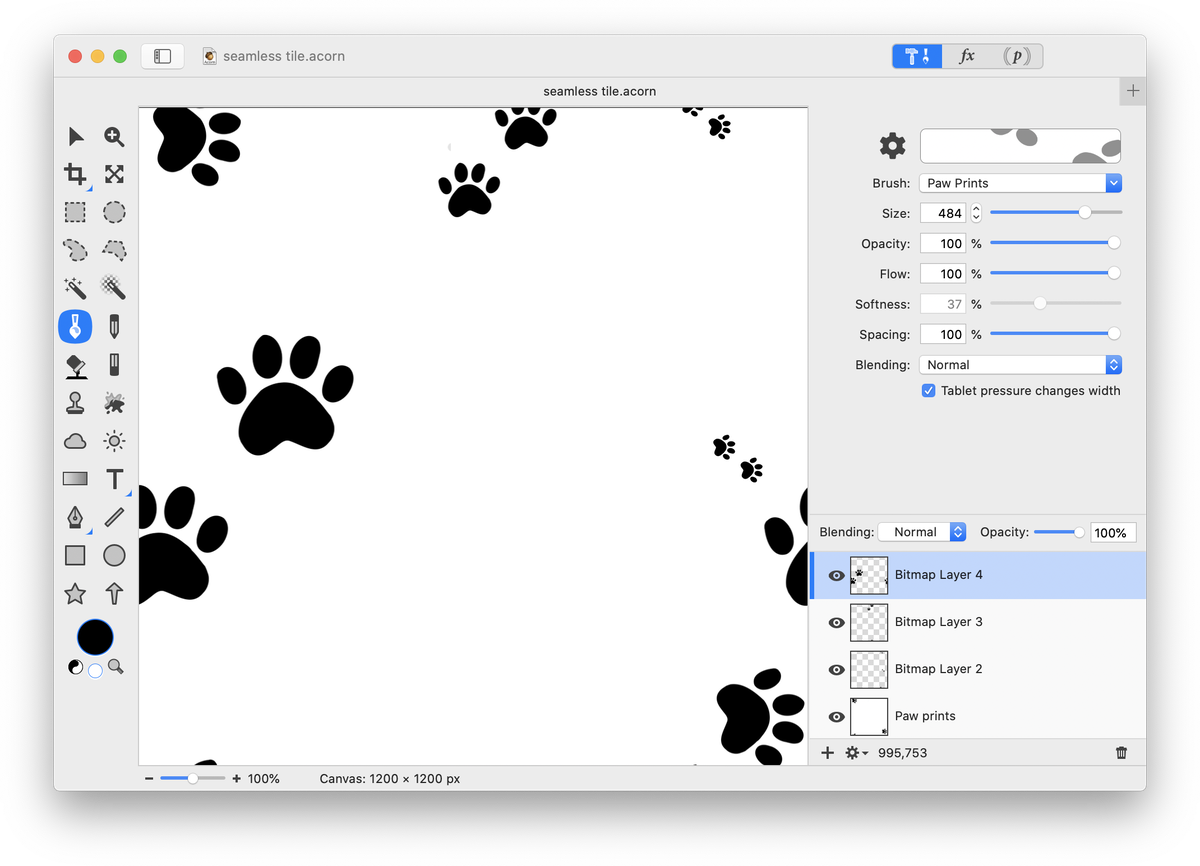
Now you can just stamp your shapes without using the offset as these shapes won't lie on the edge of the image. If you have multiple layers merge them down (⌘E) to make multiplying the tile easier in the next step.
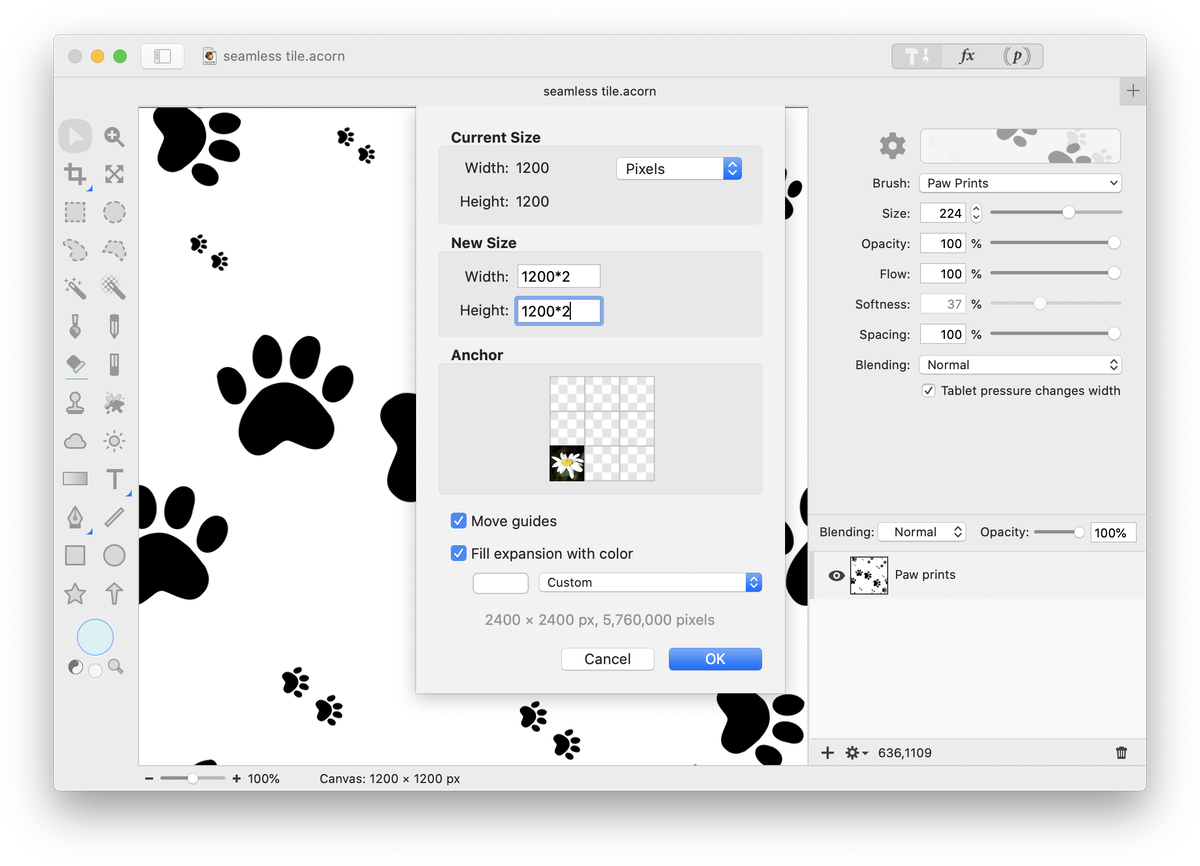
In order to tile x4, or any other multiplier, you will need to resize your canvas. Go to Image ▸ Resize Canvas. To tile x4 double the current width and height dimensions. Just below dimensions where it says "Anchor", click on the bottom left hand corner to move the image to the bottom left. Click "Ok".
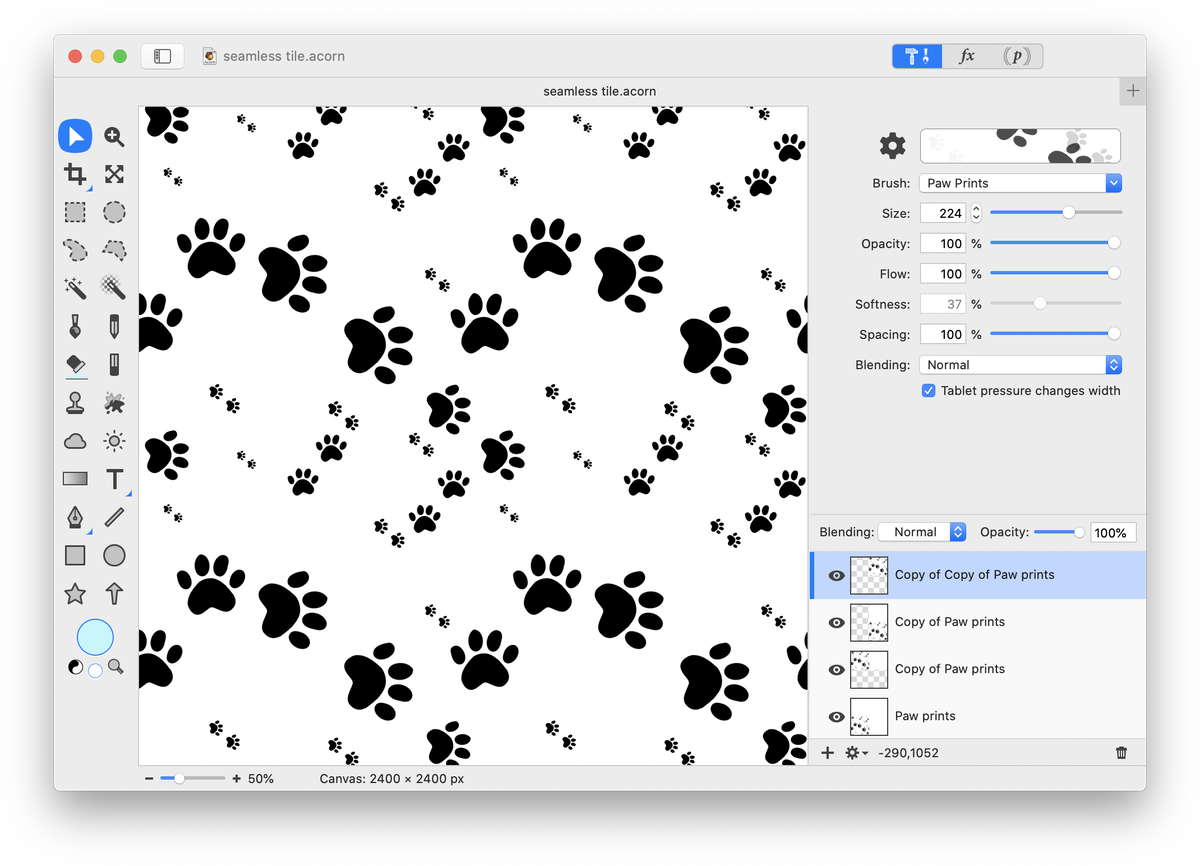
You should now see your tile in the bottom left hand corner of the canvas. Copy (⌘C) and paste (⌘V) your tile 3 times. Using the move tool, line up the copies to create the seamless effect!
This is what it looks like tiled x4:
Using an Image to Create a Tile
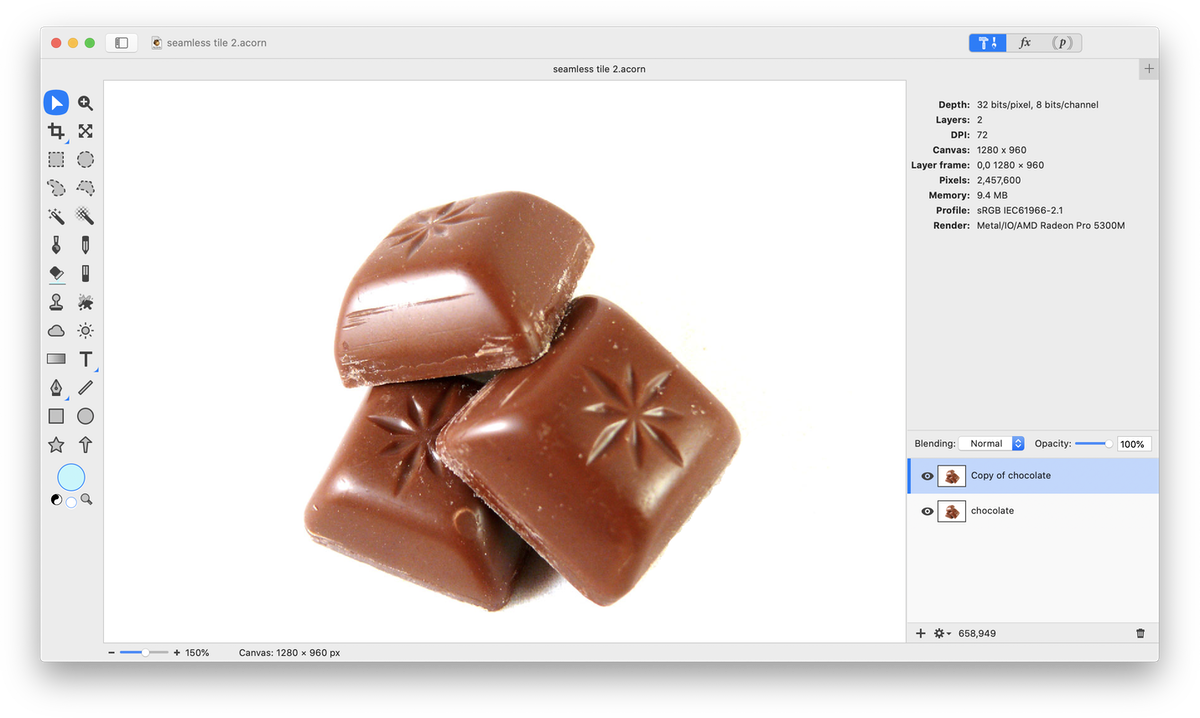
Tiling is a little bit different when working with an image. Choose an image you want to tile and open it in Acorn, File ▸ Open . An image with a solid color background is best. Duplicate your layer, Layer ▸ Duplicate Layer.
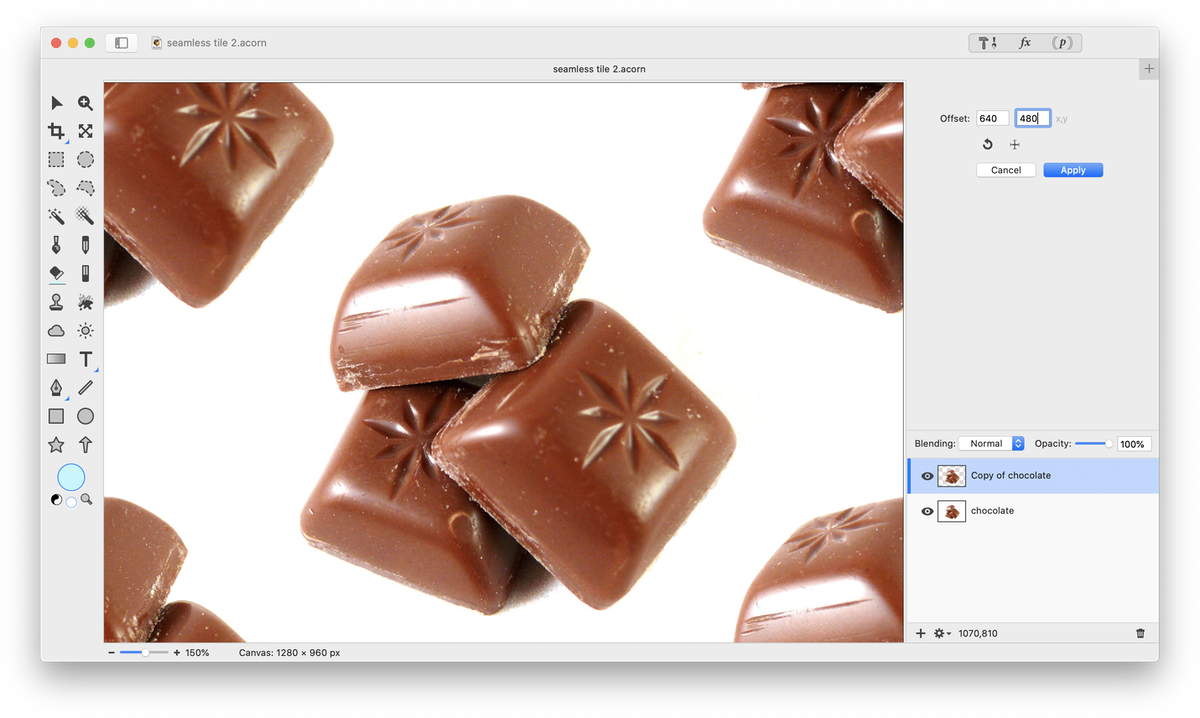
Remove the background of your duplicated layer. To learn more about how to do this, read ‘Remove the background’. Go to Layer ▸ Rotate and Transform ▸ Offset and Wrap Layer. Enter your image's center dimensions in the Offset x,y fields in the inspector palette. Click 'Apply'.
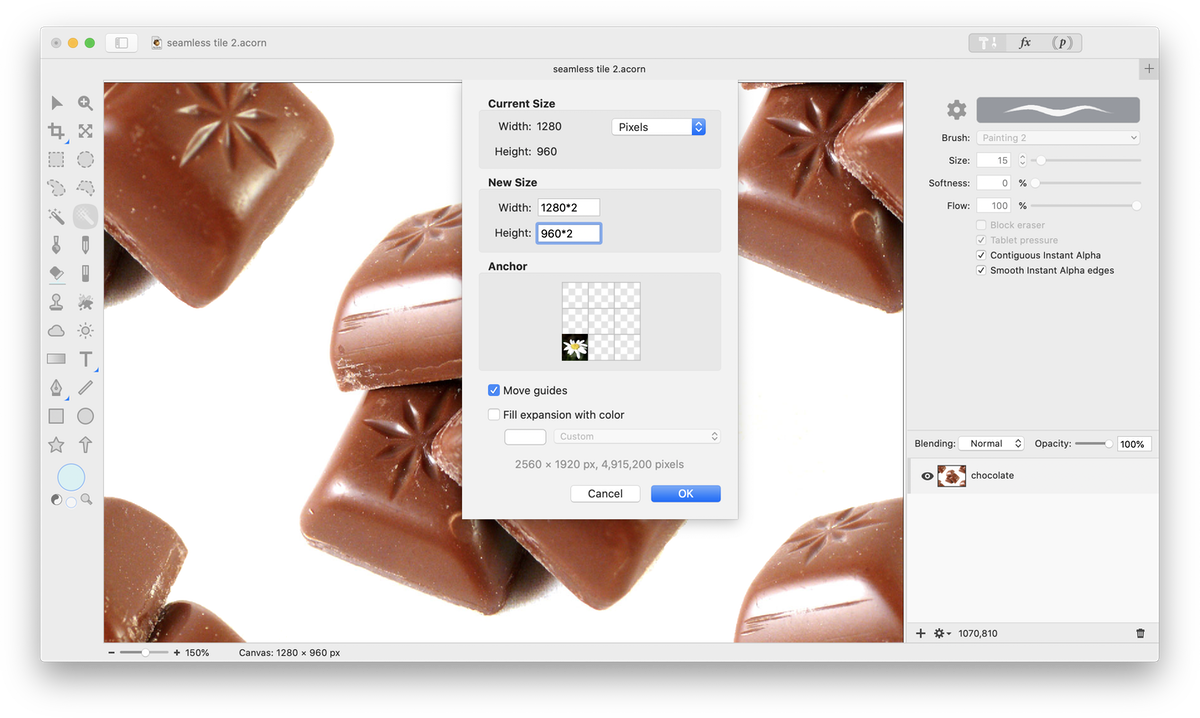
Merge your layers down (⌘E). In order to tile x4, or any other multiplier, you will need to resize your canvas. Go to Image ▸ Resize Canvas. To tile x4 double the current width and height dimensions. Just below dimensions where it says "Anchor", click on the bottom left hand corner to move the image to the bottom left. Click "Ok".
You should now see your tile in the bottom left hand corner of the canvas. Copy (⌘C) and paste (⌘V) your tile 3 times, and using the move tool line up the copies to create the seamless effect!
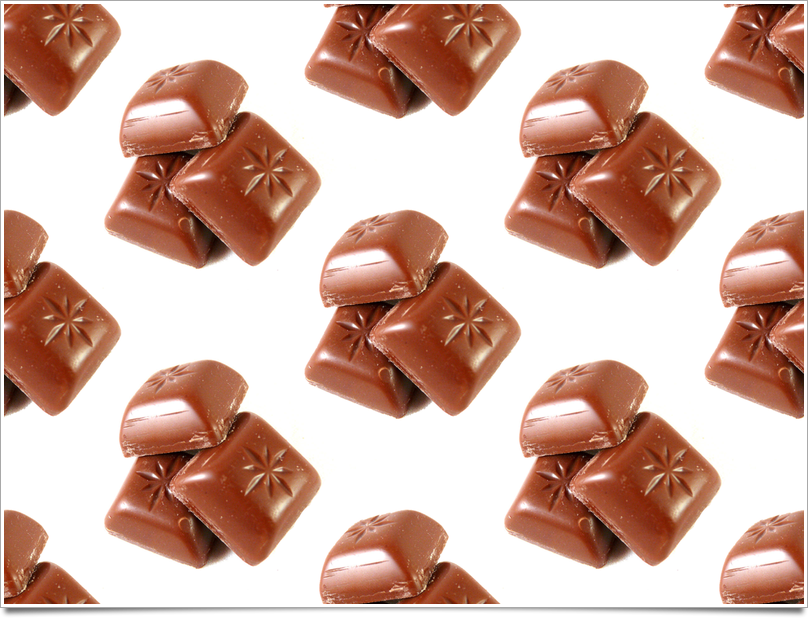
And this is what it looks like tiled x 4:

Photo Credits
Chocolate © Anna Langova