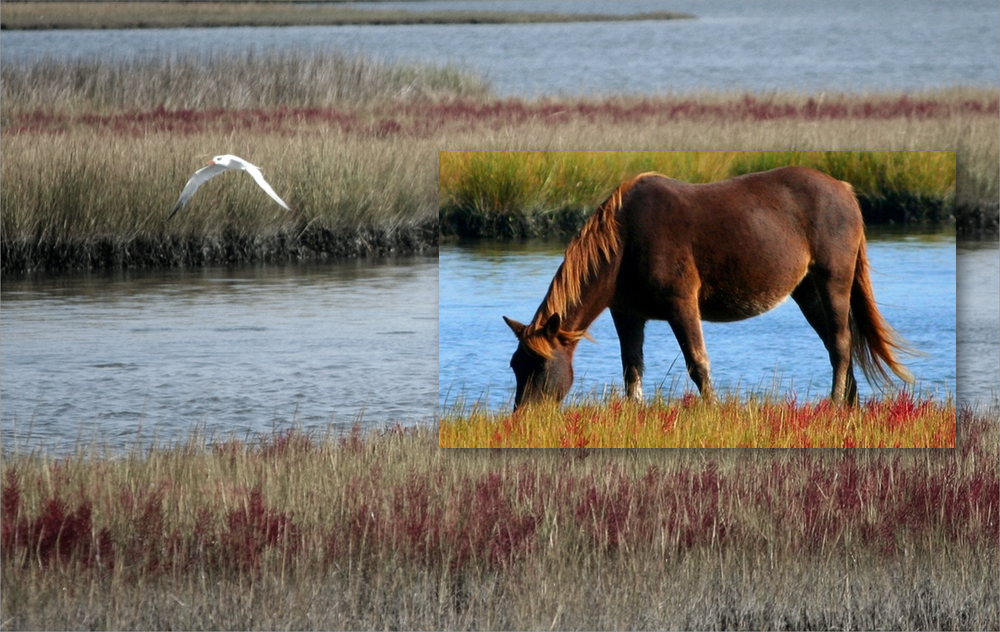
Photo Inside a Photo
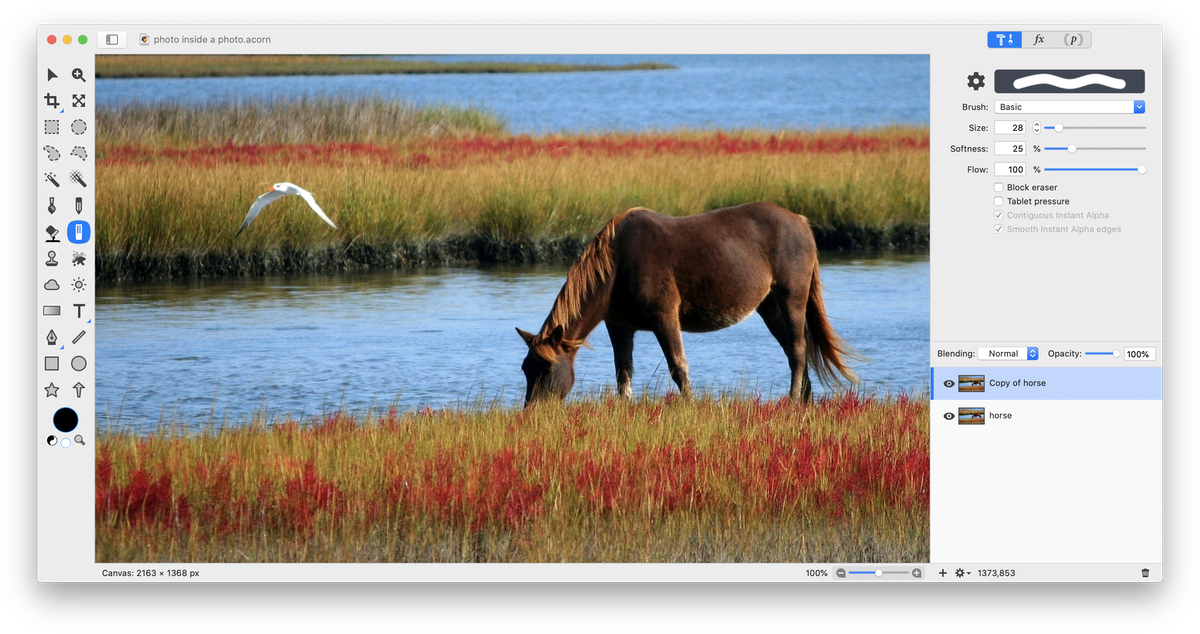
Open your image in Acorn, File ▸ Open. Duplicate the layer by right clicking on the layer in the layers list and selecting "Duplicate Layer" (⇧⌘D).
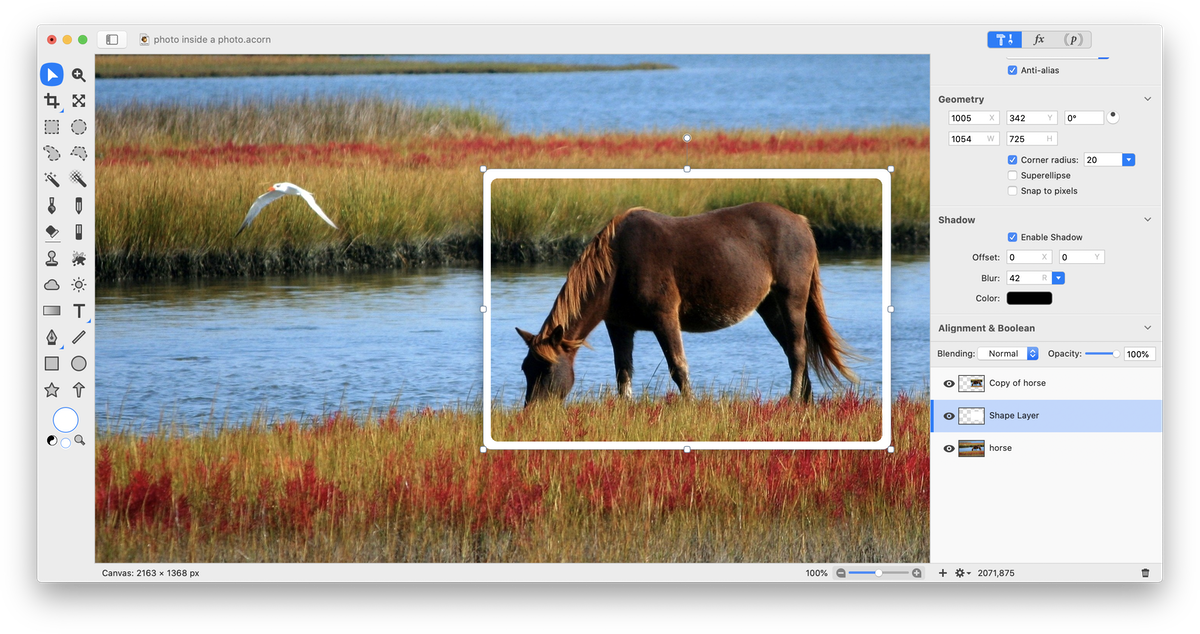
Click on the top layer in the layers list to select it. Click on the rectangular selection tool in the palette and drag out a selection of the area you want to be the "Photo". The selection is viewed as clipped out right now to highlight its position.
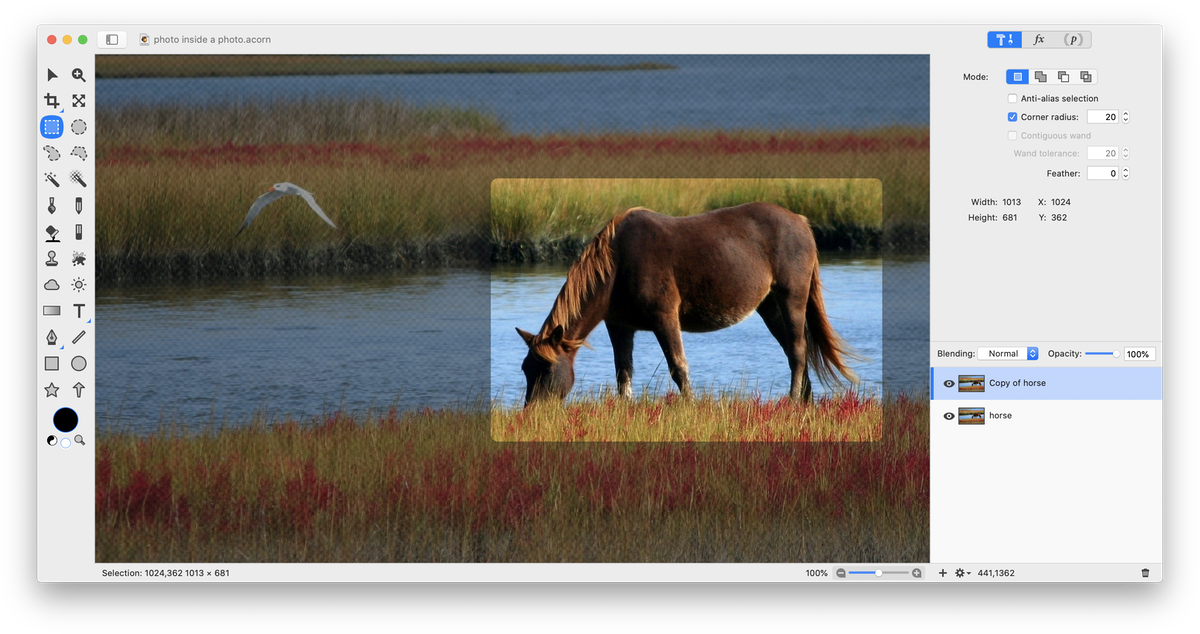
Inverse the selection by going to Select ▸ Inverse (⇧⌘I). Hit the delete key. This will leave the "photo" area separate from the background. Deselect (⌘D).
Now, select the bottom image layer by clicking on it in the layers list. Select the Rectangle shape tool in the tools palette. Make sure the fill box is checked and stroke is unchecked. Create a rectangle under the "photo" and on top of the background. If you have a hard time seeing where the "photo" is, turn off the visibility on the background layer by clicking on its visibility eye in the layers list.
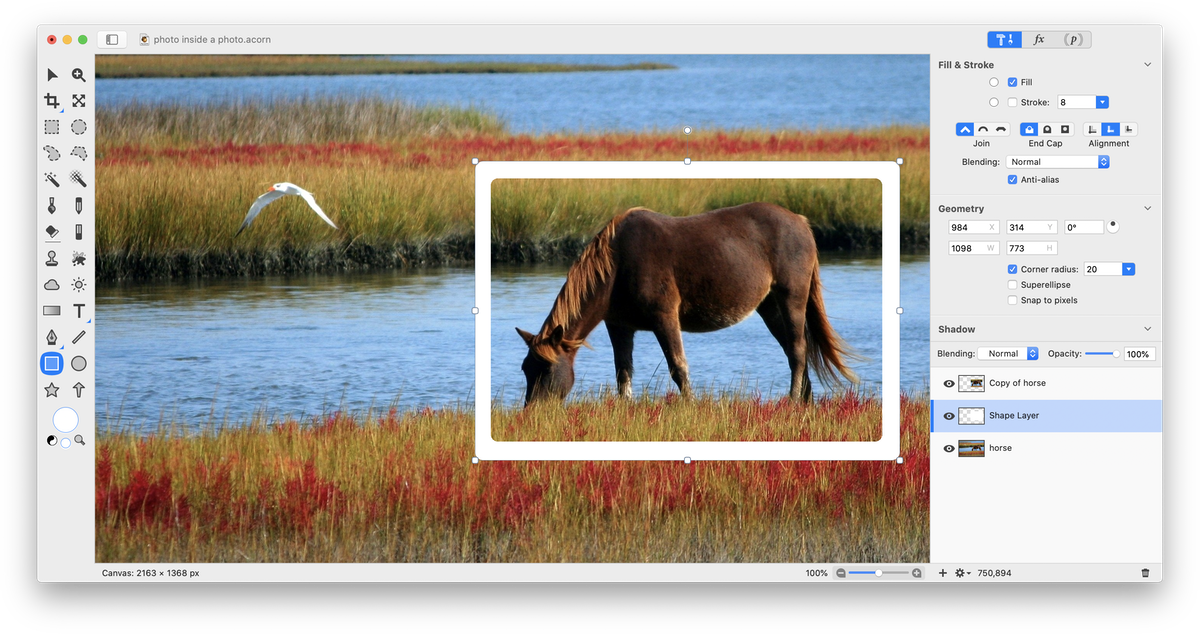
When you have your border in place, click on the shape shadow option. You can read more about this under drop shadows. Adjust the shadow placement, blur, and color until you get the effect you want.
Desaturating the background layer will make the photo stand out more. To do this, click on your bottom layer in the layers list to select it, and go to Filter ▸ Color Adjustment ▸ Color Control and adjust the Saturation slider to the left.
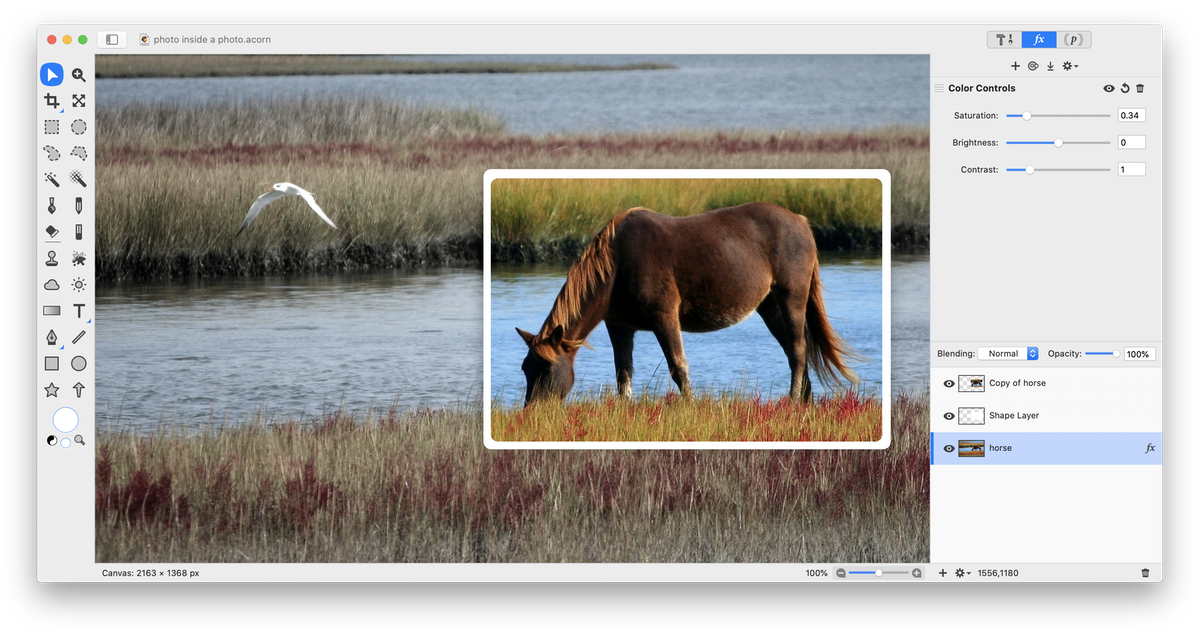
An alternative technique is to not use a shape layer at all. Instead, click on the copy of the horse layer and add a drop shadow.