Bézier Curves
![]()
The bézier pen tool is a shape tool used to create custom vector shapes. You can also select it by using keyboard shortcut "P". When the bézier pen tool is selected your cursor will look like the tip of an ink pen.
|
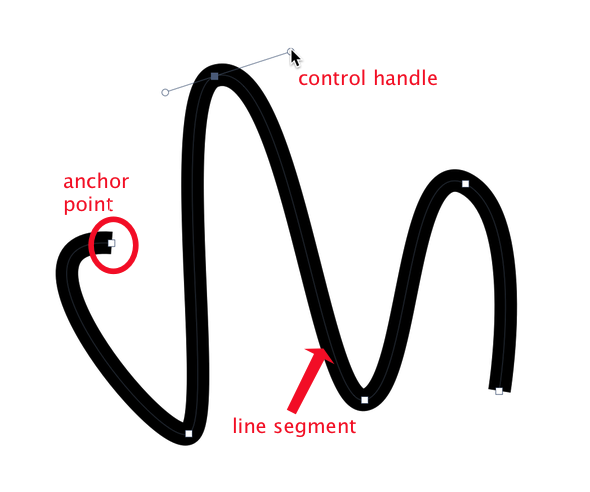
Creating a Bézier Shape Bézier shapes have line segments, anchor points, and control handles.
|
|
When you click on your canvas with the bézier pen tool, an anchor point will appear. You can then click on another area of the canvas to create a straight line. Continue placing anchor points by clicking (or clicking and dragging to make curved line segments) until you get the shape you want. You can hold down the shift key as you are clicking if you want to snap your line segments to the closest 45 degree angle. Double click to finish creating the shape, hit the escape key, or choose Shape ▸ Bézier Stuff ▸ Close Path.
Bézier shapes have the same shape options such as fill, stroke, width/height, and drop shadow available in the inspector palette as the other shape tools. For more information read the 'shape tools' tutorial.
|
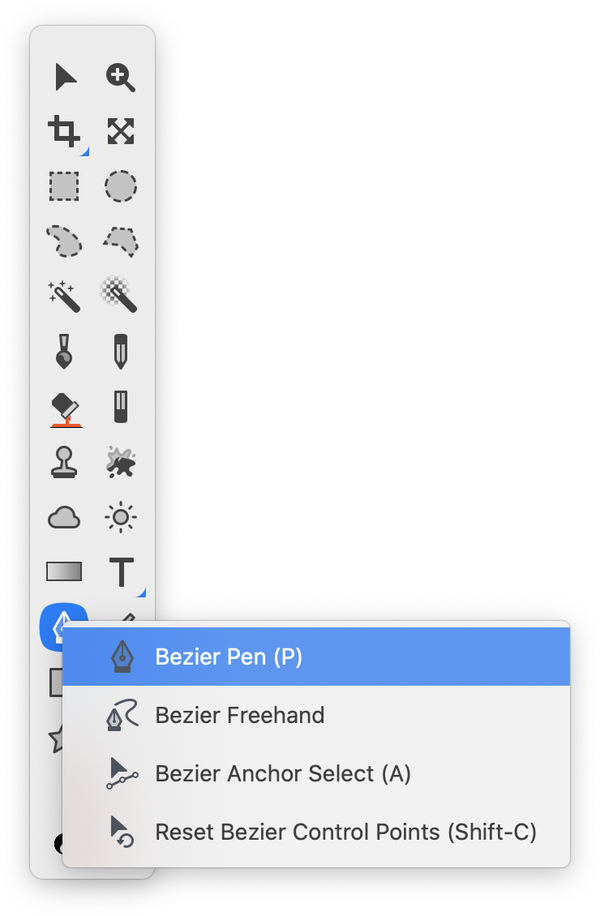
Bézier Basics Select Anchor Points (A): Click and hold on the bézier pen tool and a drop down menu will appear. Choose 'Bézier Anchor Select Tool' (keyboard shortcut 'A'). You can then click on an anchor point to select it.
Adding Anchor Points: To add points to an existing bézier shape, select the shape and choose the bezier pen tool. Hold down the shift key and click on the area of the shape where you want the anchor point to appear. A highlighted anchor point will appear, showing where your anchor point will be located. Click once to commit the anchor point placement. You can also use Shape ▸ Bézier Stuff ▸ Add Points to add more points throughout the shape. Deleting Anchor Points: To delete anchor points, select an anchor point then hit the delete key. Alternatively, you can select the bézier pen tool and hold down the option and command keys simultaneously and click on the anchor point to remove it. To have Acorn automatically delete random points for you, try Shape ▸ Bézier Stuff ▸ Simplify Path. |
|
Reset Bézier Control Points (Shift - C): Click and hold on the bézier pen tool and a drop down menu will appear. Choose 'Reset Bézier Control Points Tool' (keyboard shortcut 'Shift - C'). You can then click on an anchor point to straighten an existing curve, or click and drag on an anchor point to create a curve. There is also an option to reset bézier control points under the Shape ▸ Bézier Stuff menu.
Closing a Bézier Path: Press the enter or return key to close a bézier path. Pressing the escape key will finish editing a path, but will keep it open. You can also choose Shape ▸ Bézier Stuff ▸ Close Path when your path is selected.
Extending a Bézier Path: Double click on an open bezier shape to continue extending it. You can also use Shape ▸ Bézier Stuff ▸ Extend Path or you can extend an open bezier path by holding down the shift key with the bezier tool selected, and clicking on the end of a bezier path.
|
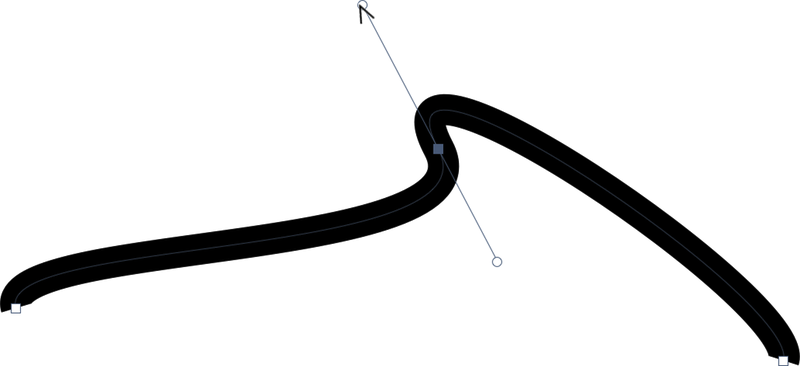
Editing Bézier Shapes You can use the arrow keys to move selected control points in a bézier shape or click and drag on a control point to modify its position. Curved Line Segments: To curve an existing line, you can either use the reset bézier control points tool as described above, or hold down the option key and click on an anchor point. The cursor will change to look like this: An additional option is to choose Shape ▸ Bézier Stuff ▸ Smooth Path. Acorn will automatically round any straight line segments. |
|
Straighten Line Segments: To make a curved line straight, use the reset bézier control points tool as described above, or hold down the option key and click once on the anchor point.
Rotating and Scaling: To rotate your bézier shape, use the angle field in the inspector palette. An alternative is to choose the move tool from the tools palette (keyboard shortcut v). Click on your shape to select it. Hover outside a corner of the boundary box and rotating arrows will appear. You can then click and drag to rotate. To scale your shape, select it with the move tool, and drag on a boundary of the shape. To keep the proportions intact while scaling, hold down the shift key.
Other Useful Editing Tips
- To delete a selected segment in a bézier shape, hold down the option key when pressing the delete key.
- Hold down the shift key when adjusting the control point will snap it to 45 degree increments as you click and drag.
- Use Shape ▸ Bézier Stuff ▸ Align Anchors to Pixels and Align Anchors to Half Pixels (appears by holding down option key for the latter menu item) to align selected anchor points in your shape to the pixel grid (or half of it). This helps with making crisp lines.
- You can temporarily toggle the "snap to pixels" setting when moving a bézier anchor by holding down the control key while clicking and dragging.
- Double clicking or pressing enter on a bezier shape will switch to the the anchor selection tool.
|
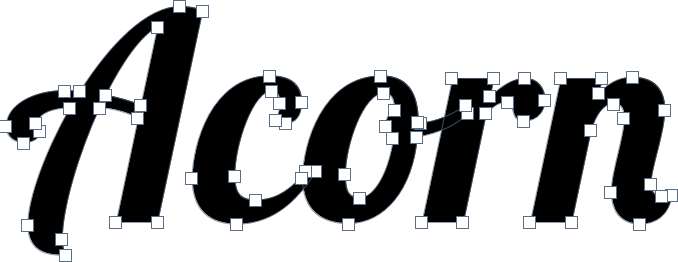
Converting Text & Shapes into Bézier Shapes To convert text into a bézier shape, first type out some text. Then with the text selected, go to Shape ▸ Bézier Stuff ▸ Convert to Bézier Shape. You can now modify the text with the anchor points and control handles. Each letter is its own separate bézier shape. To convert a shape into a bézier shape, first draw out your shape. Then with the shape selected go to Shape ▸ Bézier Stuff ▸ Convert to Bézier Shape. To turn the stroke of a shape into a bézier shape, choose Shape ▸ Bézier Stuff ▸ Outline Path. |
|
Additional Relevant Documentation
Bézier Basics Part 1 (video tutorial)
Bézier Basics Part 2 (video tutorial)


