Panorama
Panorama
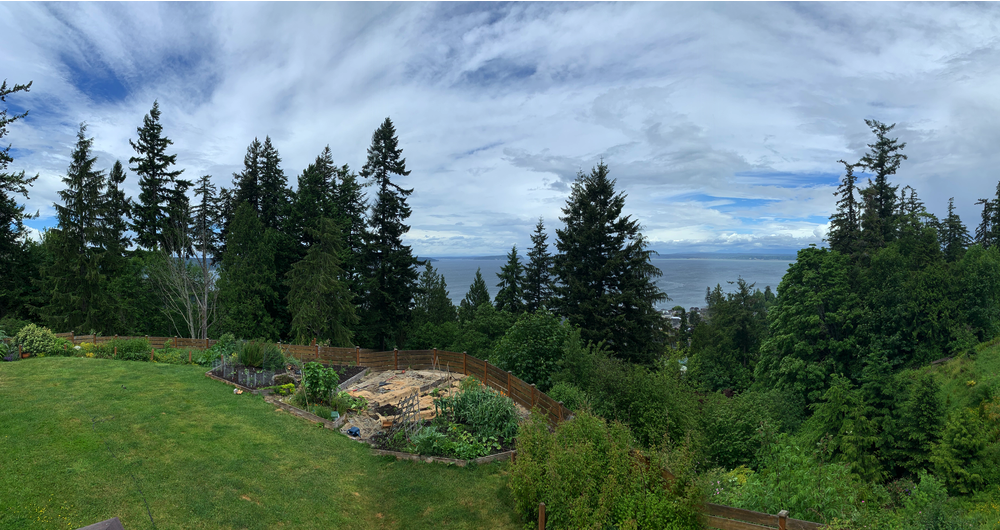
 This tutorial will teach you how to combine images to create a panorama in Acorn. Create a new image in Acorn, File ▸ New. You will likely want a fairly large canvas to start. This example uses a 3800 x 2400 canvas with a white background. Go to File ▸ Add Images and choose the images you want to be included in your panorama. Each image will be brought in as a separate layer.
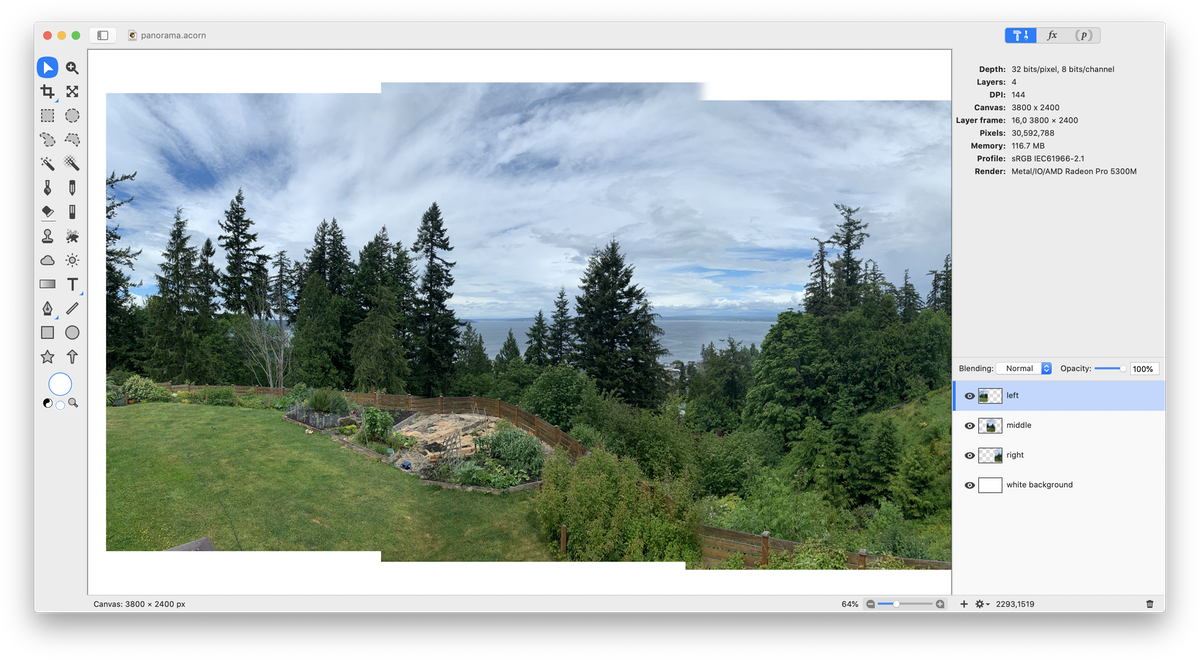
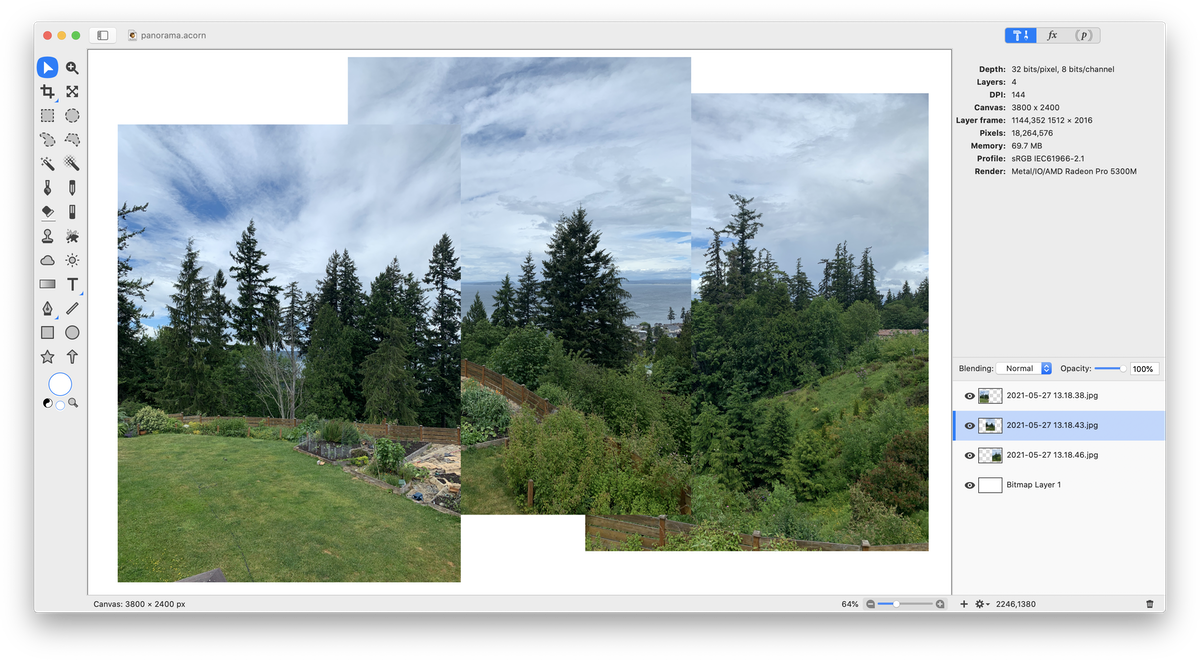 Rename your layers so it is easy to tell which one belongs where in the layers list. The layers here are renamed left, middle, right, and background. Rearrange your layers so the rightmost image is on the bottom of the layers list (just above the background), followed by the center, with the leftmost image on top.
Using the move tool in the tools palette, line up your images so they are close to being matched up. Don't match them up exactly, leave a little gap so a small area appears duplicated. It may be necessary to slightly increase or decrease the size of your image layers to assist with matching. Click on the layer you want to resize. Go to Layer ▸ Rotate and Transform ▸ Scale and Rotate. Increase or decrease the size, or rotate slightly until things look right. Uncheck the ‘keep proportions’ box to help with lining things up. In this example both the center and right most image were increased in size.
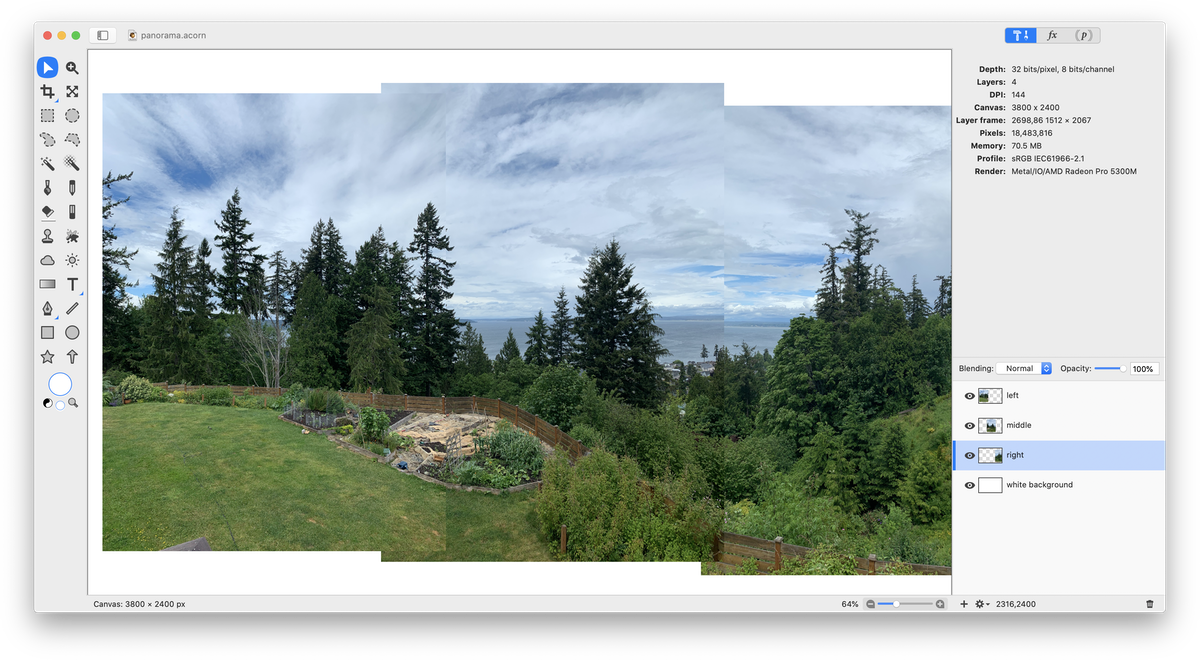 Choose the rectangular selection tool in the tools palette. Draw out a selection encompassing the obvious line of overlap between your center image and rightmost image. The selection is shown here as clipped out to help make it more visible.
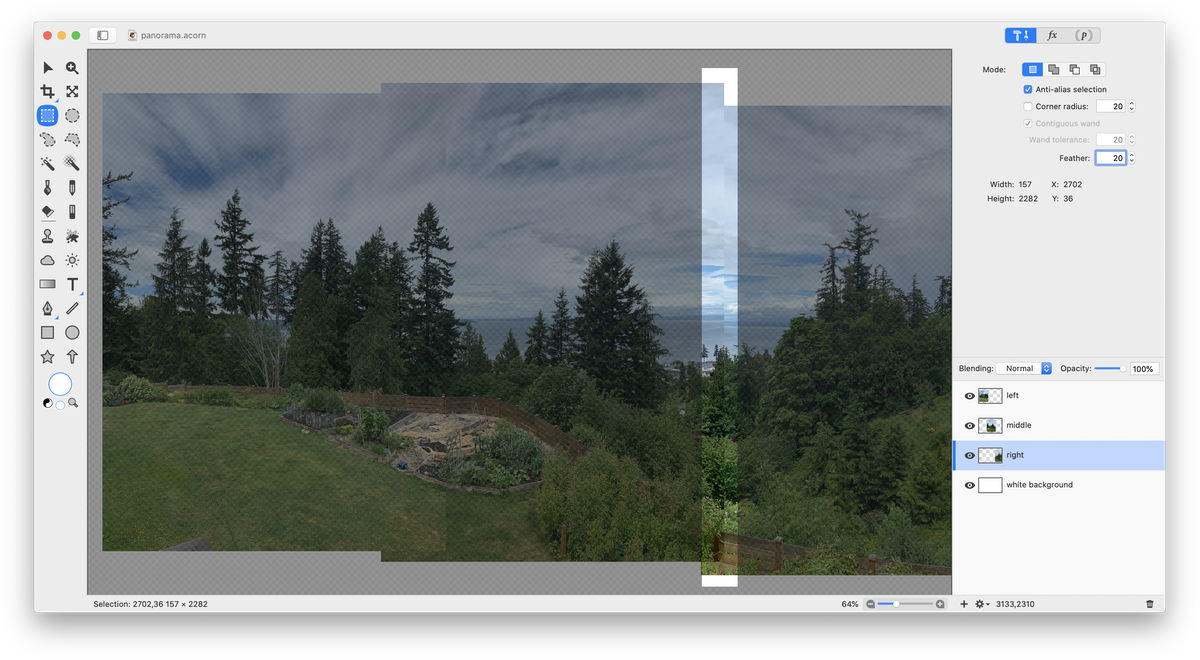 Then go to Select ▸ Feather. Choose a radius of around 20. Now click on your center layer to select it and click 'delete'. Use keyboard shortcut ⌘D to deselect.
Repeat this process for all other areas of overlap. Be sure to delete the selected area of the layer that is above the other layer. You may need to make small adjustments to how your layers are lining up using the move tool. It is helpful to zoom in (⌘+) to really see the small details.
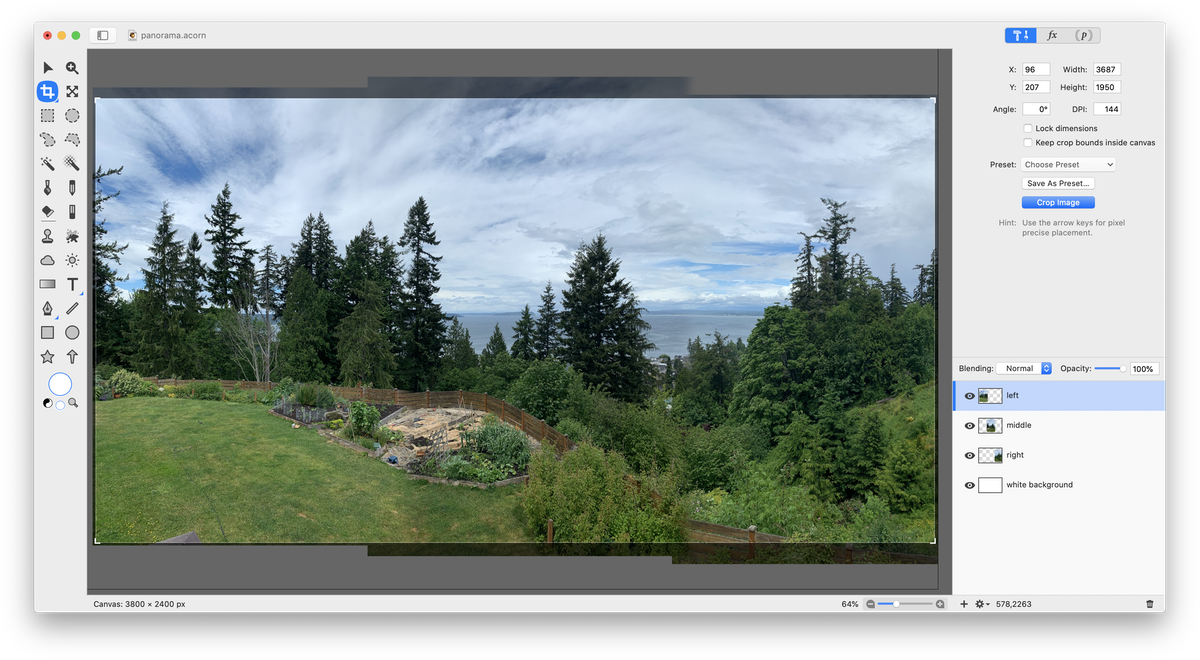
 Select the crop tool from the tools palette and crop out areas of the image you don't want or that are uneven.
 If any of your layers appear a lot brighter or darker than the others, you can click on that layer and choose Filter ▸ Color Adjustment ▸ Color Controls or adjust the curves and levels.