Smart Layer Export
Overview
Smart layer export is an alternative to traditional slicing found in image editors. Navigate to Layer ▸ Smart Layer Export Settings… and the inspector palette will populate with the various export options. A movable and adjustable canvas frame will appear on your canvas that represents the export bounds of your layer. Click and drag on the frame to change its position, or hover over a corner of the frame while clicking and dragging to resize. There is also the option to adjust the size and position of the frame in the inspector palette fields.
If you have multiple layers that make up a single icon, you'll want to composite them together (using a Group Layer) and enter your settings on that group.
Smart Layer Export Options
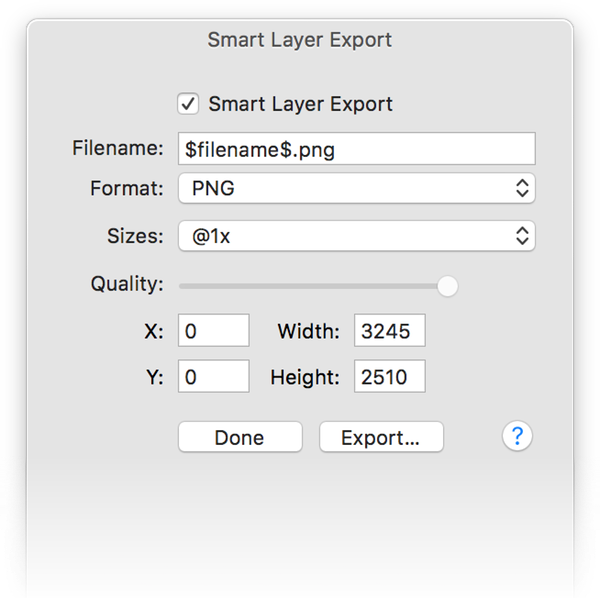
Smart Layer Export checkbox - Check this box to have your smart layer export palette settings used when choosing File ▸ Export ▸ Smart Layer Export.
File Name - Enter a name for the layer you are exporting. Acorn will default to the filename.
Format - Choose your export file format from PNG, JPG, JPEG 2000, GIF, or TIFF.
Sizes - Choose from 1x to 5x.
Quality Slider - Adjust the quality of your export via the slider if your file format is JPG or JPEG 2000.
If you are ready to export your layer, click the ‘export’ button on the inspector palette. If you want to come back to your settings at a later time, click ‘Done’.
Pro Tip: Shared Backgrounds Between Exported Layers
Starting in Acorn 8.2, Smart Layer Export got a little bit smarter. You can now share backgrounds with multiple export groups by naming the background @background. Acorn will first look the current group for a @background layer, and if it is not found, will go up a level and look for it there until it finds one. This is a great way to share a common background between your exported layers.
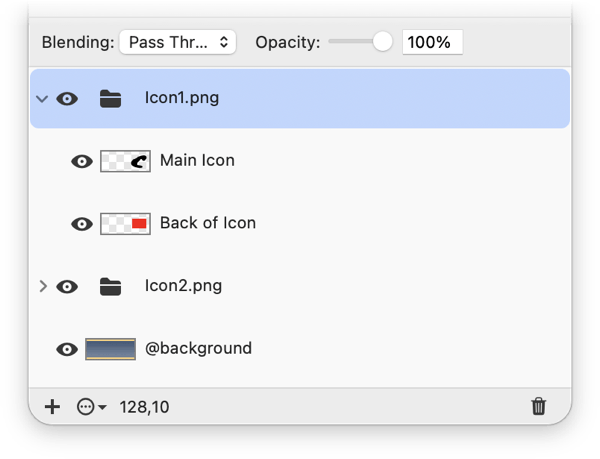
In the above example, both Icon1.png and Icon2.png share a common background (in this example, the Smart Export settings are on the group layers).
Alternative Method from Earlier Versions of Acorn (Legacy)
The technique outlined here is an alternative option if you have the ‘Smart Layer Export’ box unchecked in the palette. When you have the ‘Smart Layer Export’ box checked, Acorn will default to the export settings you have created in the palette.
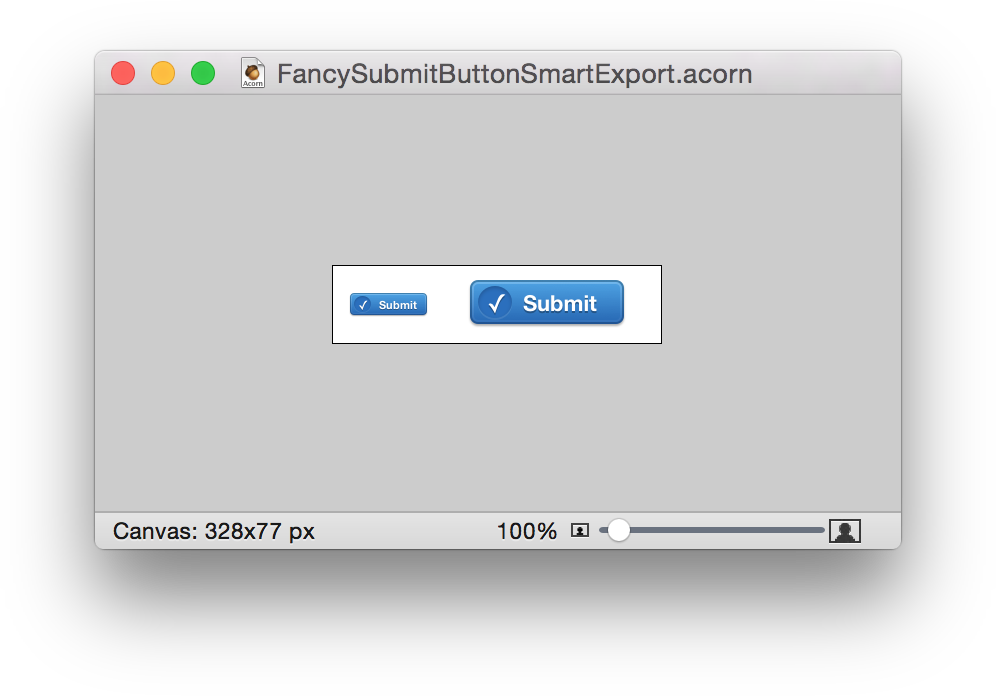
This tutorial will use the example of smart layer export being used on an image of 'submit' buttons. You can download the sample image here: FancySubmitButtonSmartExport.acorn. This is what the sample image looks like:
Smart Layer Export Steps (Legacy):
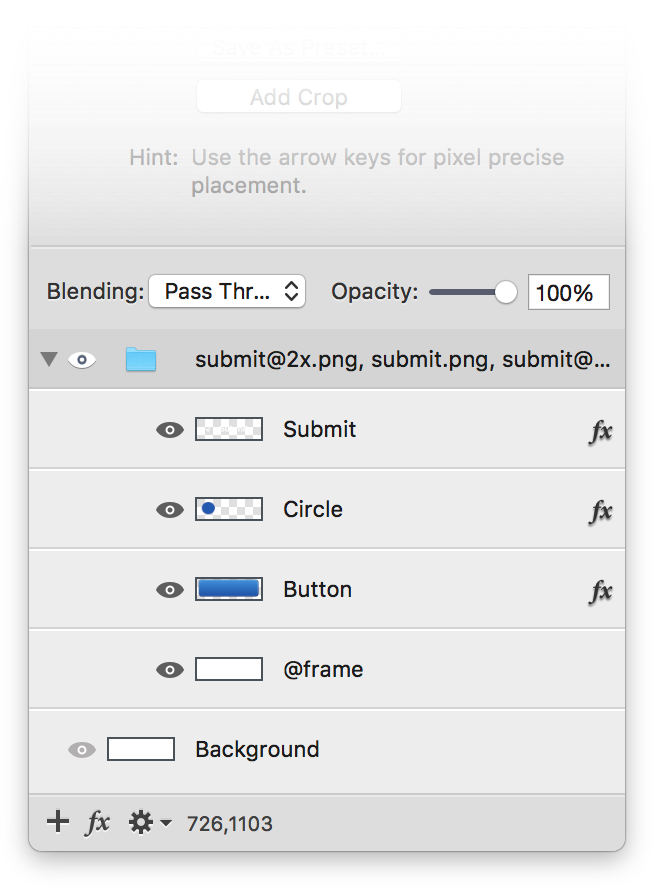
- Name your layer or layer groups with the name of the file you would like to save it as. You'll have to use one of the following file extensions on the file name: .png, .jpeg/jpg, .tiff/tif, or .gif.
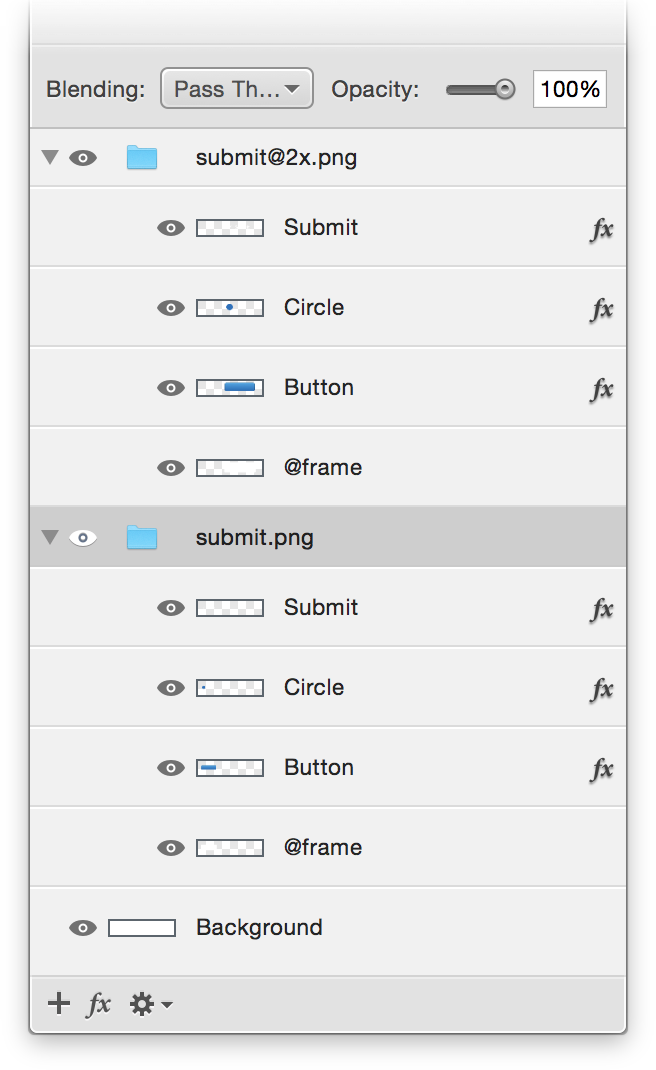
- Optionally create a layer at the bottom of each group and name it "@frame" or "@bounds". The layer doesn't need to be visible. This layer tells Acorn exactly which part of the image you want written out. In this example the @frame is a shape layer with a single rectangle object defining the area of the group to be exported. You could also use a bitmap layer, in which case the opaque areas of the bitmap layer would define the frame of the area to be exported. If no @frame or @bounds layer is added, then Acorn will default to the size of the canvas for the export size.
- Choose the File ▸ Smart Layer Export… menu item.
To see how this is done, take a look at the layers list of the example image:
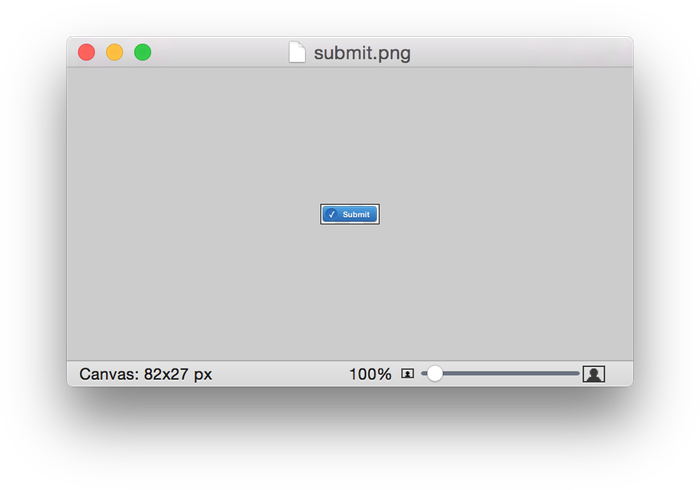
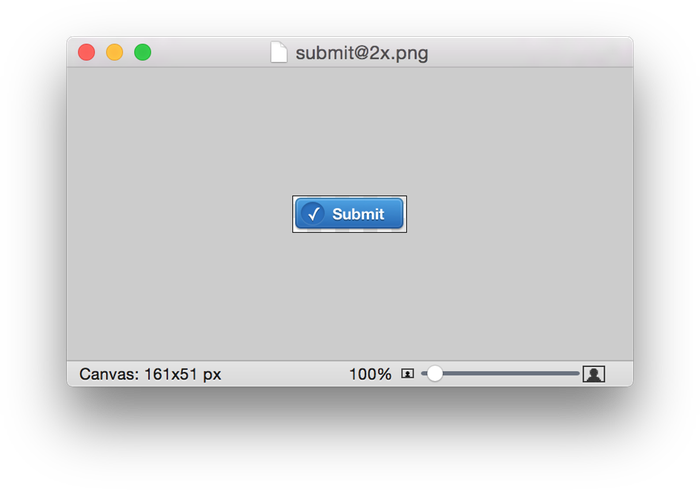
Below are the two images created from the smart layer export:
Auto-Scaling (Legacy)
Acorn can do the work of automatically exporting the image at different sizes without maintaining multiple copies of the same image in the canvas.
Instead of creating multiple layer groups for your images, just create one size. In the example below, the image is at @2x. In the layer name, put the name of the image you are starting with (submit@2x.png), followed by the names of the other images you would like auto-scaled and exported after it. For ”submit.png" Acorn will take the layer and scale it down for export. For "submit@3x.png", Acorn will scale it up for export.