Text and Font Manager
Acorn gives you the option to use its integrated text palette, or to call up the macOS font palette.
Text Options
![]() When you select the text tool (keyboard shortcut "T"), you will see your cursor change to the type cursor. You can create an area to type by clicking inside your image, or clicking and dragging a bounding box onto your image. When you click to start typing the bounding box will be small, but it will adjust to your type.
When you select the text tool (keyboard shortcut "T"), you will see your cursor change to the type cursor. You can create an area to type by clicking inside your image, or clicking and dragging a bounding box onto your image. When you click to start typing the bounding box will be small, but it will adjust to your type.
To end text editing press the command and enter keys. To deselect your text box you can hit the escape key, use keyboard shortcut ⌘D, or click once with your mouse outside the box.
Text Color

To change the color of the text fill or stroke you can click on a color well in the tools palette to access the colors palette. The outer circle is the stroke color and the inner circle is the text fill. Alternatively, you can select your text and bring up the color palette by going to Window ▸ Colors, or typing the keyboard shortcut ⇧⌘C.
Stroke is the outline of the text. Increasing the stroke makes the outline of the text thicker. Fill is the color within the stroke or outline.

Text Box Background
To put a background fill or stroke behind the text, click on the options under ‘Fill and Stroke’. To adjust the opacity of the background fill, click on the color well next to the fill checkbox. The colors palette will appear and the opacity can be adjusted via the alpha slider.

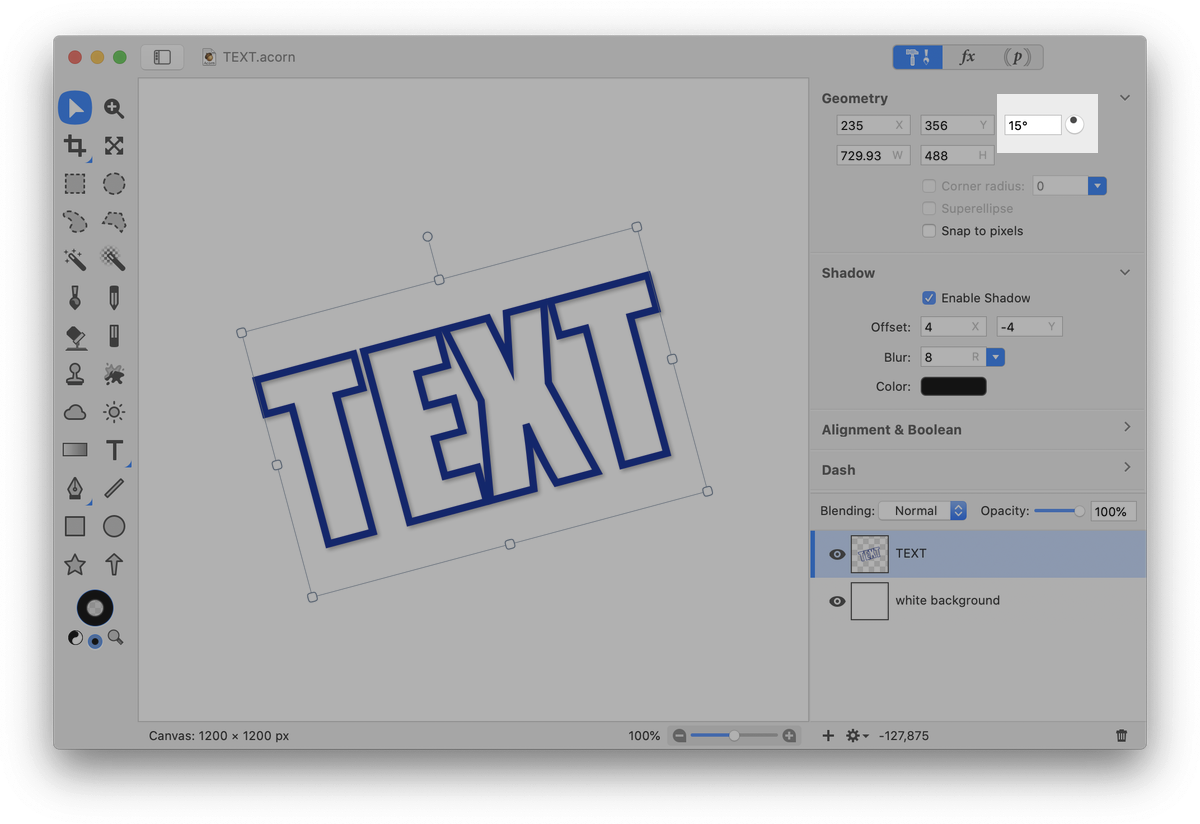
Rotating Text
The text box can be rotated by hovering the mouse over one of the text box corner boundaries. A circular arrow will appear. Click and drag in the direction you wish the text to rotate. Another method for rotating text is to have the text box selected, then go to the Geometry section of the inspector. You can change the angle of rotation by degrees. In the example below the angle is set to 15 degrees.

Text Spacing
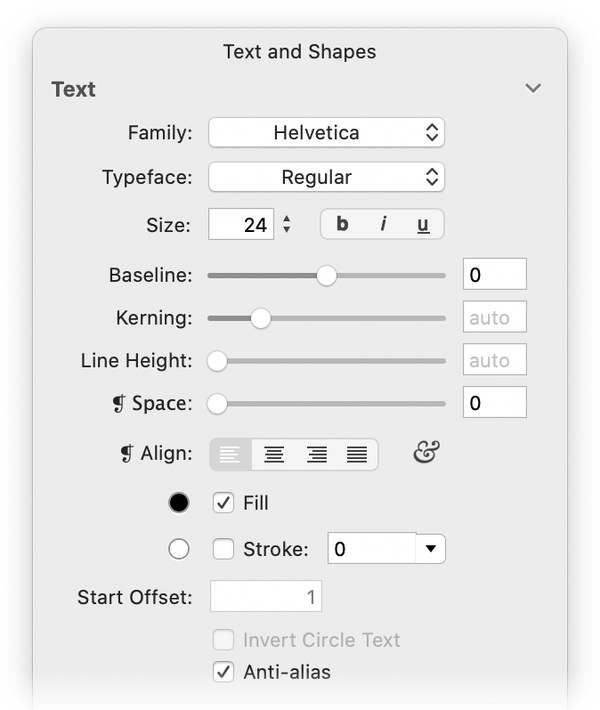
You will notice on the type palette there are sliding bars labeled Baseline, Kerning, Line Space, and Paragraph Space. There are also buttons for paragraph alignment. They are ordered as follows: Right Align, Centered, Left Align, and Justified.
Paragraph Alignment: The paragraph alignment buttons work within the bounding box to line up your text. Right align will
align your text to the right side of your bounding box. Left align will align your text to the left side of the bounding box. Centered will place your text in the center of the bounding box. Justified will stretch your text so it reaches each side of the bounding box.
Baseline: The baseline is the line on which the letters sit, and from which the descenders extend below. More options for baseline, including subscript and superscript, can be found under Edit ▸ Font ▸ Baseline.
Kerning: Kerning is the space between the letters. You can adjust the kerning for a selected text box by holding down the command and option keys then using the left/right arrow keys. More options for kern and ligature can be found under Edit ▸ Font ▸ Kern/Ligature.
Line Spacing: Line spacing is the space between the baseline and the top of the next line of text, also called leading. The lower the number the more the lines will come together. The higher the number the more they will separate.
Paragraph Space: The Paragraph Space (❡ Space) is the space between your paragraphs.
Adding Fonts
To add new fonts to Acorn, place the font file in your ~/Library/Fonts folder. You will need to re-start Acorn for it to appear in your font list.
Converting Text to Bezier Curves
Please read Bezier Curves for more information.
Anti-Alias Text
The option to turn on/off anti-alias text is available in the inspector palette. Antialiasing is the smoothing of jagged edges of shapes or text to improve their appearance or readability.
Rasterizing Text
To rasterize a text or shape layer, go to Layer ▸ Rasterize Shape Layer. Vector layers (i.e. shapes and text) are different from bitmap (or raster) layers. Vectors revolve around lines and shapes, where as bitmaps are pixel oriented. Once you have rasterized a vector layer you cannot go back and modify the shapes or text without undoing subsequent work.

Fonts Palette
You can access the Fonts palette by using Window ▸ Fonts menu. The Fonts Palette packs a lot of punch for being so small. This little window controls everything that you could want to do with fonts. If you get confused about which button does what, hold your mouse over it for a second and it will display a tooltip about its function.
Selecting Fonts
There are Collections of fonts (like folders in the finder), inside which are font Families, inside which are Typefaces. An example of this in the real world would be All Fonts ▸ American Typewriter ▸ Bold. Collections can be handy if you find yourself often using the same few fonts You can create your own collections, or use the ones Apple has provided. The Fun collection includes some excellent fonts for parties and cards. If you would like to add a font to the collection, simply drag it in. Adding and deleting collections is controlled by the plus and minus buttons below the collections.
If you find yourself unable to find a font you know is on your computer, make sure the All Fonts collection is selected. Size is controlled by the slider, list, and box to the right of the window. You can enter in a value into the upper box, find a commonly used size in the list, or move the slider until you are happy.
There is also a search field at the bottom of the window. If you find that scrolling through all of your fonts takes longer than you want, simply type the name of the font into the search field and it will instantly pop up in the Family column.
Things like shadow, underline, color, and strikethrough are controlled by the buttons on the top of the window, as well as from the Format ▸ Font menu.
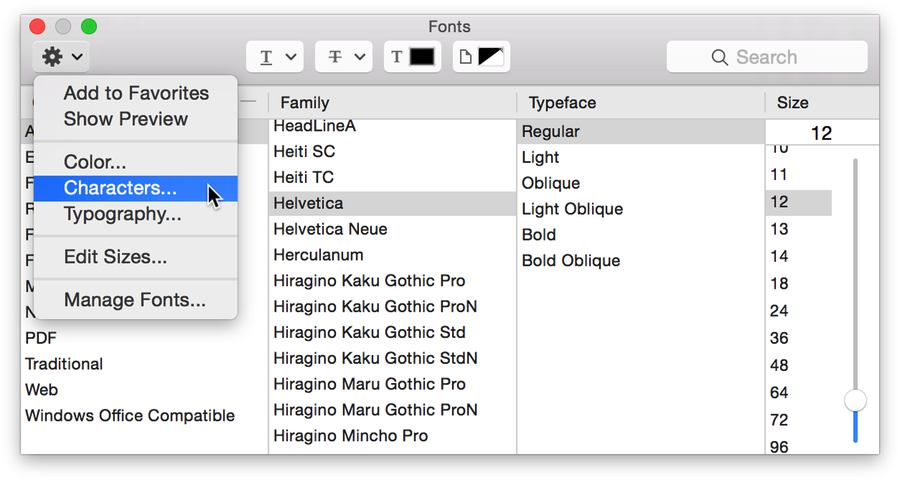
Symbols, Punctuation, and Special Characters
The action button on the upper left hand corner of the font palette is the gateway to adding special characters, varying typography, non-standard punctuation, and other language scripts. Click on the action menu and choose 'Characters' from the drop down menu.
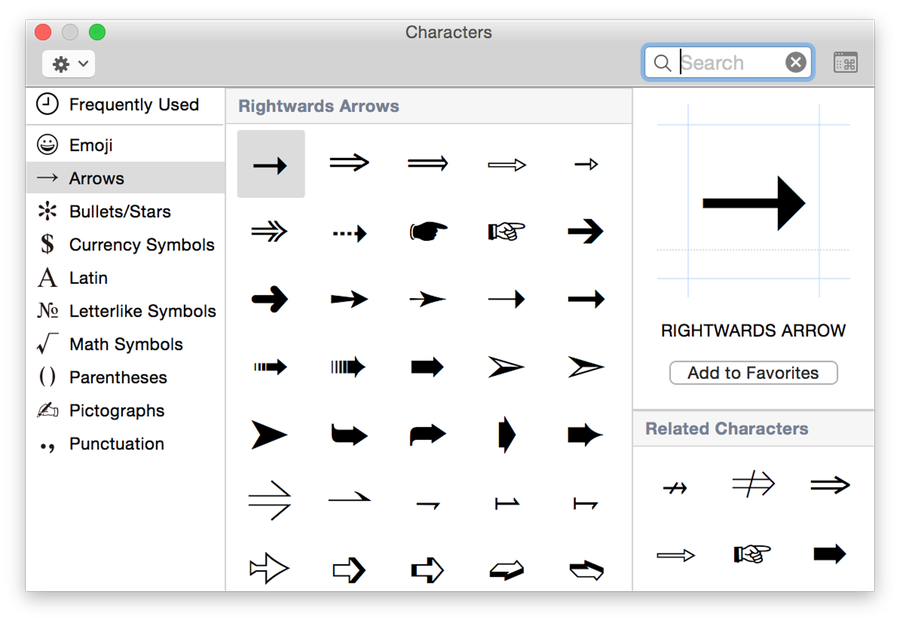
Create a text box, then double click on a character and it will be inserted into the box. Alternatively you can drag and drop the character into the text box.
Another way to access characters is through the Edit ▸ Special Characters menu item. If you don't see the option in the menu, go to System Settings ▸ Keyboard ▸ Keyboard and check the box next to 'Show Keyboard and Character Viewers in menu bar'.
Additional Relevant Documentation
Check out the bottom of the tutorials page for tutorials specific to text!
Text Tool Basics (video tutorial)
Path Text
Circle Text