Color Adjustment Filters
Many of the filter definitions below come directly from Apple’s core image filter reference.
1bit
Converts all pixels in your image to either black or white.
Alpha Multiply
Multiplies the alpha values of your pixels by a certain amount. Can be useful for sharpening anti-aliased edges of shapes and text.
Color Absolute Difference
Produces an image that is the absolute value of the color difference between two images. The alpha channel of the result will be the product of the two image alpha channels.
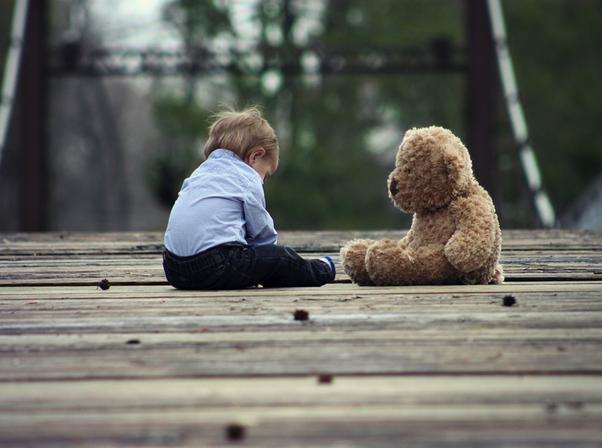
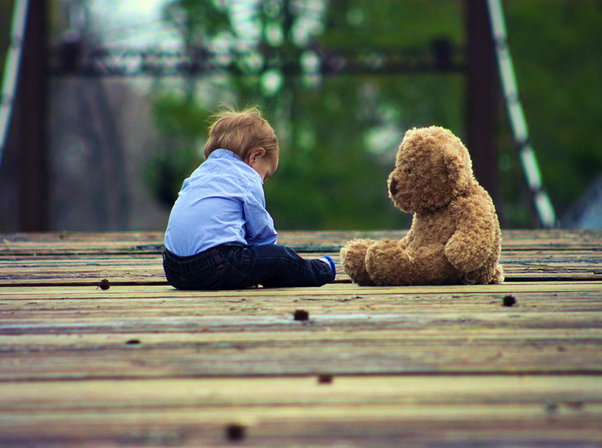
 Original image |
 Color Controls: Brightness decreased |
 Color Controls: Saturation increased |
 Color Controls: Saturation decreased |
 Exposure Adjust: Exposure decreased |
 Gamma Adjust: Power decreased |
 Grayscale |
 Hue Adjust
|
Color Controls
Adjusts saturation, brightness, and contrast values.
- Saturation: Saturation is the intensity of color in your image. If you slide the slider to the left (to 0), the image will become black and white, and if you slide it to the right (2.00) it will become fully saturated.
- Brightness: Adjust the darkness or lightness in your image. Drag the slider all the way to the left your image will become totally black, if dragged to the right it will become completely white.
- Contrast: Contrast is the difference between the lights and darks of your image. A higher contrast will have darker darks and lighter lights. A lower contrast or no contrast will make the tones in the image appear the same.
Color Threshold Otsu
Produces a binarized image from an image with finite extent. The threshold is calculated from the image histogram using Otsu's method. The red, green, and blue channels of the resulting image will be one if its value is greater than the threshold and zero otherwise.
Color Threshold
Produces a binarized image from an image and a threshold value. The red, green, and blue channels of the resulting image will be one if its value is greater than the threshold and zero otherwise.
Curves
Adjust an images’ tonal range or contrast by modifying the diagonal line on the graph via control points See our additional documentation on Curves.
Dither
Dither your layer with a drop down menu to choose from Atkinson (old school Mac OS), Floyd Steinberg, Gaussian Blue, and Ordered Reproducible.
Exposure Adjust
Adjusts the exposure setting for an image similar to the way you control exposure for a camera when you change the F-stop. This filter multiplies the color values to simulate exposure change by the specified F-stops.
Gamma Adjust
Adjusts midtone brightness. This filter is typically used to compensate for nonlinear effects of displays. Adjusting the gamma effectively changes the slop of the transition between black and white. Gamma Adjust leaves blacks and whites unchanged, while adjusting the mid-point colors of your image. A high gamma level can create a washed out appearance to an image, but a small adjustment usually creates a pleasing result.
Grayscale
Turns a colored image into grayscale. See Black & White.
Hue Adjust
Changes the overall hue, or tint, of the source pixels. This filter essentially rotates the color cube around the neutral axis. This filter adjusts the color of your image, leaving black, white, and gray alone. There is a dial to adjust the color of your image. Think of the dial as a compass. If the dial is placed south, it will show your original image, to the west and it will become red, north for blue, and east for green.
Levels
Read our documentation on Levels to find out more about this tool.
Lookup Table
LUTs are an easy way to enhance images. To install LUTs, drag and drop the LUT file into Acorn's application support folder (Finder ▸ Go ▸ Library (hold down option key for Library to appear) ▸ Application Support ▸ Acorn ▸ LUTs). You will need to quit and restart Acorn for the LUT filter to be present in Acorn's filter window. Imported LUTs can be found under Filter ▸ Color Adjustment ▸ Lookup Table ▸ LUT ▸ Select LUT.
Mask to Alpha
Converts a grayscale image to a white image that is masked by alpha. The white values from the source image produce the inside of the mask; the black values become completely transparent. With the Invert Colors option, Mask to Alpha will convert the white areas of the image to transparent, and keep the black opaque. This is helpful for scanned line drawings to make the backgrounds transparent.
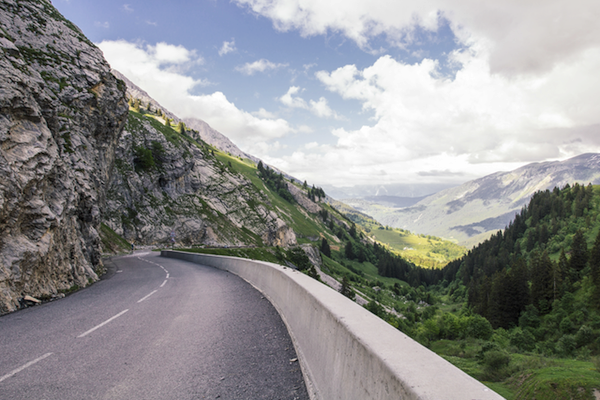
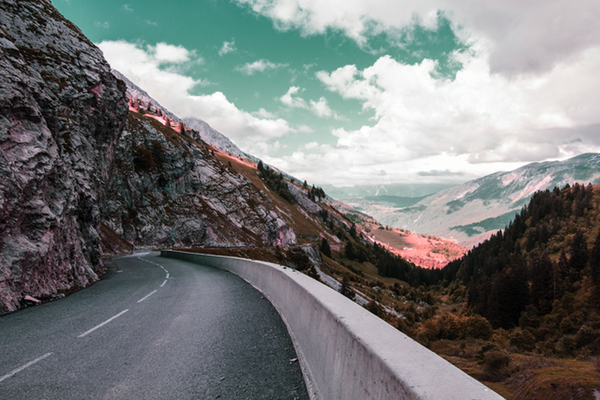
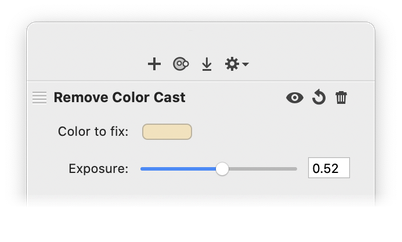
Remove Color Cast
Adjust the exposure and choose a color to remove in your image to be replaced with white. This is useful for images taken indoors that are excessively yellow.
 Original
|
 Remove Color Cast Filter
|
|
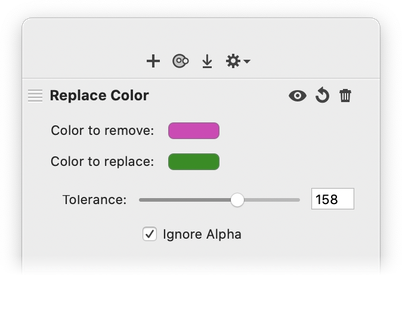
Replace Color
Choose a specific color to remove and replace it with another. Adjust the tolerance as needed.

|
|
|
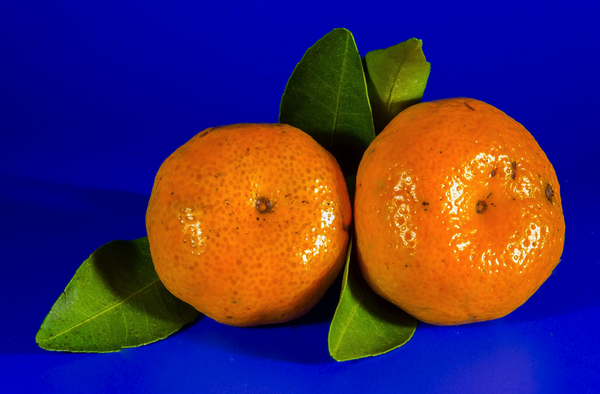
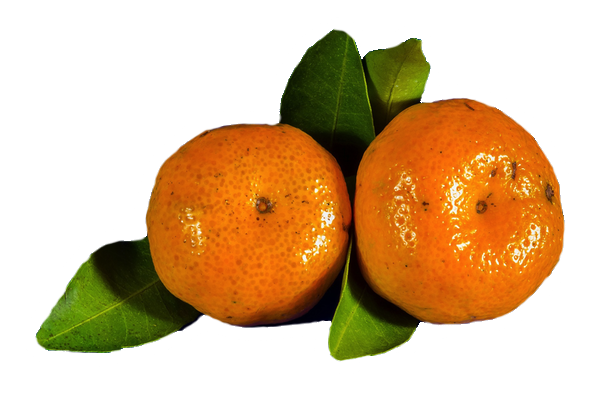
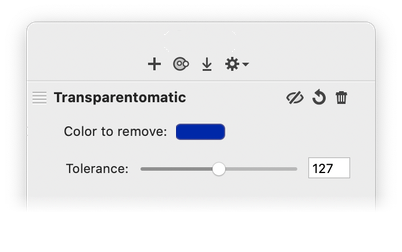
Transparentomatic
Remove a specific color in your image and replace it with transparency.
|
|
|
Vibrance
Adjusts the saturation of an image while keeping pleasing skin tones.
White Point Adjust
Adjusts the reference white point for an image and maps all colors in the source using the new reference. The White Point Adjust filter determines what "white" is in your photo. Light isn't usually really white. It can have tints of yellow, orange, or blue. The true color of white depends on the lighting when the photo was taken. For best results choose a natural color that is close to white.
 Original |
 Vibrance increased |
Try playing around with some of the filters and experiment, experiment, experiment. For more information, check out the Tutorials or send an email to support@flyingmeat.com and request a tutorial.
Additional Relevant Documentation
Filters Basics (video tutorial)
Filters Basics
Curves
Levels