Retouching a Portrait
This tutorial will go over how to whiten teeth, apply lipstick, and give a subject eyeliner. The basic principles for each technique is the same, but they will be outlined separately to highlight the before and after appearances.
Whitening Teeth
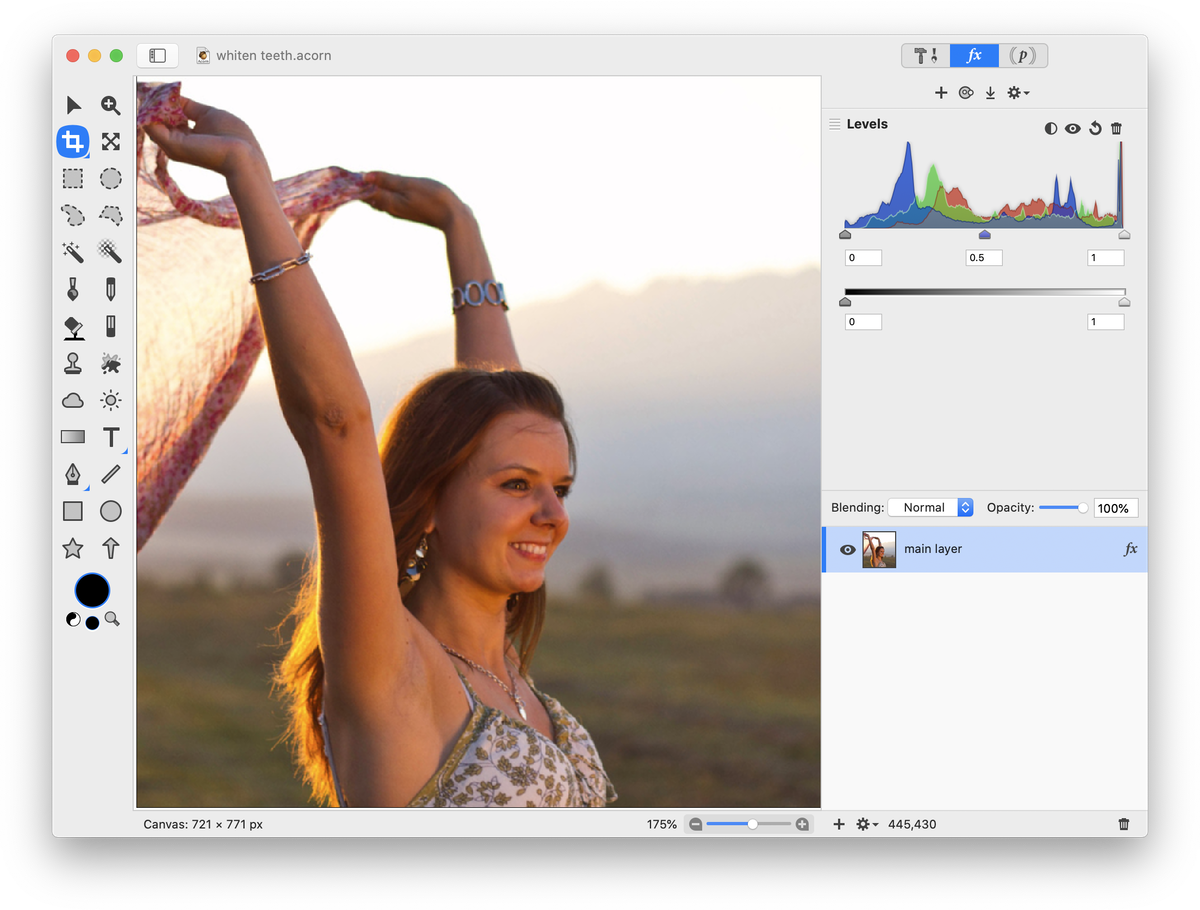
Open the image in Acorn, File ▸ Open. Choose File ▸ Save As and rename your image so that you retain your original. Start by adjusting the levels of the image, Filter ▸ Color Adjustment ▸ Levels and clicking the auto levels button  (keyboard shortcut ⇧⌘L).
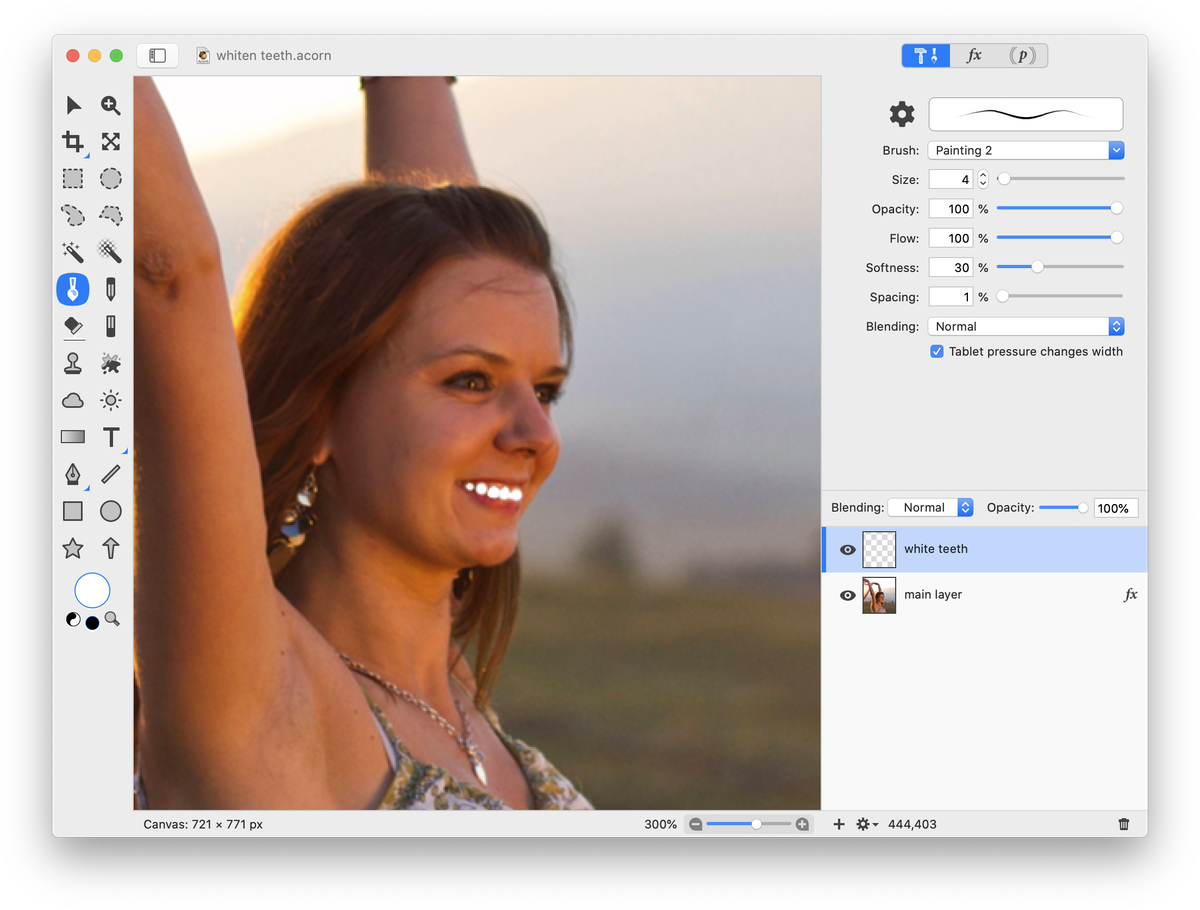
 Then, add a new layer to your image, Layer ▸ New Layer. Select the paint tool from the tools palette and set the tools palette color well to white. Brush over her teeth with white. If you brush too far onto her gums or lips just use the eraser tool to remove it. It helps to zoom in on her teeth to be more accurate, View ▸ Zoom In.
 In the inspector palette, change the blend mode from the drop down menu. You can scroll through the different blend modes with the arrow keys on your keyboard. A blend mode of 'Soft Light' is seen here. If needed, go to Filter ▸ Blur ▸ Gaussian Blur. Adjust the blur so there are no hard white lines visible on the teeth. A blur was not needed for this photo.
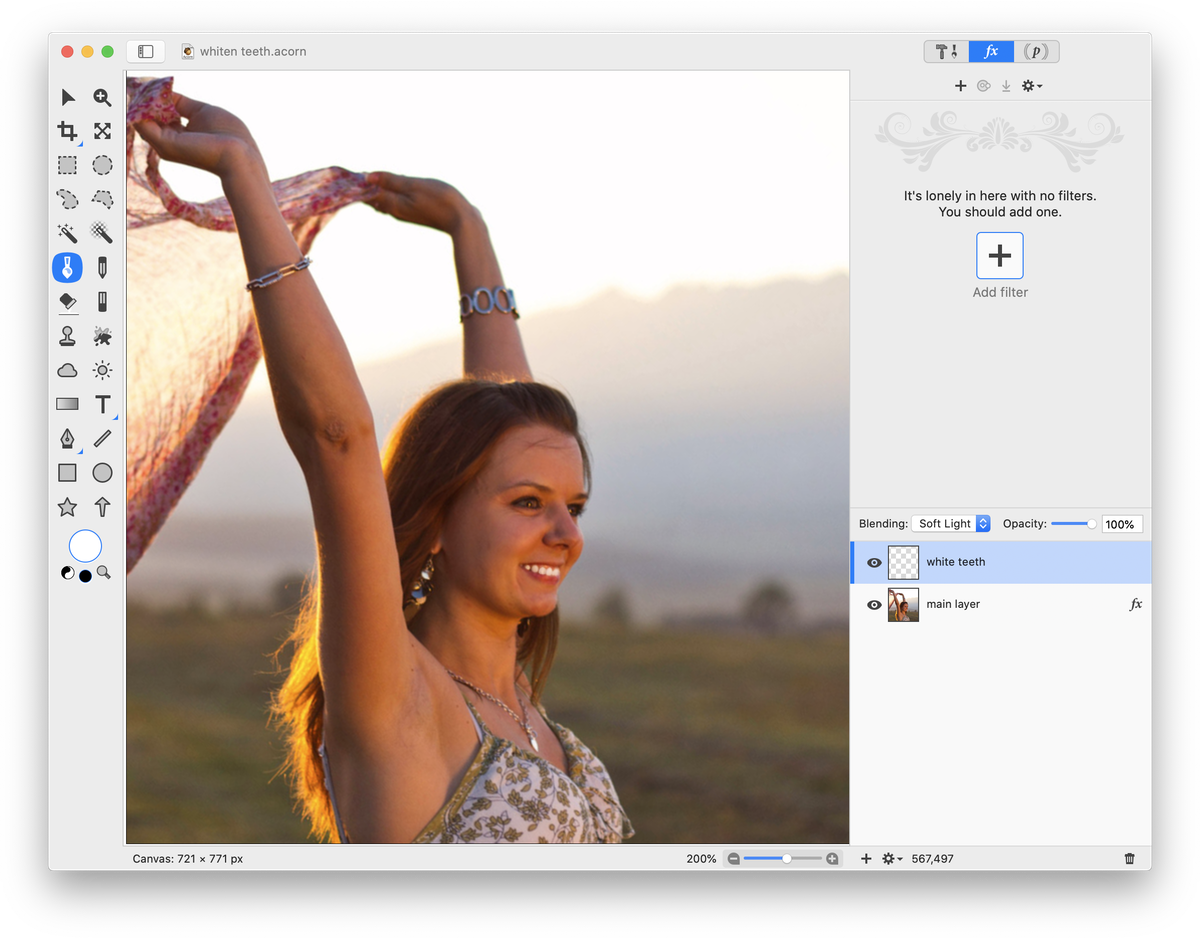 If the effect is too strong, you can adjust the opacity of the layer in the inspector palette. The opacity here has been left at 100%.
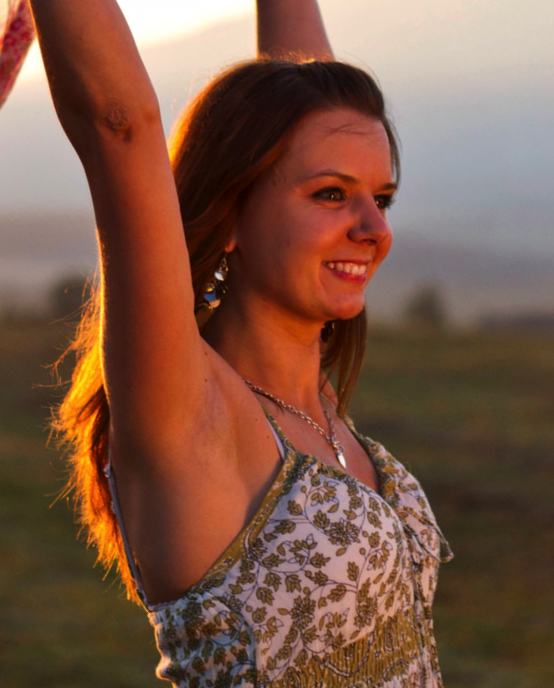

Before and after
Applying Lipstick
Many of the same steps can be followed for applying lipstick as for whitening teeth. Open the image in Acorn, File ▸ Open. Choose File ▸ Save As and rename your image so that you retain your original. Start by adjusting the levels of the image, Filter ▸ Color Adjustment ▸ Levels and clicking the auto levels button (keyboard shortcut ⇧⌘L).
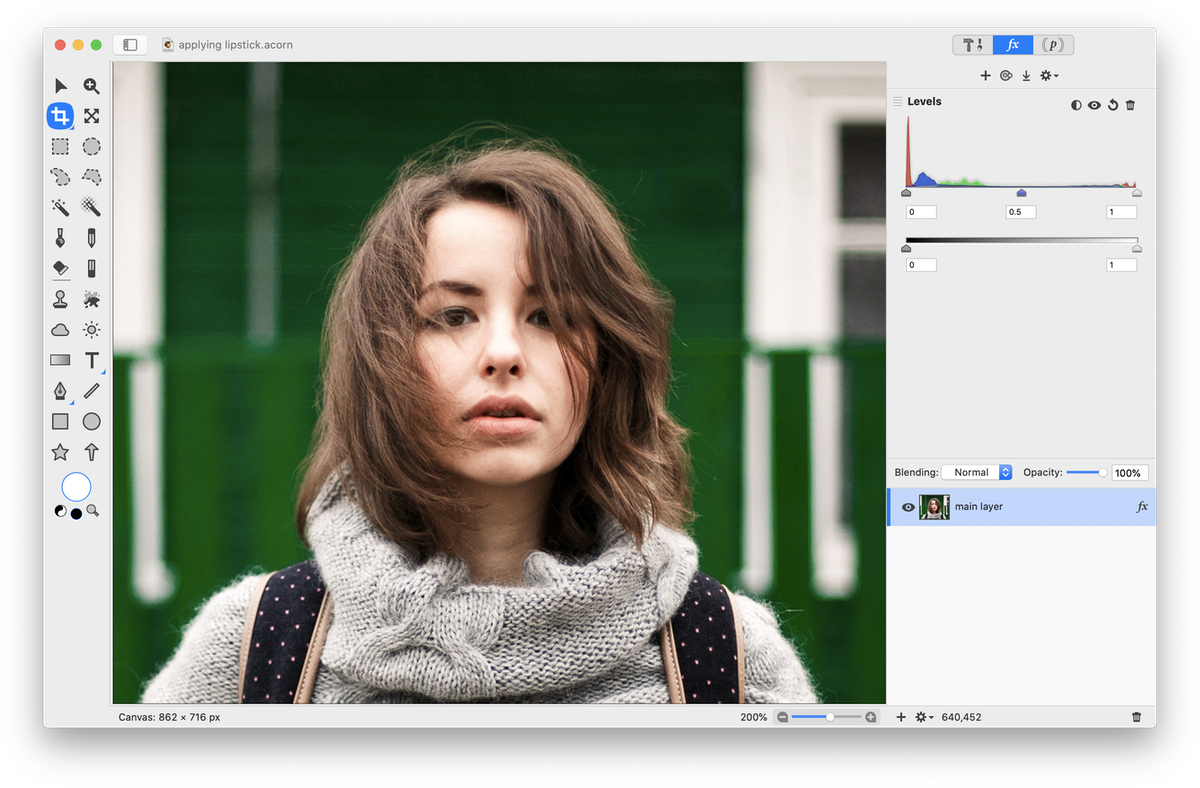 Then, add a new layer to your image, Layer ▸ New Layer. Select the paint tool from the tools palette and set the tools palette color well to your desired lipstick color. Brush over her lips with this color. If you brush too far onto her teeth or skin just use the eraser tool to remove it. It helps to zoom in on her lips to be more accurate, View ▸ Zoom In. Use the eraser tool as needed.
 Go to Filter ▸ Blur ▸ Gaussian Blur. Adjust the blur so there are no hard lines on the lipstick brush strokes. A radius of 4 is seen below.
 Then in the inspector palette, change the blend mode from the drop down menu. You can scroll through the different blend modes with the arrow keys on your keyboard. A blend mode of 'Linear Burn' is seen here, but 'Soft Light' and 'Hue" also create a nice effect.
 If the effect is too strong, you can adjust the opacity of the layer in the inspector palette. The opacity here has been decreased to 50%.
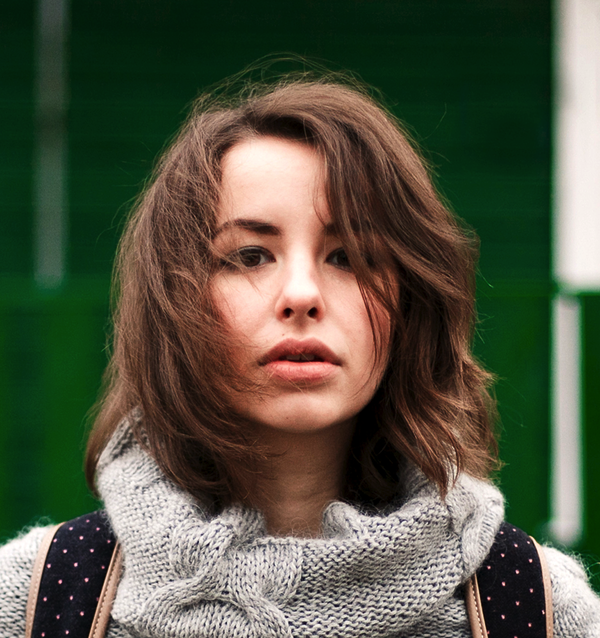

Before and after
Applying Eye Liner
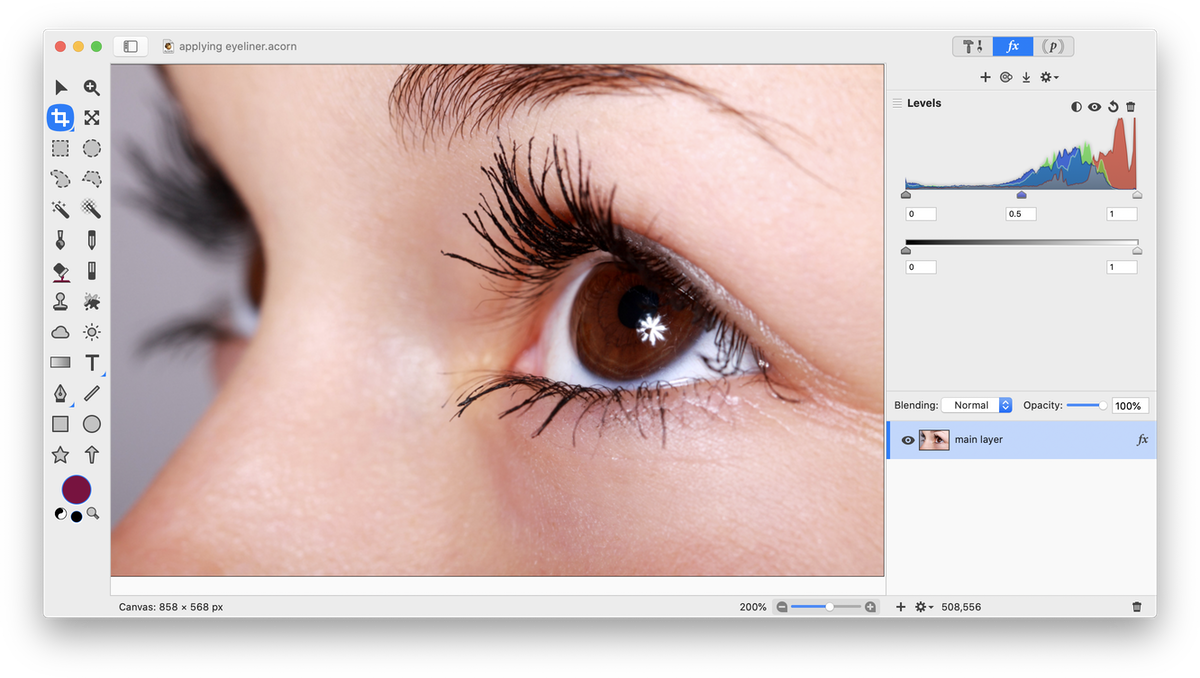
Open the image in Acorn, File ▸ Open. Choose File ▸ Save As and rename your image so that you retain your original. Start by adjusting the levels of the image, Filter ▸ Color Adjustment ▸ Levels and clicking the auto levels button (keyboard shortcut ⇧⌘L).
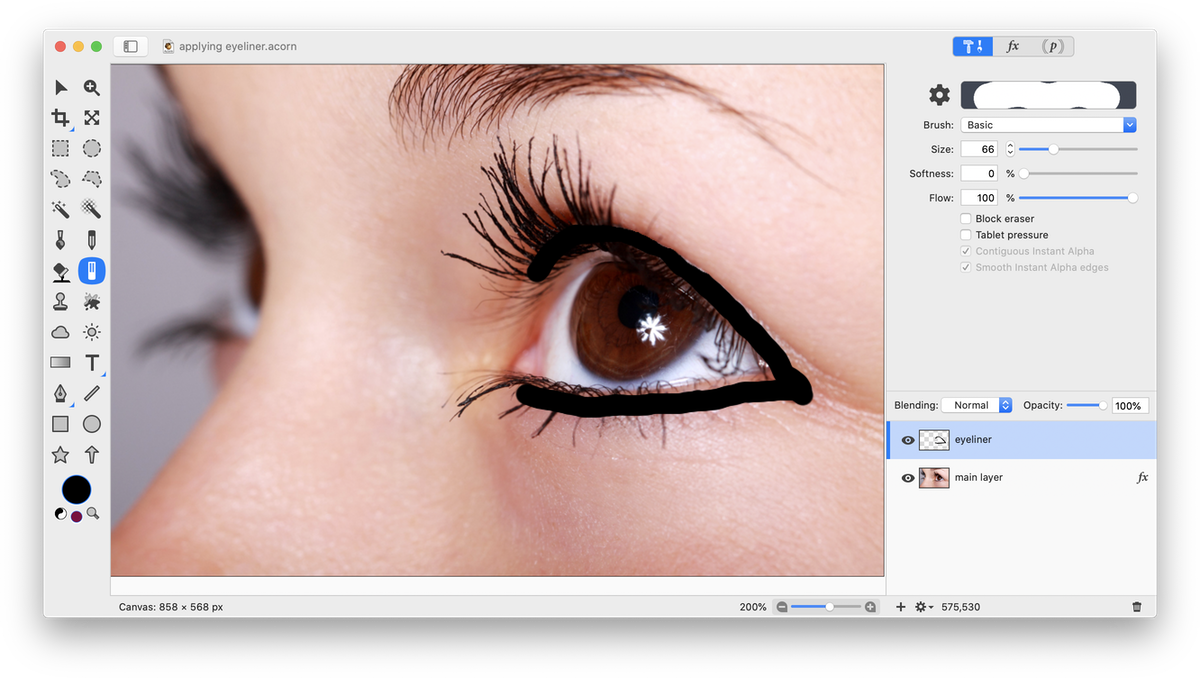
 Then, add a new layer to your image, Layer ▸ New Layer. Select the paint tool from the tools palette and set the color well to the eye liner color you desire. Brush under and over her eye lashes. If you brush too far onto her eyes or eye lids just use the eraser tool to remove it. It helps to zoom in on her eye to be more accurate, View ▸ Zoom In.
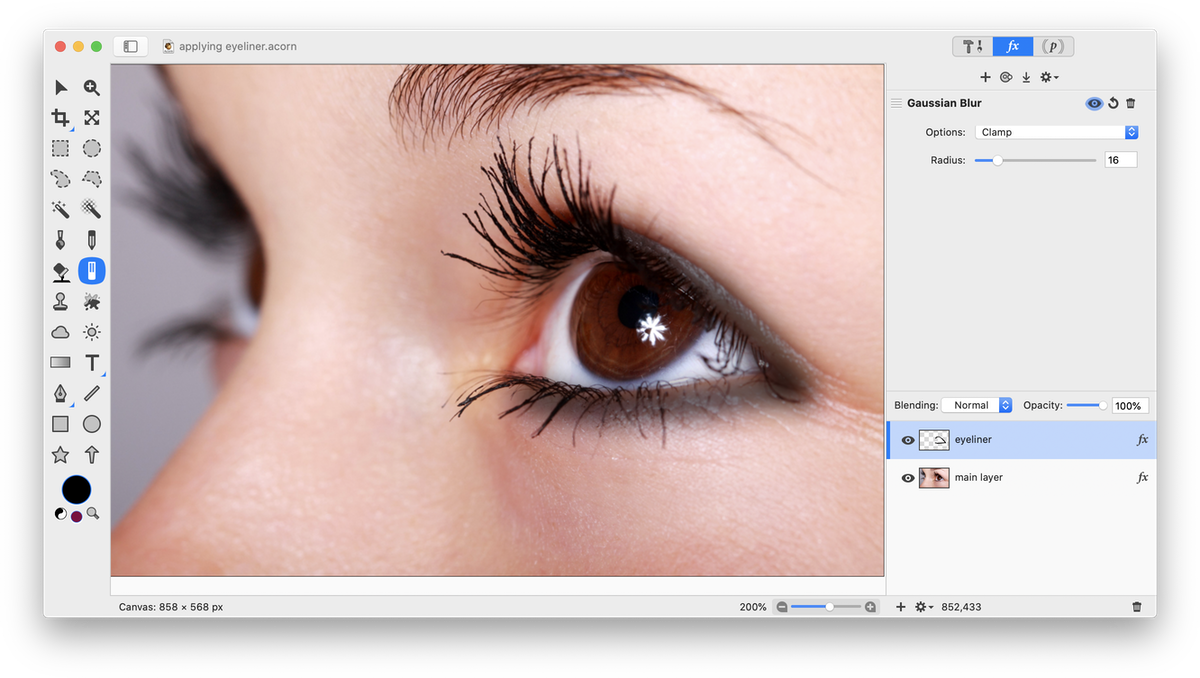
 Go to Filter ▸ Blur ▸ Gaussian Blur. Adjust the blur so there are no hard lines on the brush strokes. A radius of 16 is seen below.
 If desired, change the blend mode from the drop down menu. You can scroll through the different blend modes with the arrow keys on your keyboard. A blend mode of 'Normal' is seen here.
If the effect is too strong, you can adjust the opacity of the layer in the inspector palette. The opacity here has been set to 75%.
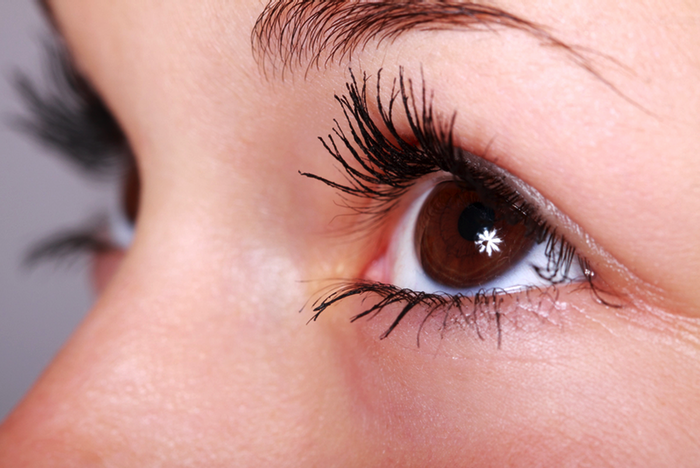

Before After