HDR Effect
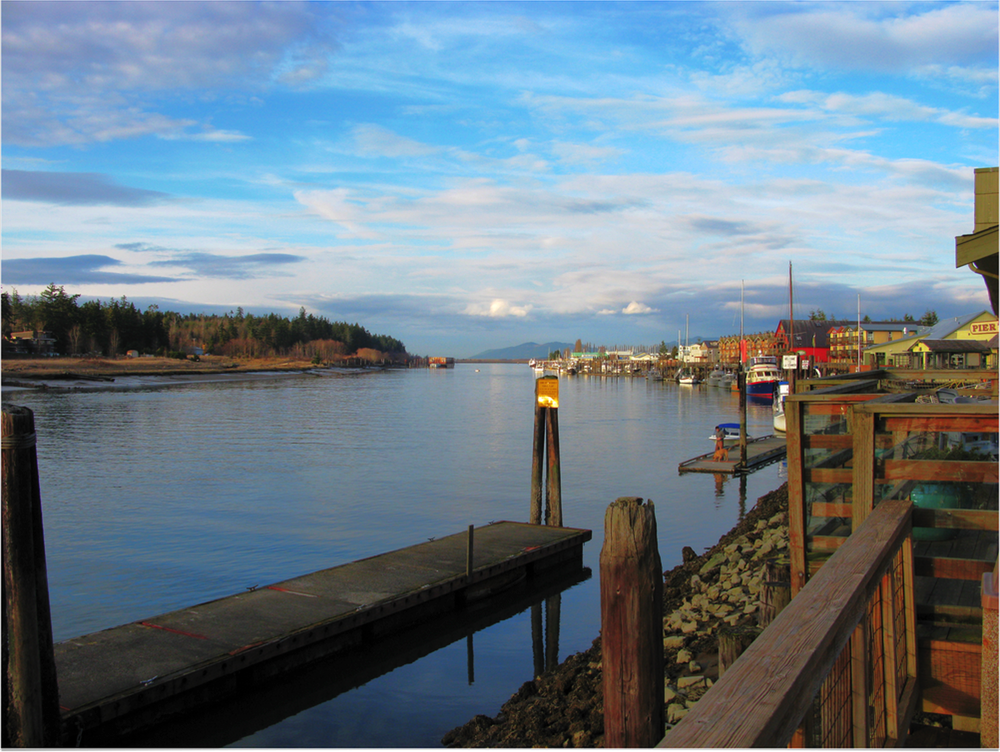
This tutorial will guide you in how to give your photos a HDR (high dynamic range) effect. You can read more about HDR here. Start by opening your image in Acorn, File ▸ Open. Adjust the levels by selecting Filter ▸ Color Adjustment ▸ Levels and clicking the auto levels button  (keyboard shortcut ⇧⌘L).
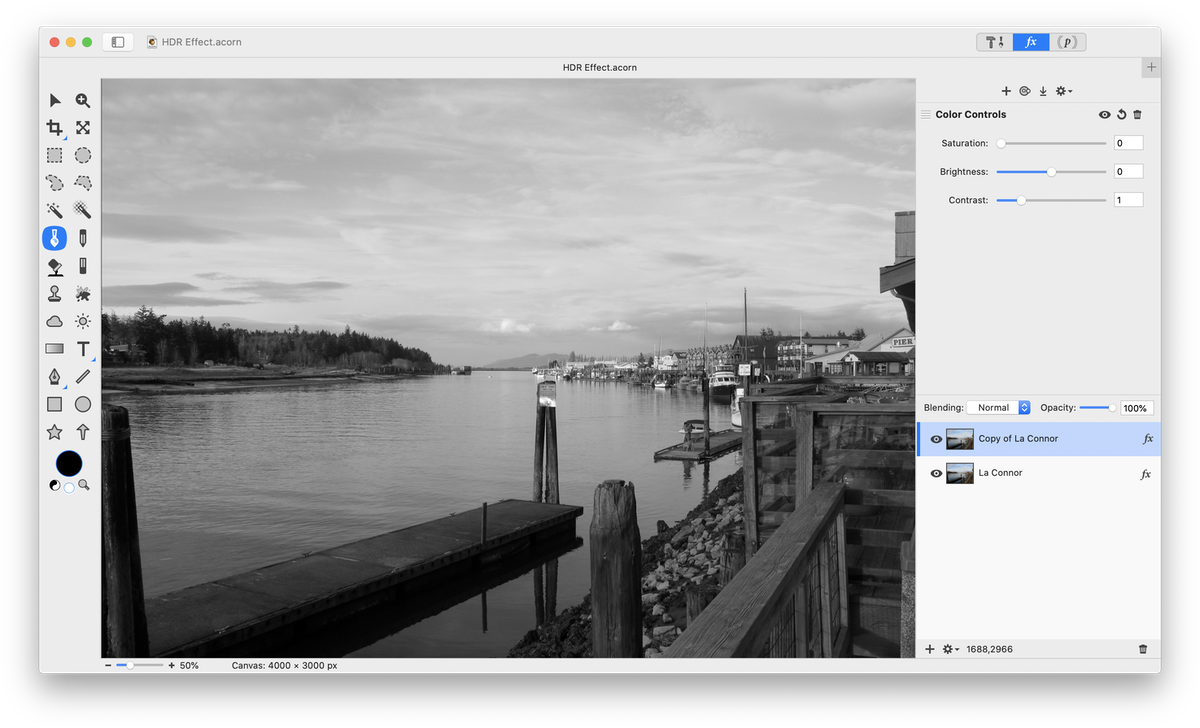
 Duplicate your original layer by selecting Layer ▸ Duplicate Layer (⇧⌘D). Go to Filter ▸ Color Adjustment ▸ Color Controls and decrease the saturation to 0.
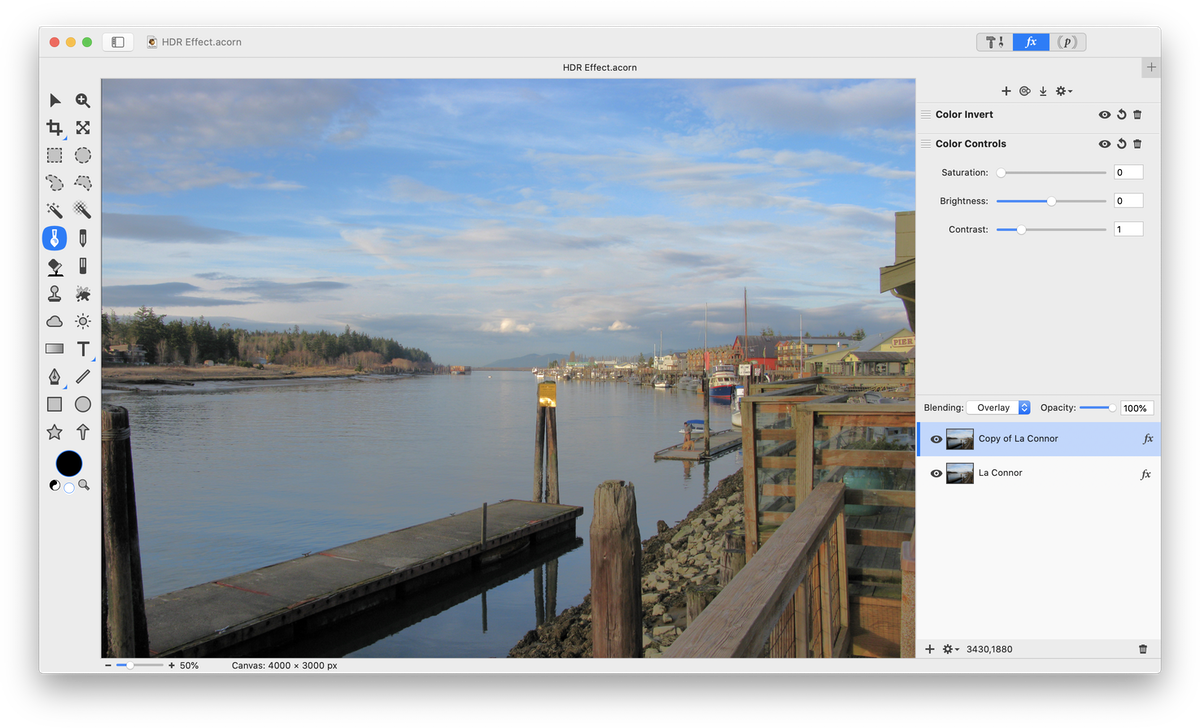
 Click on the '+' on the top portion of the filter inspector and choose Color Effect ▸ Color Invert. In the Inspector Palette, change the blending mode of the duplicate layer to 'Overlay'.
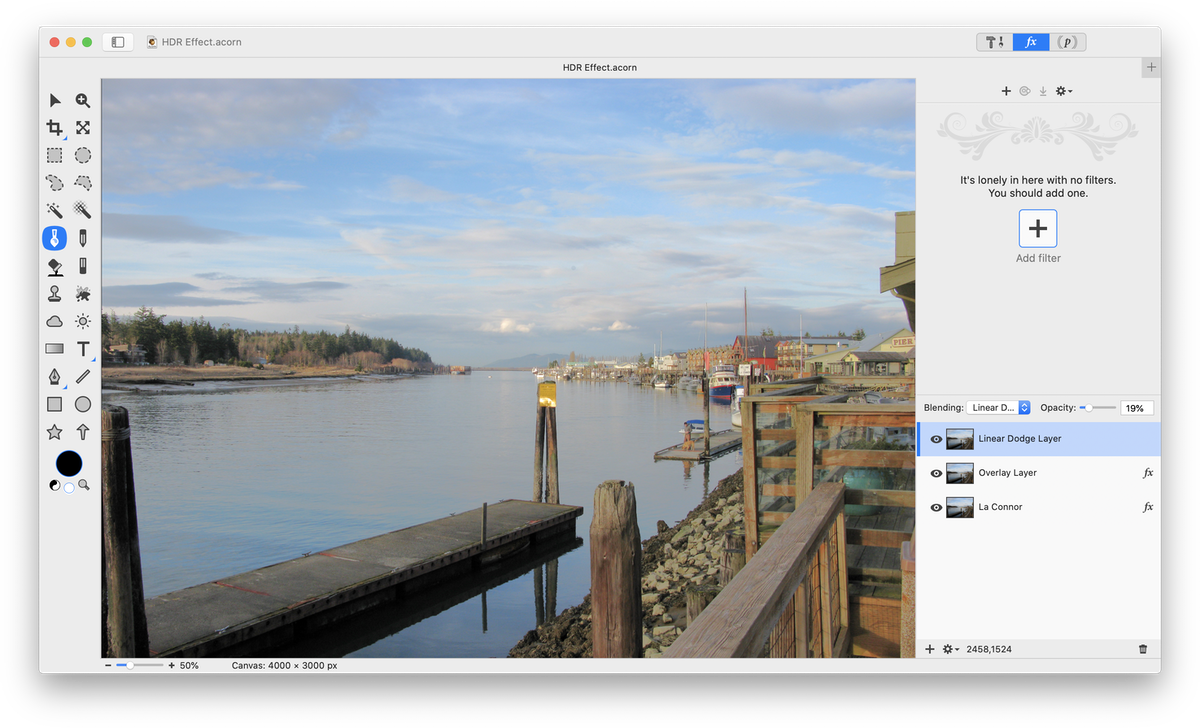
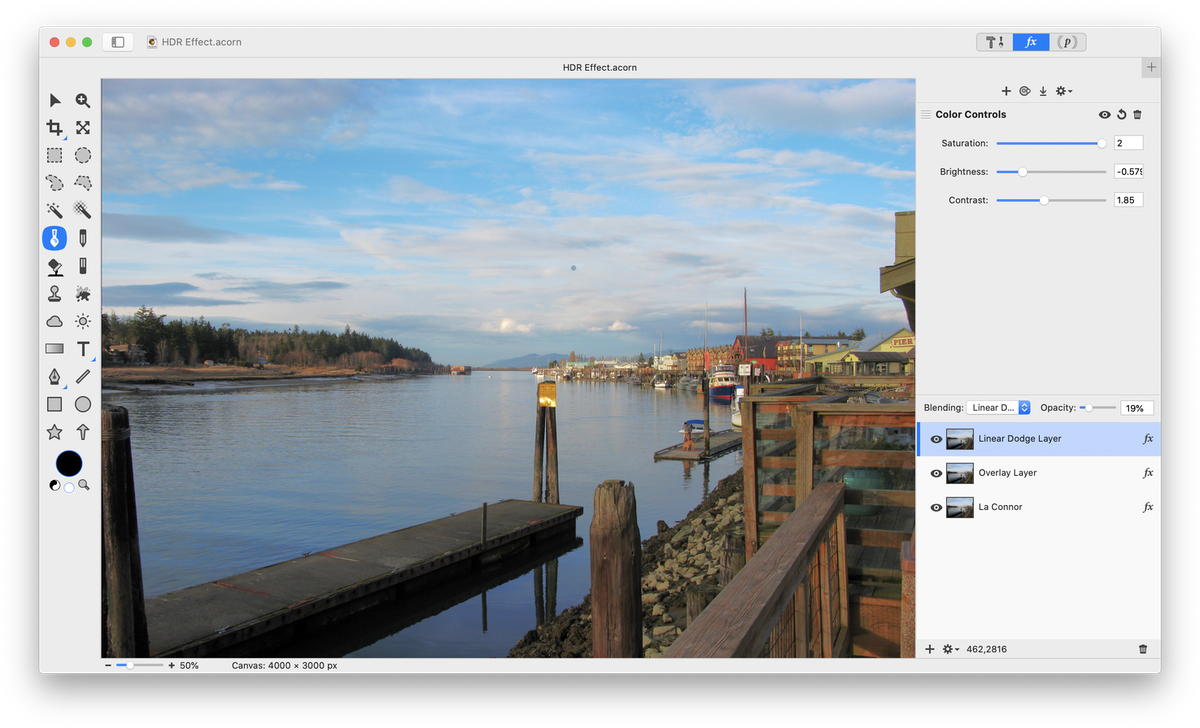
 Go back to your original image layer and duplicate it again, Layer ▸ Duplicate Layer. Move this layer to the top of your layers list, above the inverted layer. Change the blending mode of the layer to "Linear Dodge" and decrease the opacity to around 20-30%.
 Select Filter ▸ Color Adjustment ▸ Color Controls and play around with increasing the saturation and decreasing the brightness and contrast sliders.
 If any areas appear too bright, use the eraser tool on the first or second duplicated layers to darken them. Set the eraser tool opacity to around 15-20% to prevent any obvious lines.