Wood Text
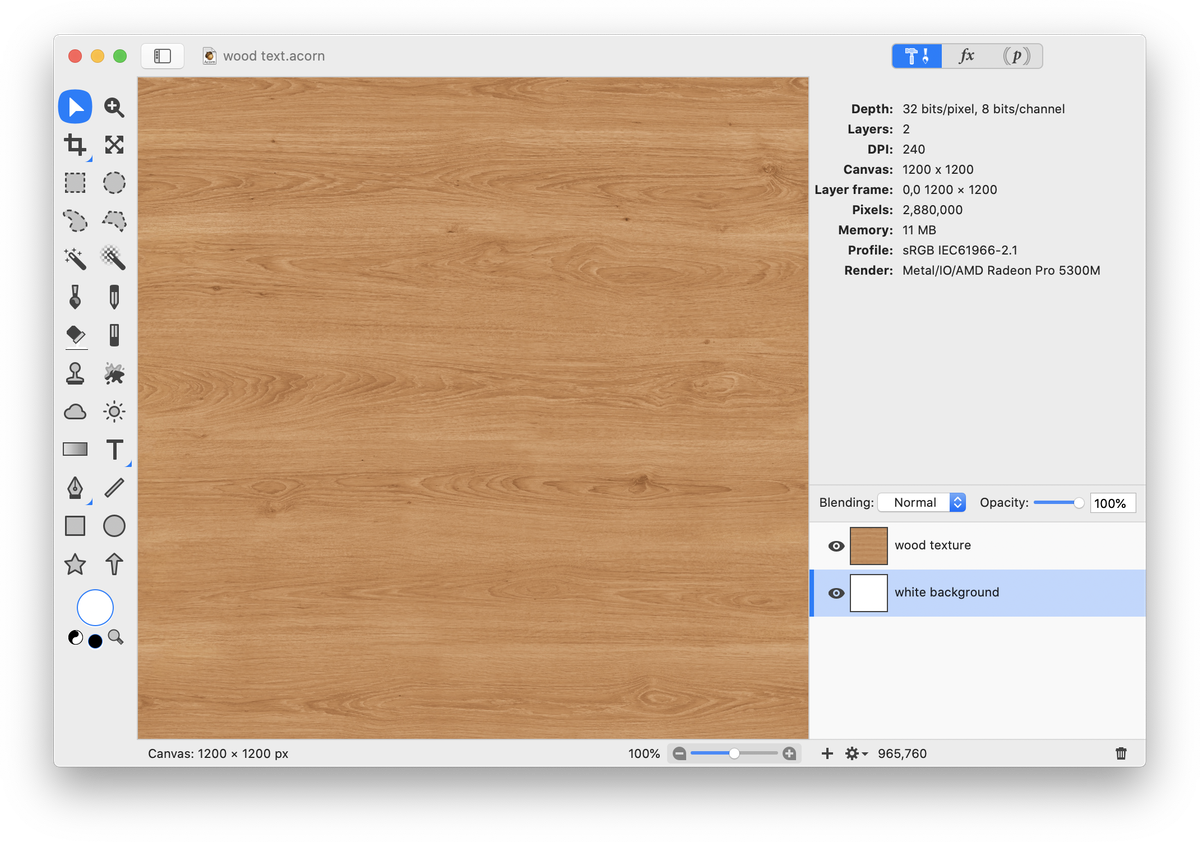
 Open a new image in Acorn, File ▸ New. This example uses dimensions of 1200 x 1200 pixels and a white background. Find a wood texture image you want to use for your text, the one used here can be found at http://www.cgtextures.com. Drag the wood texture image into your layers list so it is above the white background.
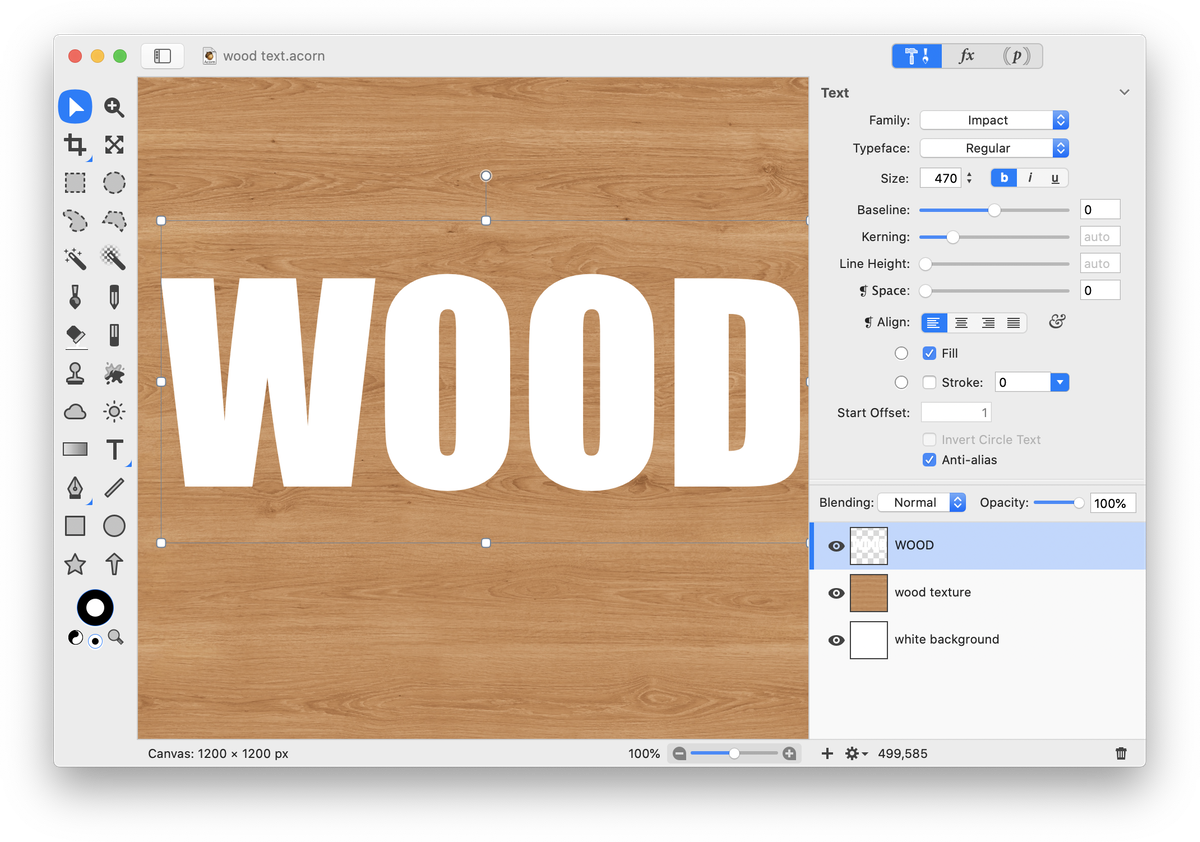
 Depending on how large you want the wood grain to be on your text, you may want to scale the wood texture layer. Using Layer ▸ Rotate and Transform ▸ Scale and Rotate (⇧⌘T), the wood texture layer has been scaled to 32% here. Choose the text tool and type out your text. The color doesn't currently matter, but you don't want a stroke.
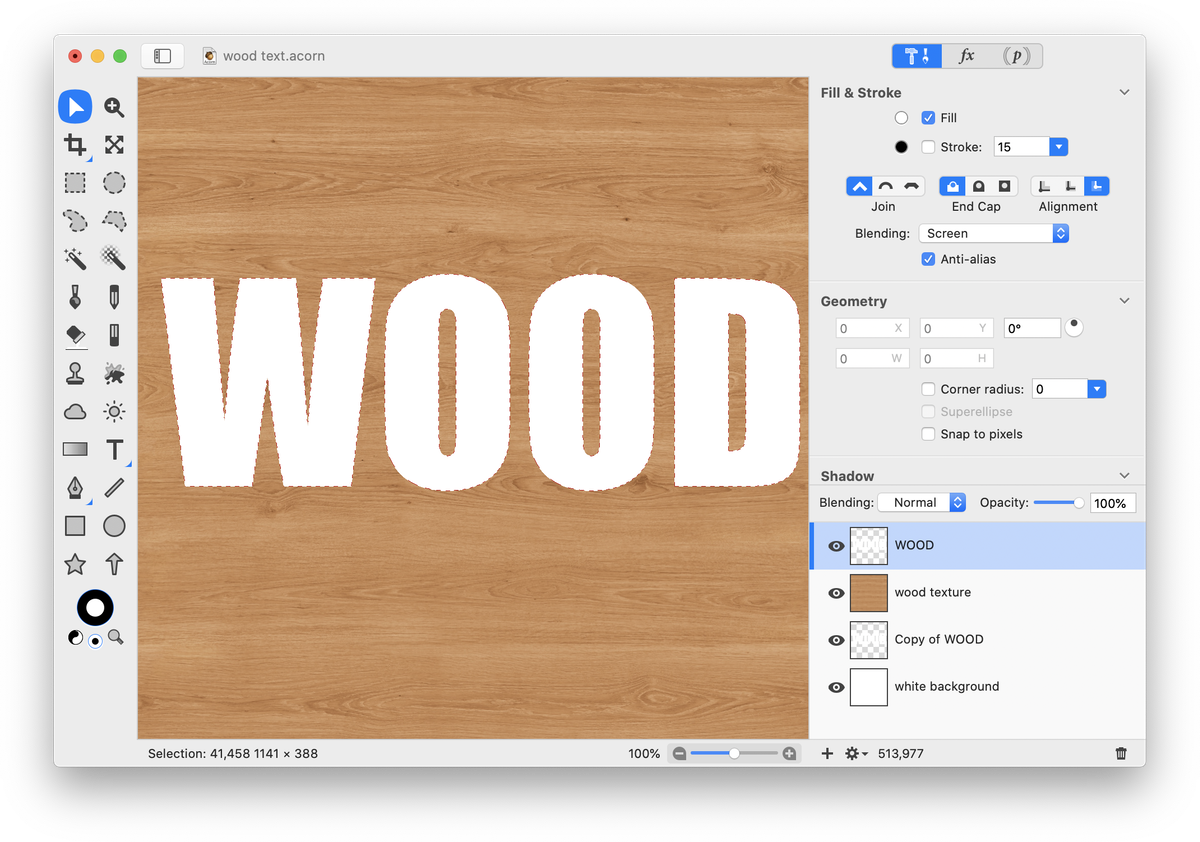
 Make a copy of your text layer Layer ▸ Duplicate Layer (⇧⌘D), and move the copied layer below the wood texture layer, but above the white background. Make sure the top most wood text layer is selected and choose Select ▸ Make Selection from Layer.
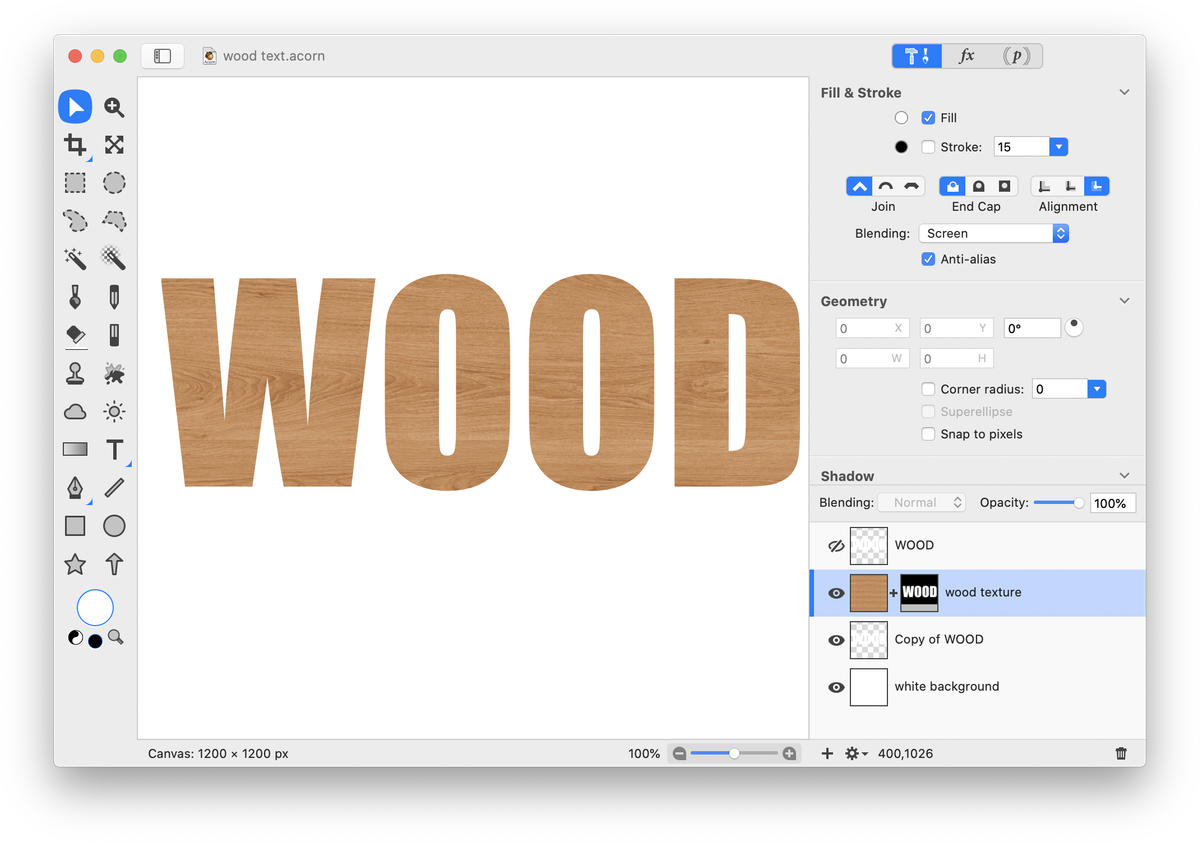
 Click on the visibility icon to the left of the top most text layer to hide it. Now click on the wood texture layer. Click on the action menu towards the bottom left of the layers list and choose 'Add Layer Mask'.
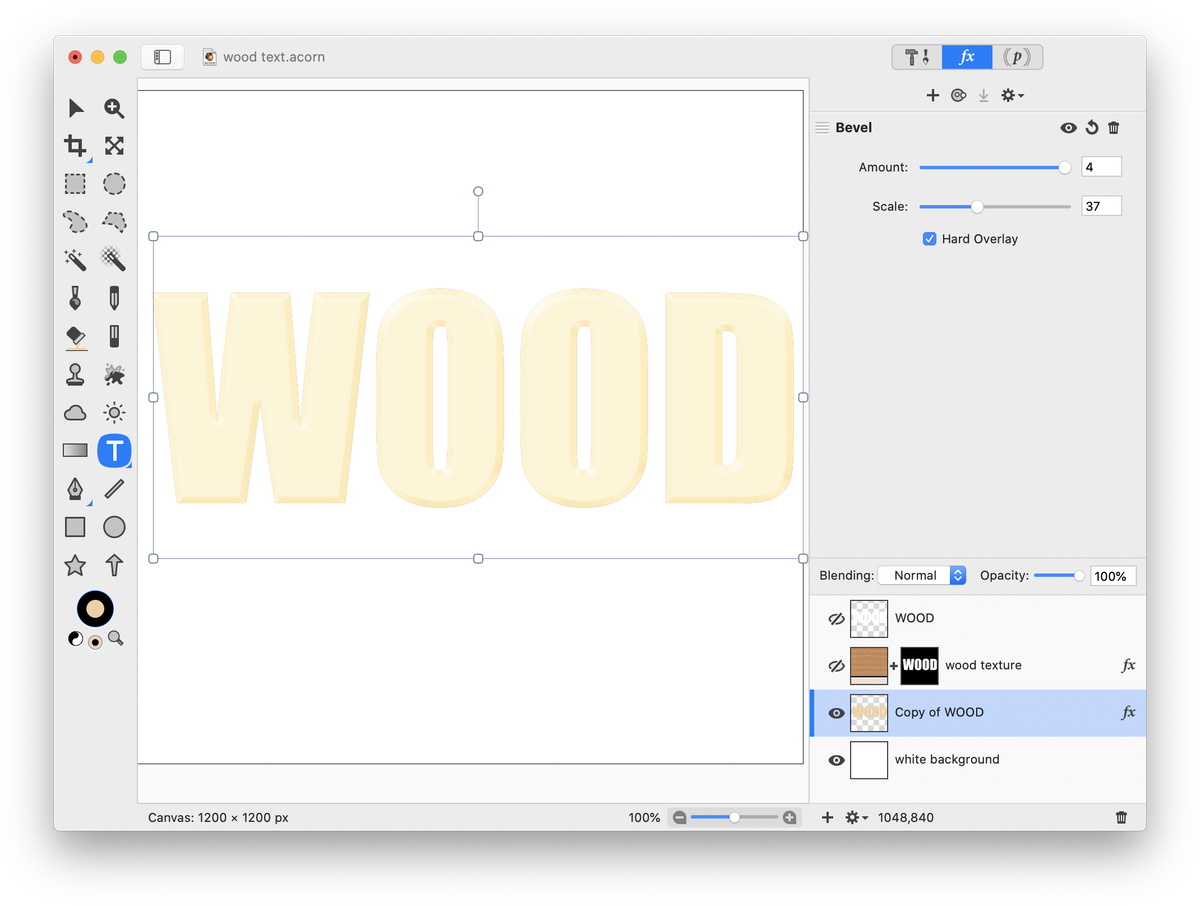
 Click on the wood texture thumbnail in the layers list to select it. Go to Filter ▸ Stylize ▸ Bevel, then click the '+' button on the upper left hand corner of the window and choose Stylize ▸ Inner Shadow. Use the settings seen here:
 If you're happy with the text, you can stop here. Or, if you want to beef it up a bit, continue on with the tutorial.
Click on the color picker. It looks like a magnifying glass and can be seen just to the right of the color wells in the tools palette. Using the color picker loupe, click on a light area of the wood texture to choose that color. The color will show up in the colors palette. Drag and drop the color to the bottom of the colors palette as a swatch. This allows you to easily retrieve the color for the next step.
Click on the visibility icon on the wood texture layer to hide it. Click on the lower text layer to select it. Select the text (if it's white you won't be able to see it at first). Increase the stroke setting to around 4. Drag and drop the color you saved in the colors palette in the previous step into both color wells in the tools palette. This will adjust the fill and stroke colors.
Choose Filter ▸ Stylize ▸ Bevel and enter the settings seen below:
 Click on the visibility icon of the wood texture layer so it appears again. You can fatten up the text even more by increasing the stroke value on the lower text layer.
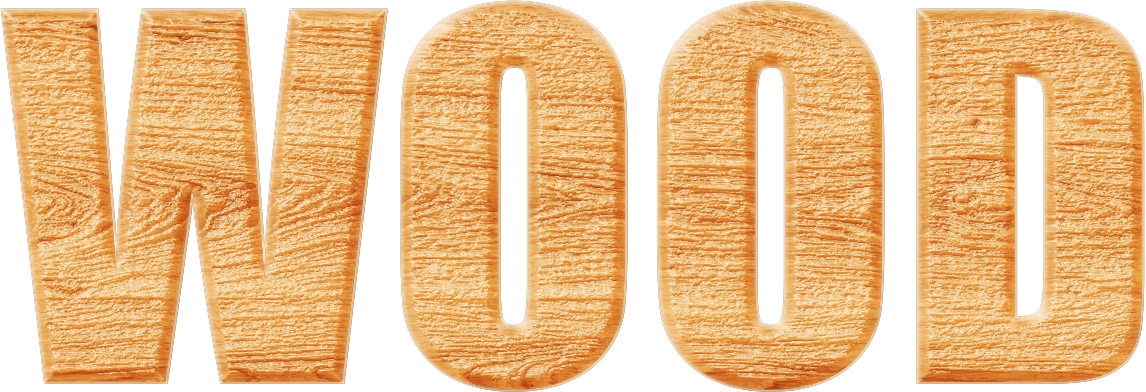
It's hard work carving wood, isn't it?
