Lightning and Electricity
 Whether making a halloween invitation or modifying an image of the outdoors, creating the appearance of lightning or electricity from scratch is a fun project.
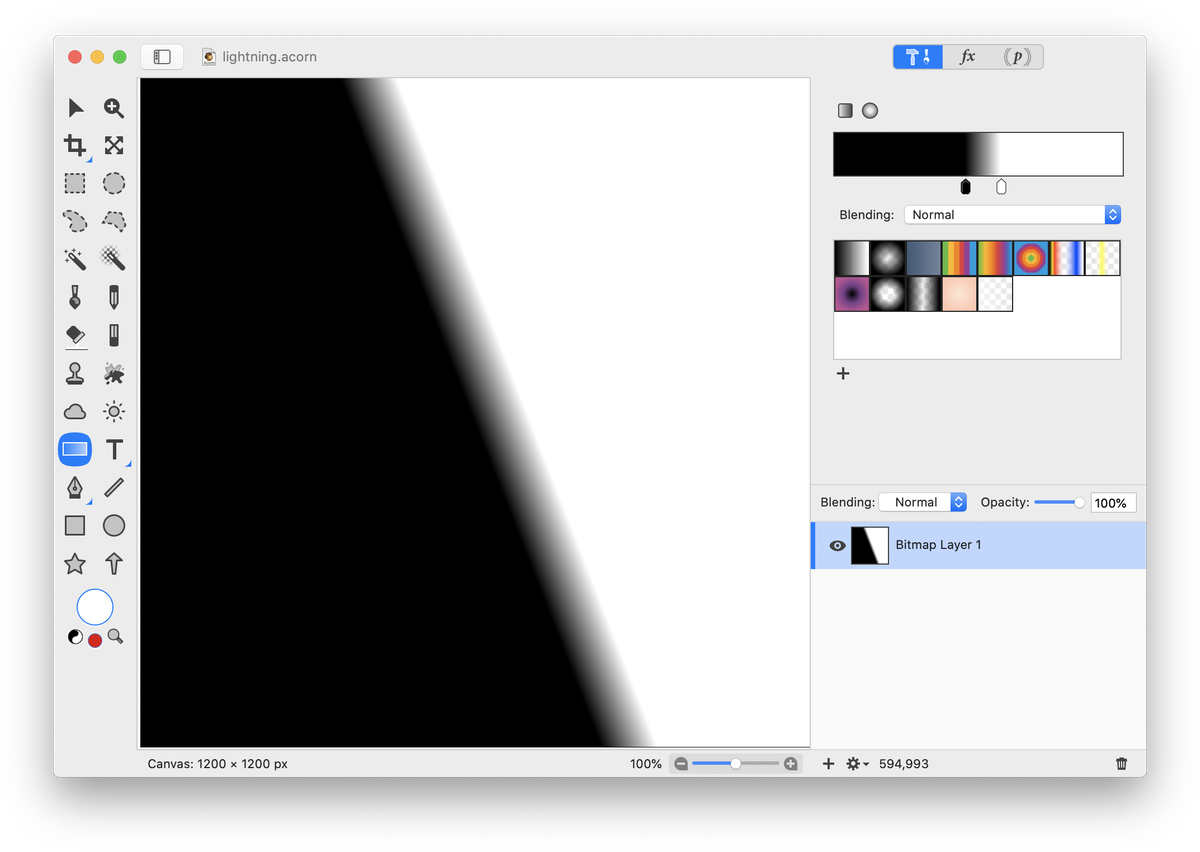
To start, open a new blank image in Acorn with a white background, File ▸ New. The dimensions used here are 1200 x 1200 pixels. Click 'OK'. Create a black to white gradient similar to the one shown below. It is important to move the black and white gradient tabs in towards each other.
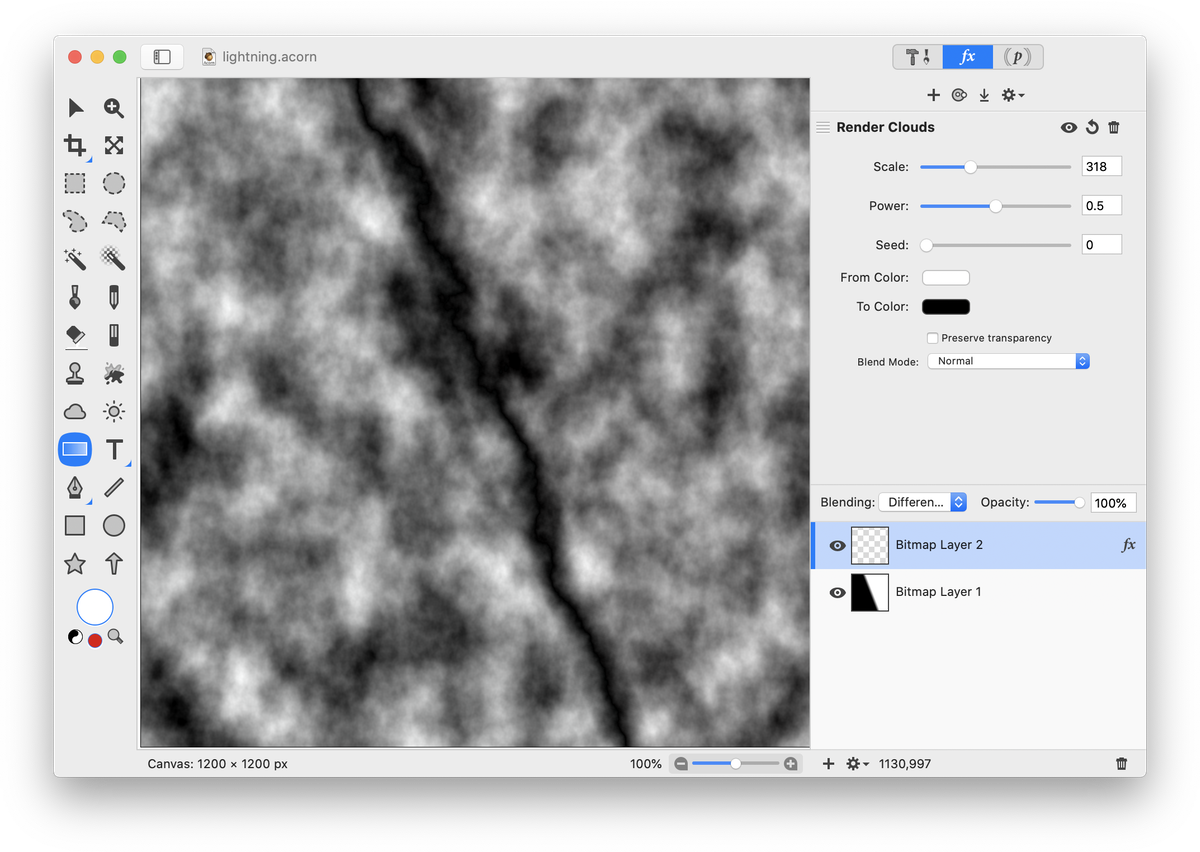
 Add a new layer, Layer ▸ New Layer. Set the blending mode to 'difference'. Go to Filter ▸ Generator ▸ Render Clouds. The settings used here are shown below. Make sure the 'from' color is white and the 'to' color is black. Click the 'Flatten' button at the top of the filters (it looks like a downward arrow).
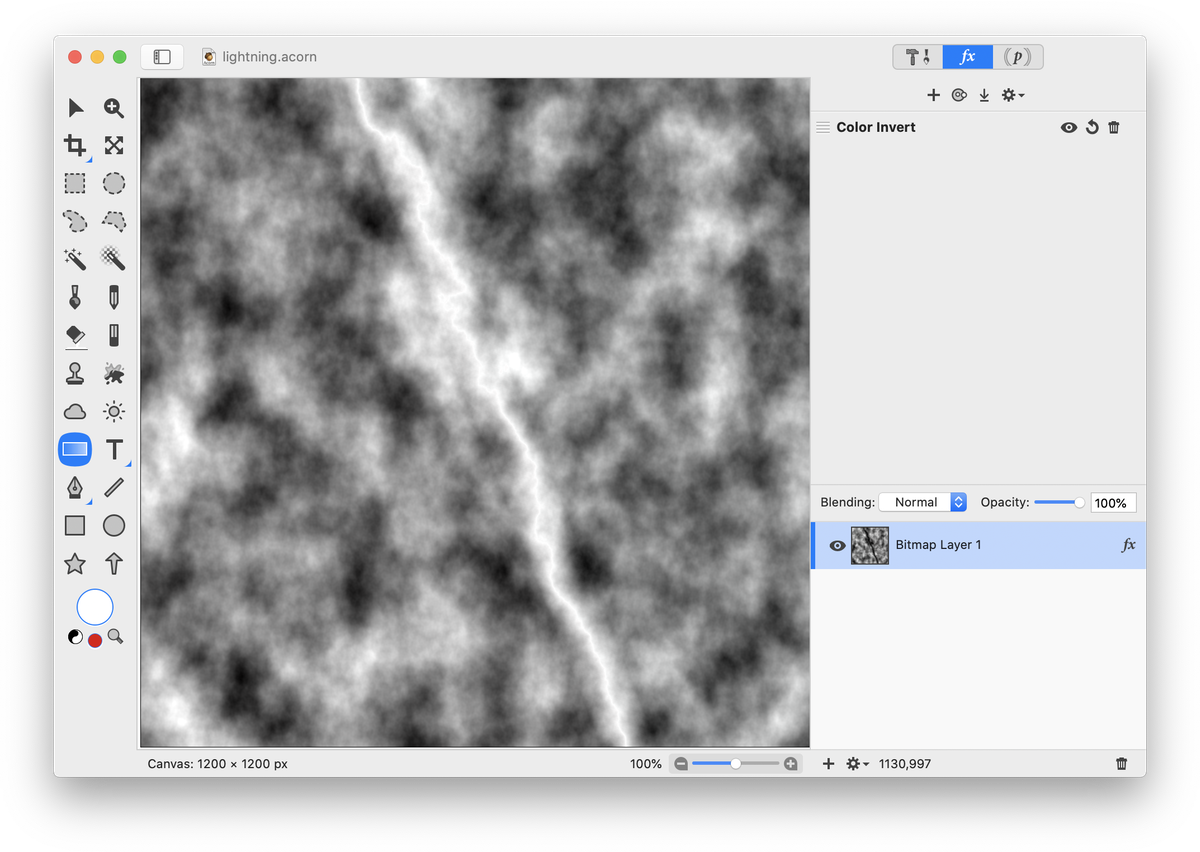
 Merge the layers, Layer ▸ Merge Down. Then select Filter ▸ Color Effect ▸ Color Invert. Click the 'Flatten' button at the top of the filters.
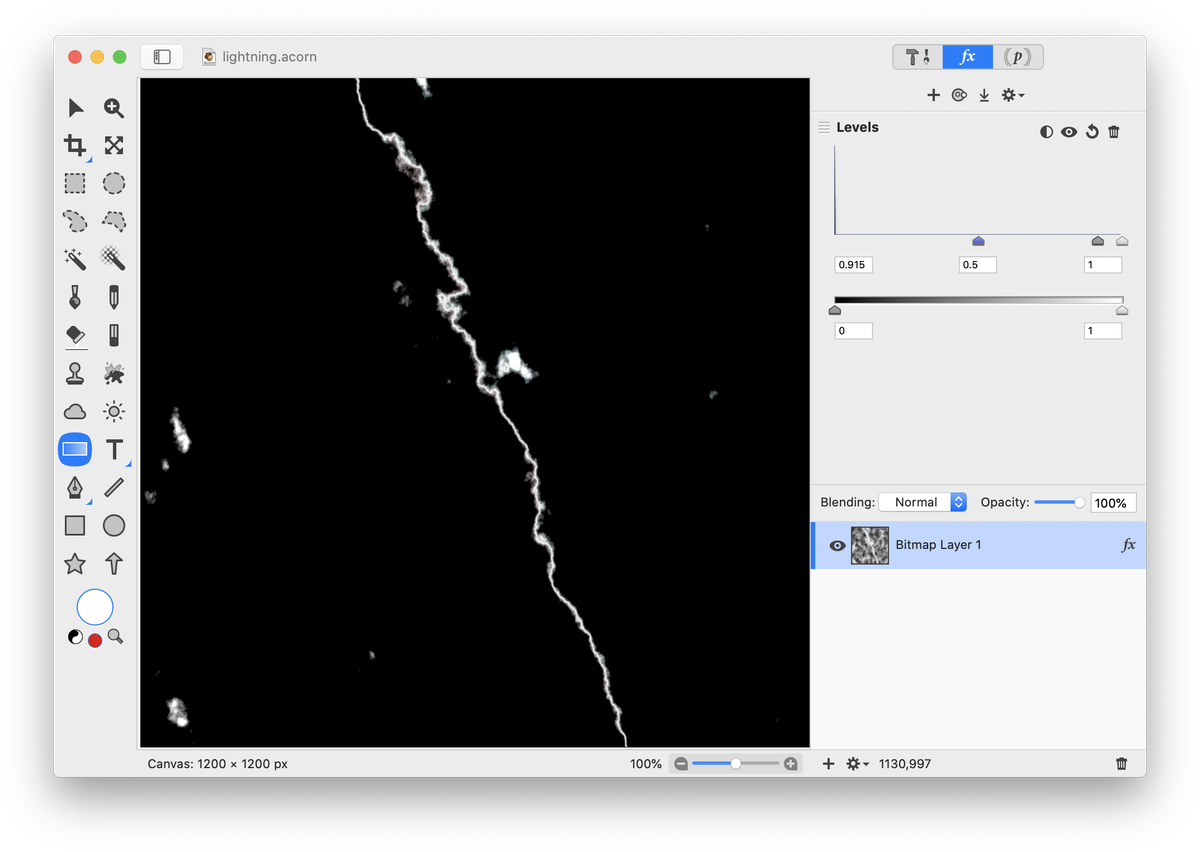
 Go to Filter ▸ Color Adjustment ▸ Levels. Move the left most tab to the right until the electricity is mostly isolated. Click the ‘Flatten’ button at the top of the filters.
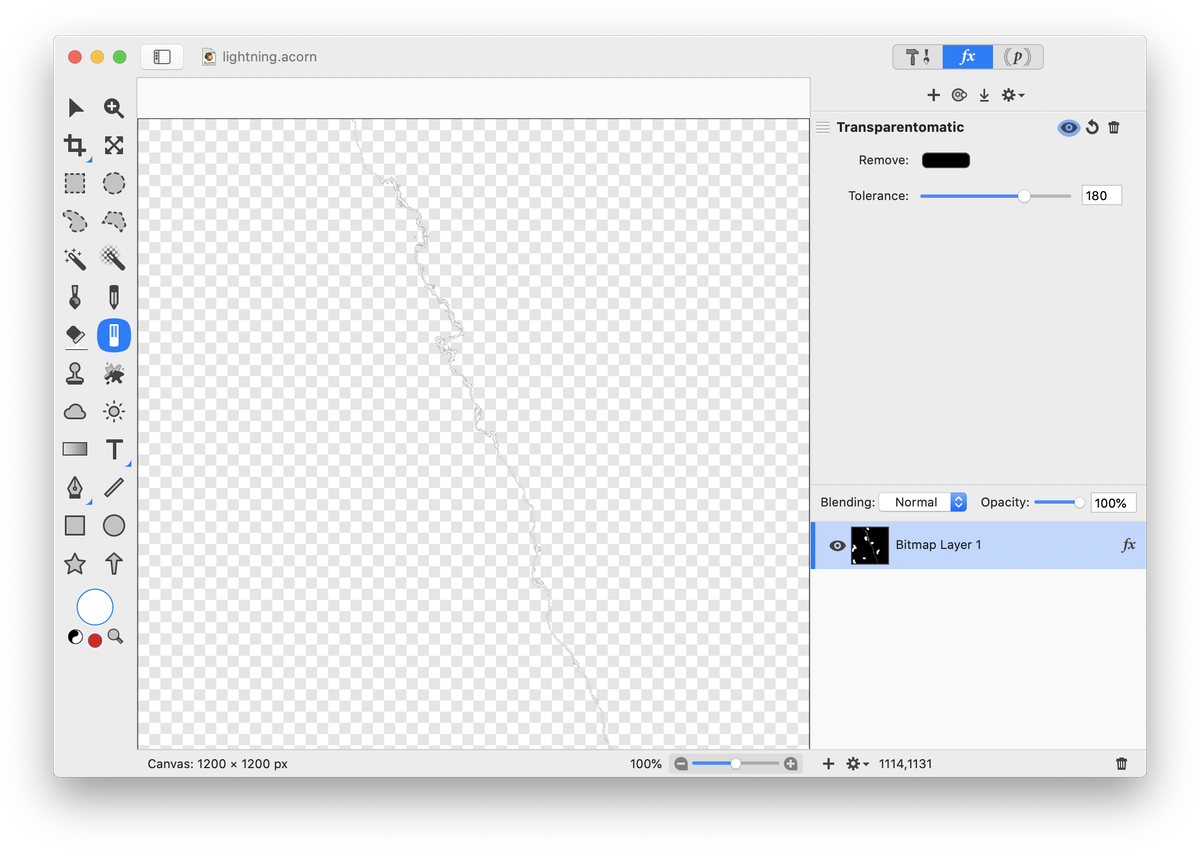
 If you have any lingering white areas not associated with the electricity, use the eraser tool to get rid of them. Then, go to Filter ▸ Color Adjustment ▸ Transparentomatic. Choose black as the color to be removed and adjust the tolerance. Click the’ Flatten' button.
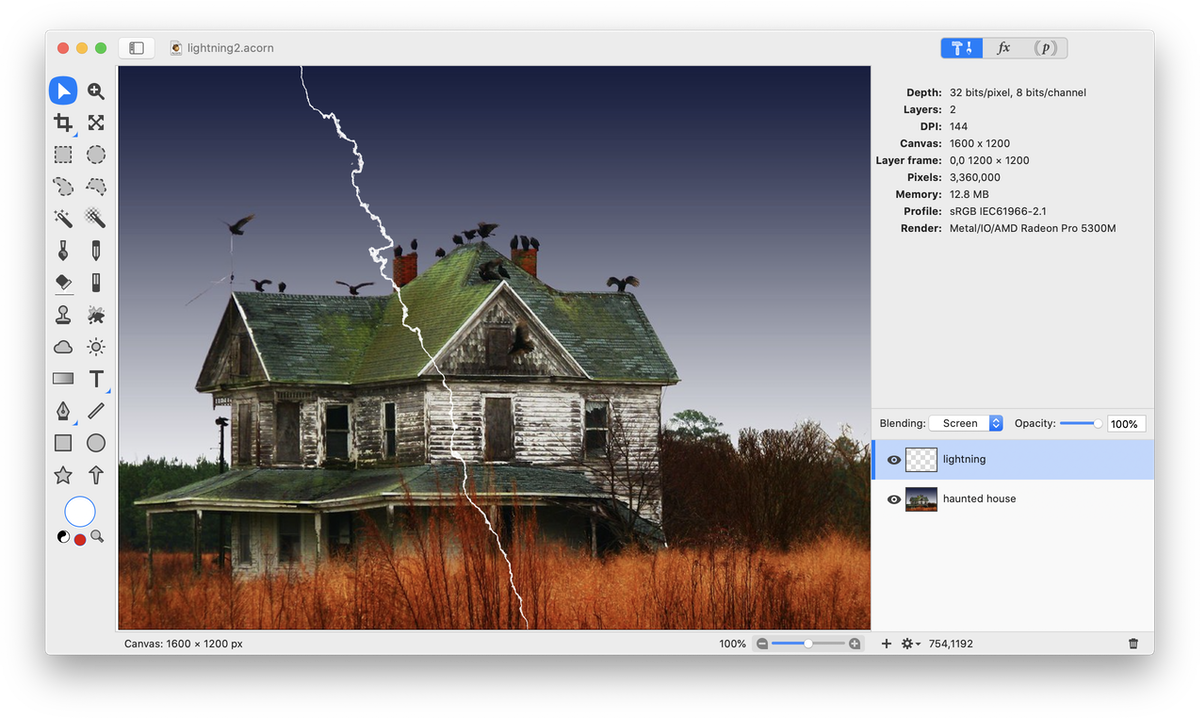
 Bring the electricity you have created into the image you want to use it in, or vice versa. Change the blending mode of the electricity layer to 'screen'. You can also try blending mode 'color dodge'.
 Duplicate the lightning bolt layer, Layer ▸ Duplicate Layer. While on the duplicated layer, go to Filter ▸ Tile Effect ▸ Kaleidoscope. Change the count to '2' and play around with the angle and center placement. Click the ‘Flatten' button.
 Using one of the selection tools, select one of your duplicated lightning bolts and go to Layer ▸ New Layer with Cut Selection. Set the blending mode of the new layer to screen. Deselect.
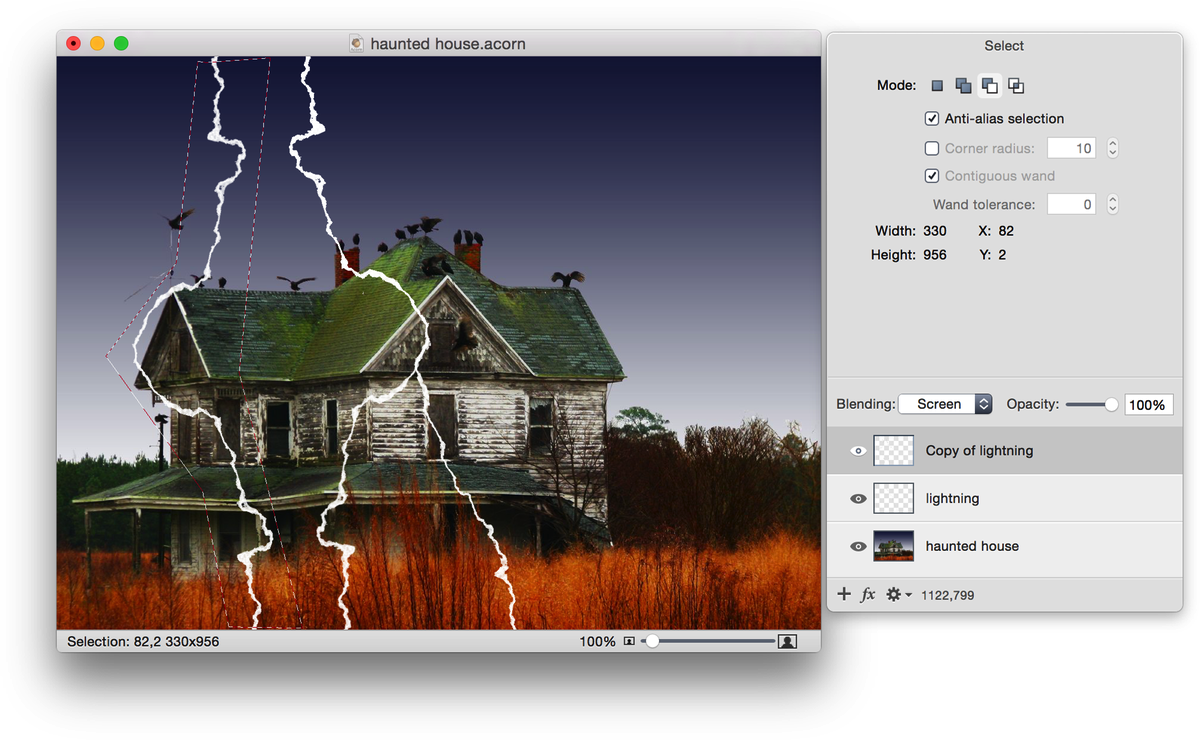 Select Layer ▸ Rotate and Transform ▸ Scale and Rotate. Move, rotate, and scale the lightning to create your desired look. Repeat the same steps with your other lightning bolts.
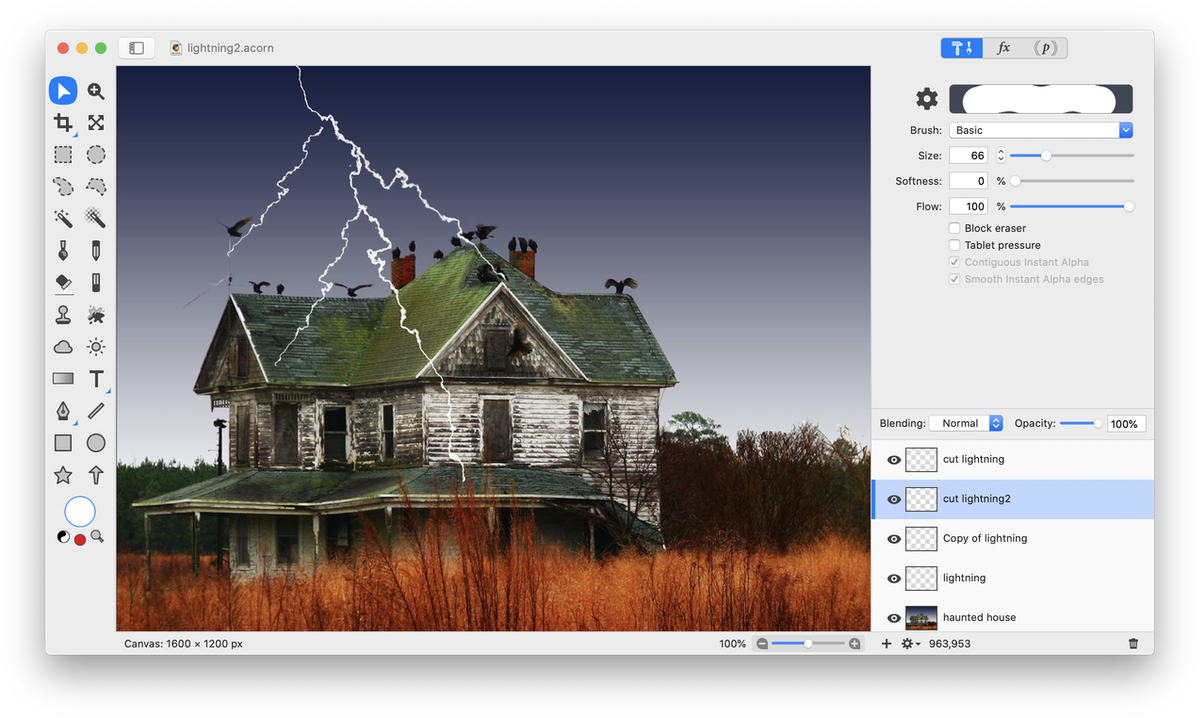 You can also break up a lightning bolt pair by using the selection tool to select part of a bolt, then make a new layer with your selection. Using the eraser tool, click on each lightning bolt layer to erase some of the ends of the bolts to make their point of contact with the house more realistic. Decrease the opacity of the eraser to help with the transition from the bolt to the house. Also play around with decreasing the opacity of a few of the lightning bolt layers.
 An additional idea for using lightning bolts is on Halloween cards or invitations. The above steps were followed for creating the lightning bolts. Then the image of Frankenstein was added, along with text, and the 'Gloom' stylize filter was added to all layers. The colors of the lightning bolts were changed using the 'Replace Color' filter found under 'Color Adjustment'.
 Tutorial Credit
Thank you to Troye Hering for outlining the steps of this tutorial.
Photo Credits
Haunted House © Trostle; Frankenstein © Newsbie Pix.