Animate an Image
This tutorial will show you how to use Acorn to create an image and save it as an Animated GIF or PNG.

Make a new image by using the File ▸ New… menu item (shortcut key ⌘N). In the New Image window that appears, create an image that is 128 pixels wide, and 128 pixels high (or download a premade image: animate_image.acorn)
Next, select the oval tool (shortcut key 'o') and drag out a new circle on the the canvas. In the shape palette change its width and height to 60 pixels wide by 60 pixels high.
Changing ruler units to pixels
If your image is set to use inches or centimeters as the measurement style, you can change it to pixels for this tutorial by using keyboard shortcut ⌘R to show the canvas ruler. Control click on the ruler and select "Pixels". Alternatively, you can use the Command Bar action "Use Pixels for Measurement".
This little circle is going to be the base of the animation. The circle will appear to move around and change colors using various Shape Processor filters.
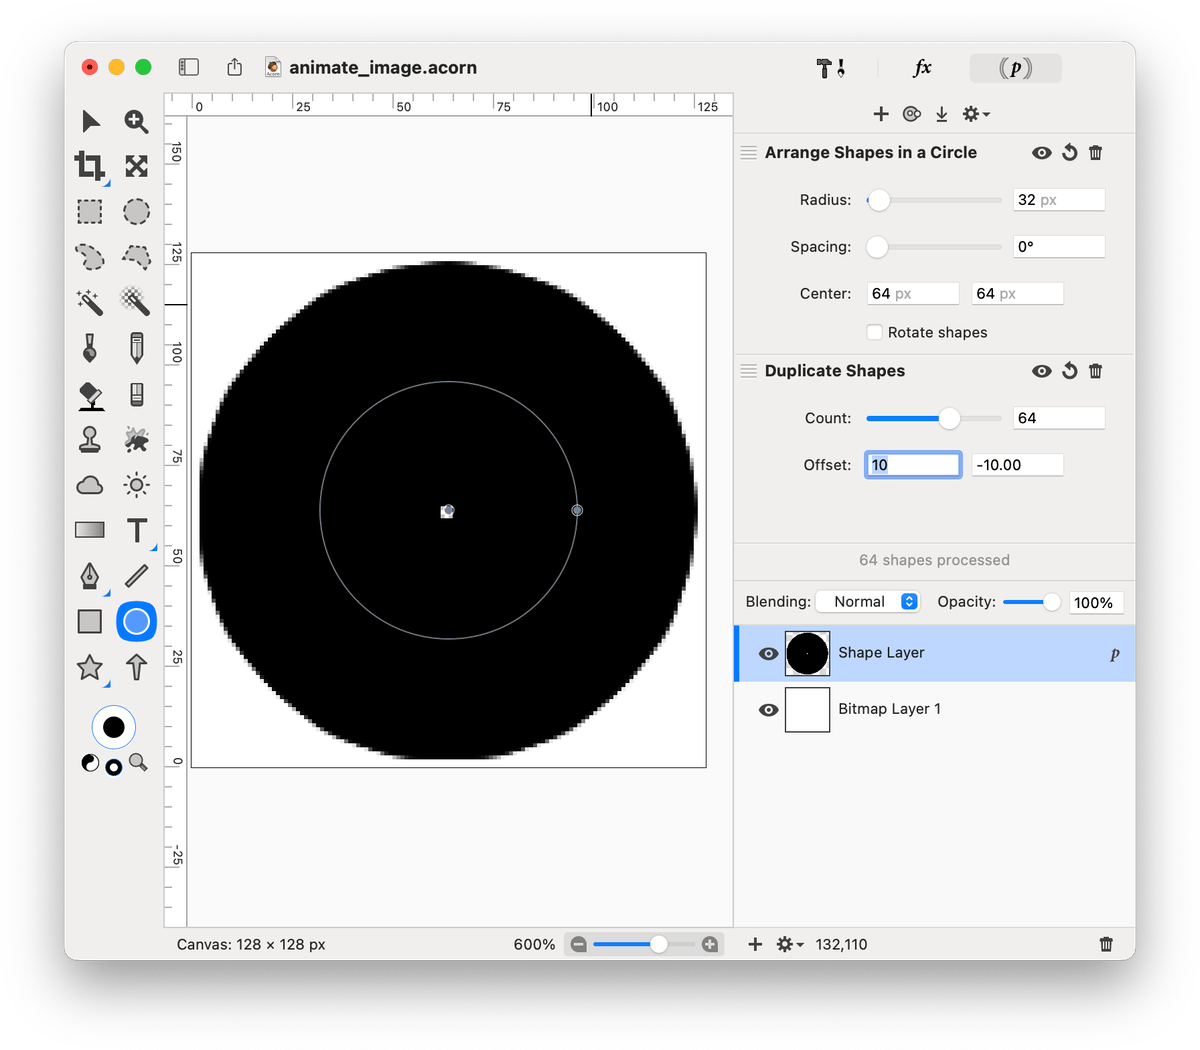
Select the Shape ▸ Process ▸ Duplicate Shapes menu item, and in the palette that appears change the "Count" field to 64. Next use the Shape ▸ Process ▸ Arrange Shapes in a Circle menu item, and change the Radius field to 32 so all the copies of circles will fit on the canvas. The processors should look similar to the image below.

Next add some color to the image via the Shape ▸ Process ▸ Cycle Colors menu item. This will evenly color all the circles in various hues.
Once all the Processors are set, "flatten" everything by using the Shape ▸ Process ▸ Flatten Shape Processors menu item. This will convert filtered shapes into editable vectors.
The image has two layers- a background bitmap layer which is white, and the shape layer. Delete the white bitmap layer by clicking on it then choosing Layer ▸ Delete Layer. When making an animated image in Acorn each layer will be its own frame in the animation, and the white layer would appear as a flash.
After deleting the bitmap layer, move each shape to its own layer. Each shape will be a frame in the animation. To quickly move each shape to a new layer, first select all the shapes by using Select ▸ Select All (shortcut key ⌘A) menu item, and then use the Command Bar (shortcut ⇧⌘O or '/') and the "Extract Each Selected Shape to a New Layer" command.

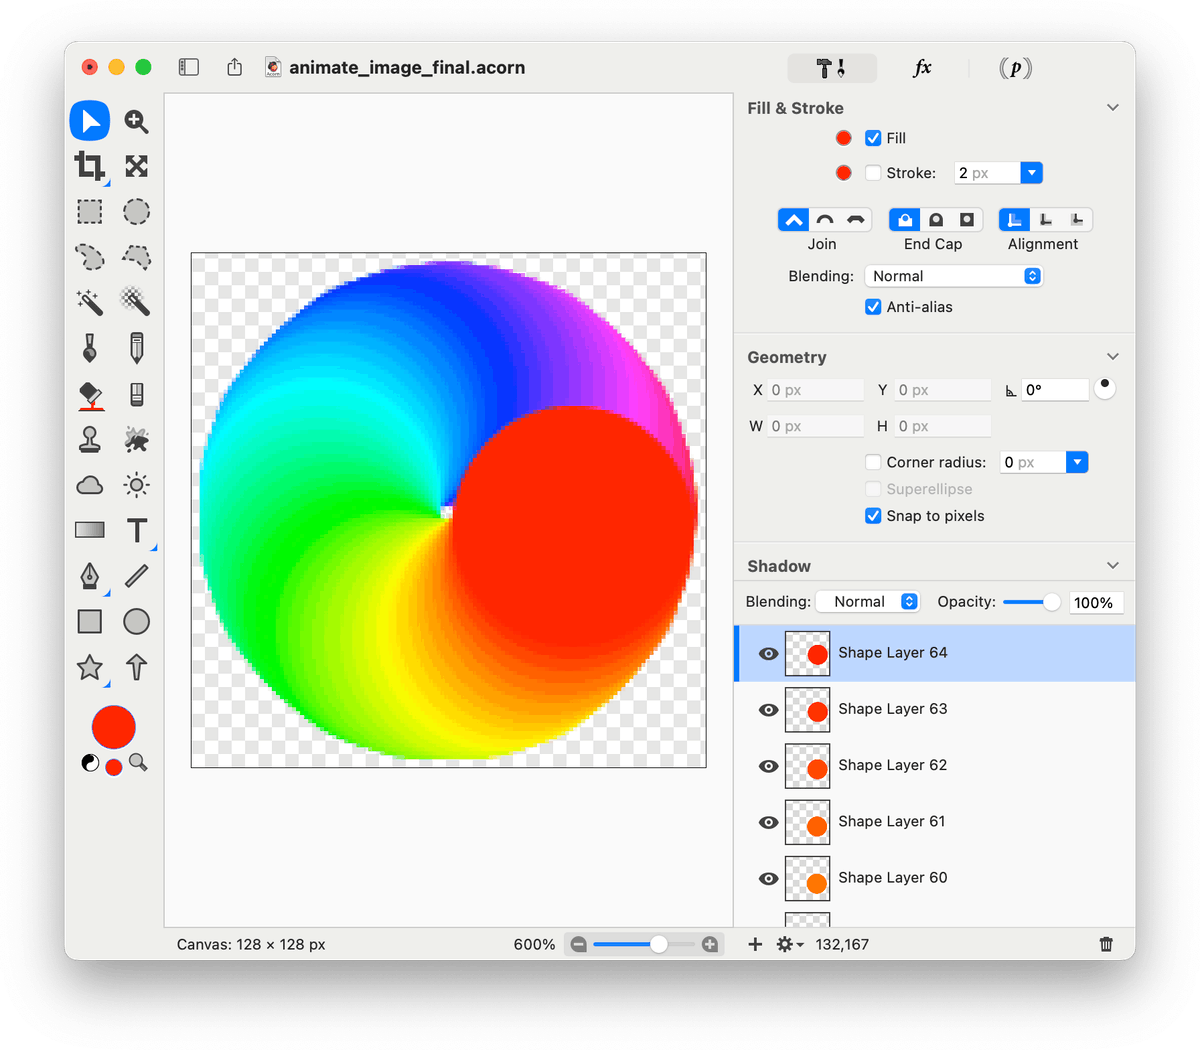
The last step is to export the image using the File ▸ Export ▸ Export (Web & Other)… menu item. This brings up Acorn's standard export window. For the format choose "Animated PNG" or "Animated GIF". Change the FPS (Frames Per Second) of the image, 45FPS works well for this tutorial. Save the image. Final result:
Acorn can open animated PNG and GIF images, and each frame of the animation becomes a layer. You can then alter those layers/frames and export the image back to an animated GIF or PNG.
Download the final project