Shape Editing & Viewing
Basic Shape Editing
Adding Shapes: Click on the shape tool of the style of shape you want to add and then click and drag on the canvas to draw the shape.
Deleting Shapes: To delete a shape, select the shape(s) with the move tool then hit the delete key. Pressing delete on a shape layer without anything selected will remove all the shapes in the layer.
Duplicating Shapes: You can duplicate a selected shape by choosing Edit ▸ Copy and then Edit ▸ Paste. Another option is to use Shape ▸ Duplicate Shape. The copy will be placed right above the original shape.
Resizing Shapes: To resize a shape, select the shape then click and drag on its bounding box using the move tool. Hold down the shift key as you are dragging on the bounding box to keep the aspect ratio of the shape intact. Holding down the option key as you are dragging will resize the shape from the center. If you know the exact shape dimensions you want, you can use the shape width/height fields in the inspector palette. To resize multiple shapes at once, hold down the shift key while selecting the shapes. Use the move tool to drag on the outer bounding box encompassing all the shapes. You will be prompted by a pop-up window to convert your shapes to Bézier shapes. You can choose to 'Always Convert' to avoid seeing this window in the future or 'Convert' to have the prompt continue to appear.
Adding Shape Layers: To add a new shape layer you can right click on the layers list to bring up the contextual menu, or choose Layer ▸ New Shape Layer from the menu. An additional method is to hold down the option and command keys while clicking the '+' button in the inspector palette.
Filters on Shapes: You can use filters on shape layers. The filter will be present on all shapes in that layer.
Copying Shape Styles: To modify shapes to have the same style attributes (stroke/fill/color/drop shadow/etc) as another shape on the same layer, select the shape(s) you want to change. Then hold down the option + command keys at the same time and click on the shape whose attributes you want to copy.
Flipping Shapes: To flip a shape, choose Shape ▸ Flip Vertically/Horizontally. If you have multiple shapes selected and choose Flip Horizontal or Vertical, the flip point will be the center of the all the selected shapes.
Rotating Multiple Shapes: You can select multiple shapes and rotate them all at once. To rotate shapes around the center point of all the selected shapes, hover over a bounding box corner until the rotation arrows appear. Click and drag on the canvas to rotate. Hold down the shift key to constrain the rotation to 45° increments. To rotate multiple shapes around their individual center axes, use the angle value field in the inspector palette.
Aligning Shapes: To align multiple shapes on the same layer, select the shapes you wish to align and then choose one of the options under the menu item, or click on an alignment option in the inspector palette. Aligning can also be accessed by control-clicking on the selected shapes.
Arranging Shapes: Shape orders within a layer can be re-arranged by choosing the Shape ▸ Arrange menu item. This option can also be accessed by control-clicking on a shape.
Join Style: If your shape has a stroke, you can modify the appearance of its join style. There are 3 options: miter, rounded, and bevel. Miter is the default stroke appearance. If you currently have a corner radius on your shape, you cannot modify the line join style.
Anti-aliasing: Antialiasing refers to the smoothing of jagged edges to improve appearance. This option to select anti-aliasing is available towards the top of the shape inspector
Blending Modes: All of the blending modes available for layers are also available for shapes. Click on the dropdown menu in the shape inspector to see the various options. Shape blending modes affect how shapes interact with one another.
Boolean Path Operations
Boolean operations in Acorn allow you to combine, subtract, intersect, exclude, and divide two or more selected overlapping shapes in order to create different shapes. These options can be found under the menu item, as well as in the inspector palette. The style attributes of the top-most selected shape in the layer will be applied to the other shapes involved in the operation. If you wish to retain your original shapes, hold down the option key when selecting an operation.
 Union: When two or more overlapping shapes are selected, union mode will combine the shapes into one.
  Intersect: When two or more overlapping shapes are selected, intersect mode will retain areas of the shapes that are overlapping.
  Difference: When two or more overlapping shapes are selected, difference mode will subtract the top-most shapes from the bottom-most shape. If you hold down the shift key, it'll reverse the order of the shapes during the operation.
  Exclude: When two or more overlapping shapes are selected, exclude mode will retain the areas of the shapes that are not overlapping.
  Divide: When two overlapping shapes are selected, divide mode will create a new shape out of the areas of overlap, and subtract the areas of overlap from the initial shapes.
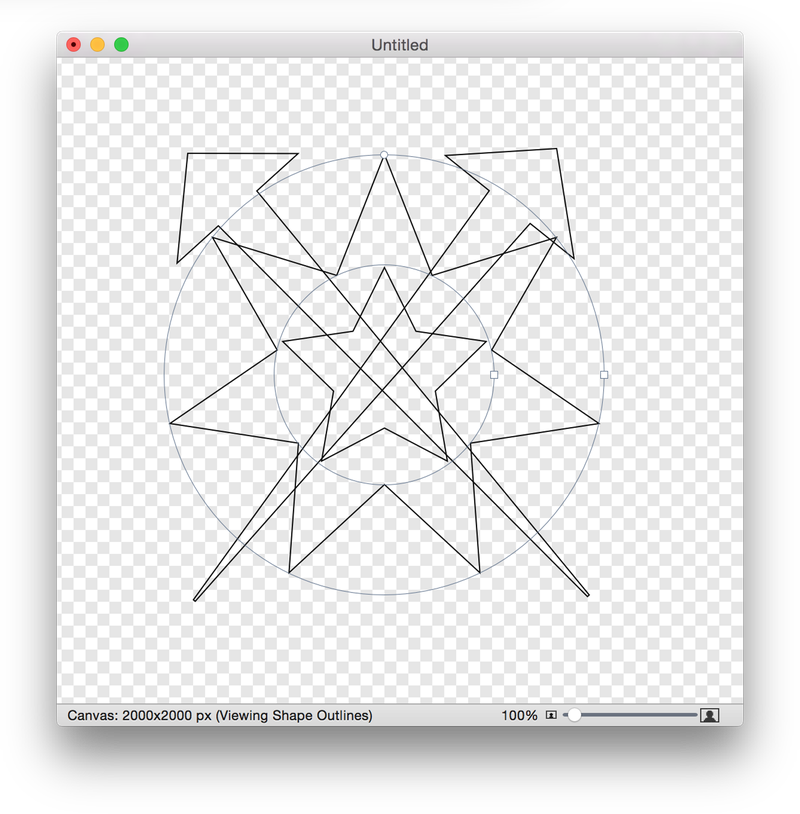
Shape Viewing
Under the 'View' menu item you can choose 3 different options for viewing your shapes. When you select , the stroke and fill of the shapes in the current shape layer will be hidden. Acorn will create a simple outline of your shapes which can be very useful if you have a lot of shapes you need to manage, especially when zoomed in. presents your shapes as scaled vectors, and is the standard view.