Create a Box
This tutorial will outline how you can create a gift box using Acorn. The box can then be printed, cut, folded, and pasted as a fun art project. To start, create a new image, File ▸ New. The image dimensions used here are 1200 x 1200 pixels, 144 ppi, with a transparent background.
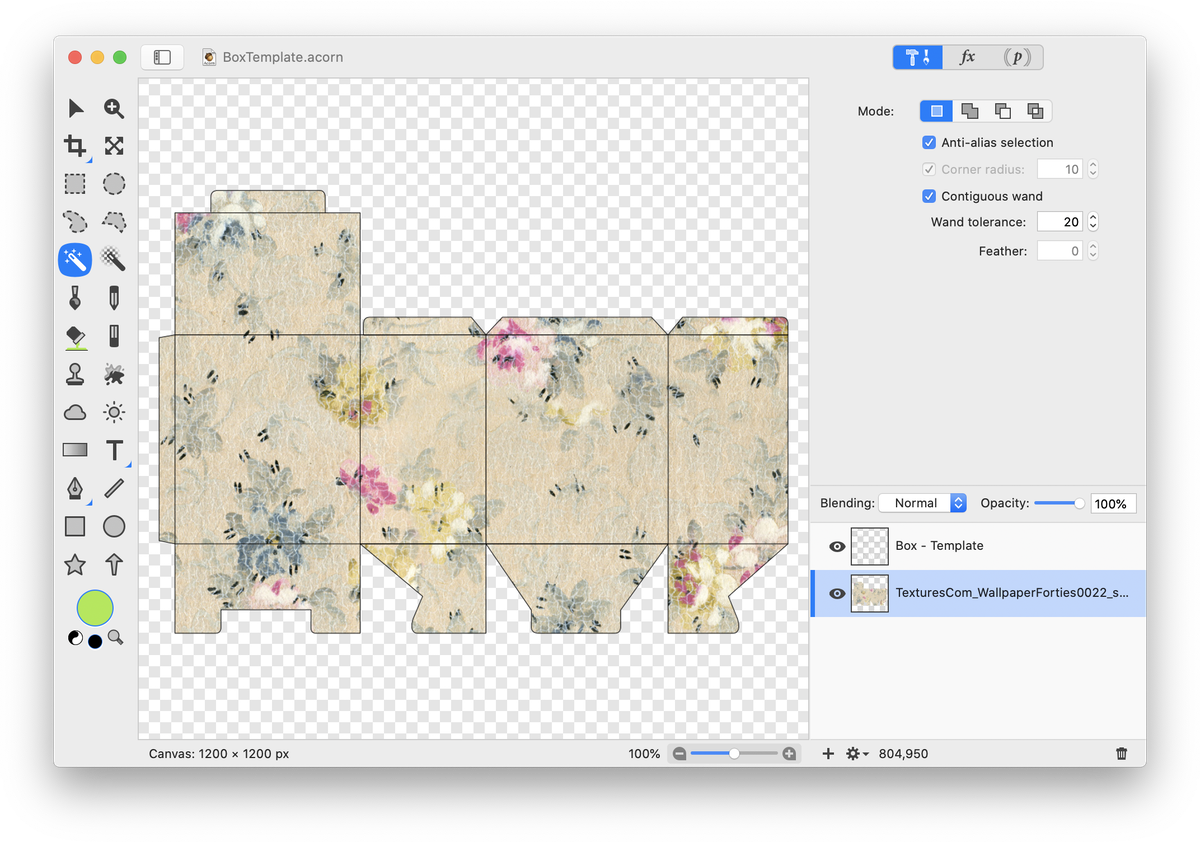
Add the image of a box template, File ▸ Add Images. The box template used in this tutorial can be downloaded here.

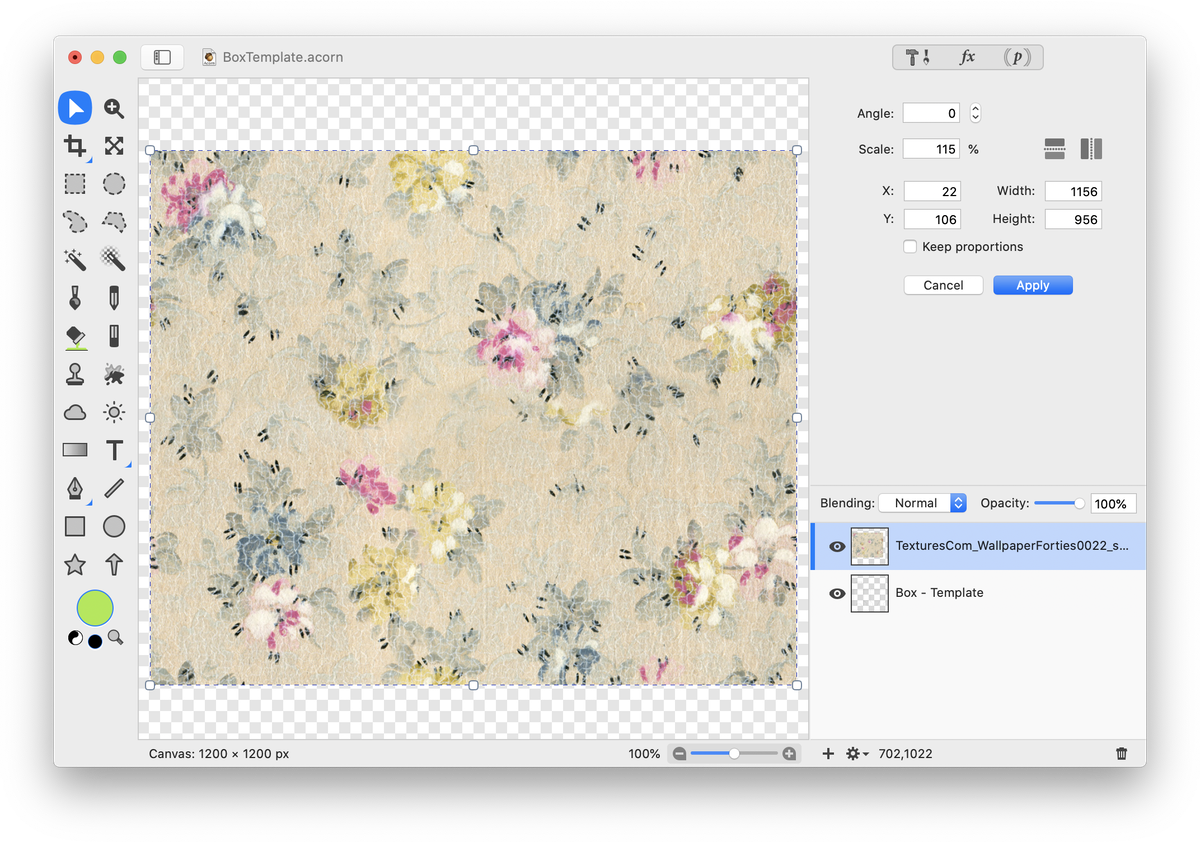
Add a patterned image to be your wrapping paper, File ▸ Add Images. The image used here can be found at http://www.cgtextures.com. You can also follow the steps of 'Creating a Seamless Tile' to make your own wrapping paper.
If necessary, decrease the size of the wrapping paper layer to match that of the box template layer by going to Layer ▸ Rotate and Transform ▸ Scale and Rotate.
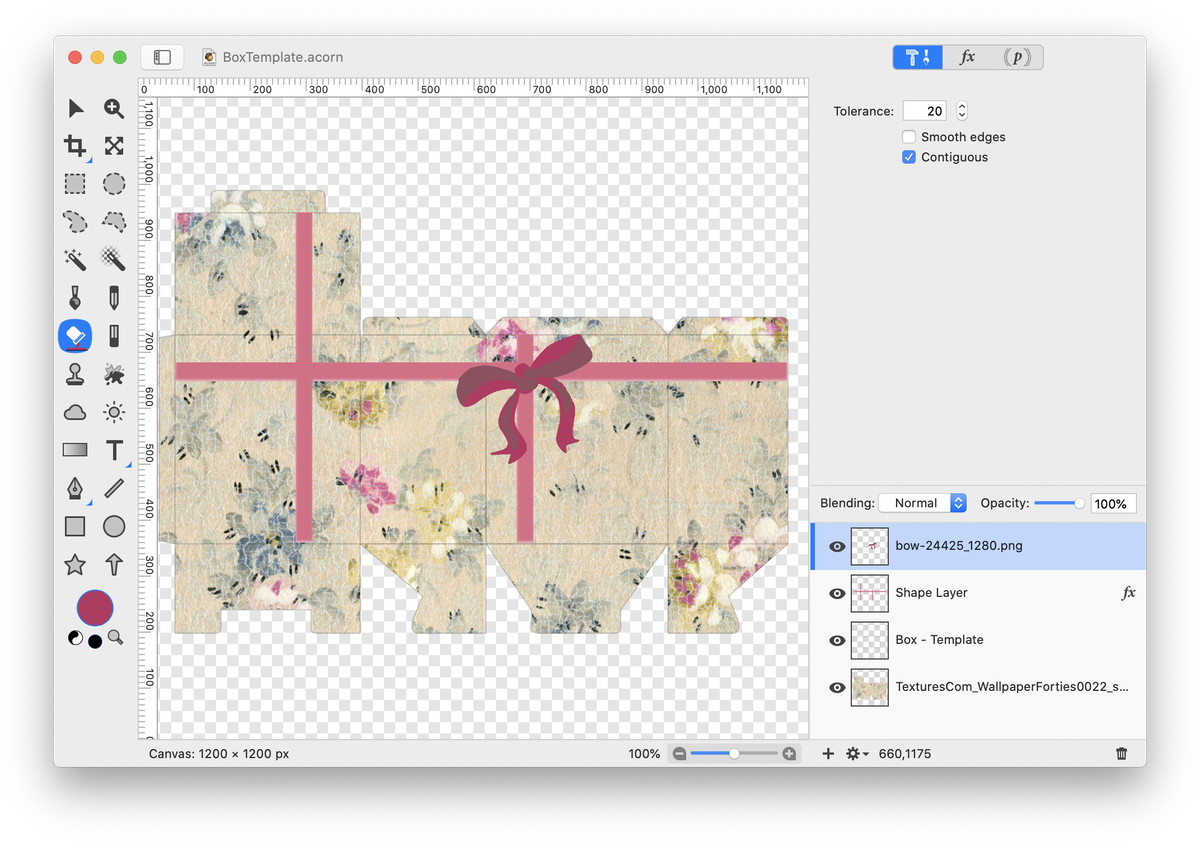
Move the wallpaper layer below the box template layer in the layers list. Click on the box template layer in the layers list. Select the magic wand tool from the tools palette and select the area of the layer outside of the box. Make sure the 'contiguous wand' option is checked in the inspector palette. Select ▸ View Selection Clipped Out is used here to make it easier to see the area of the selection.
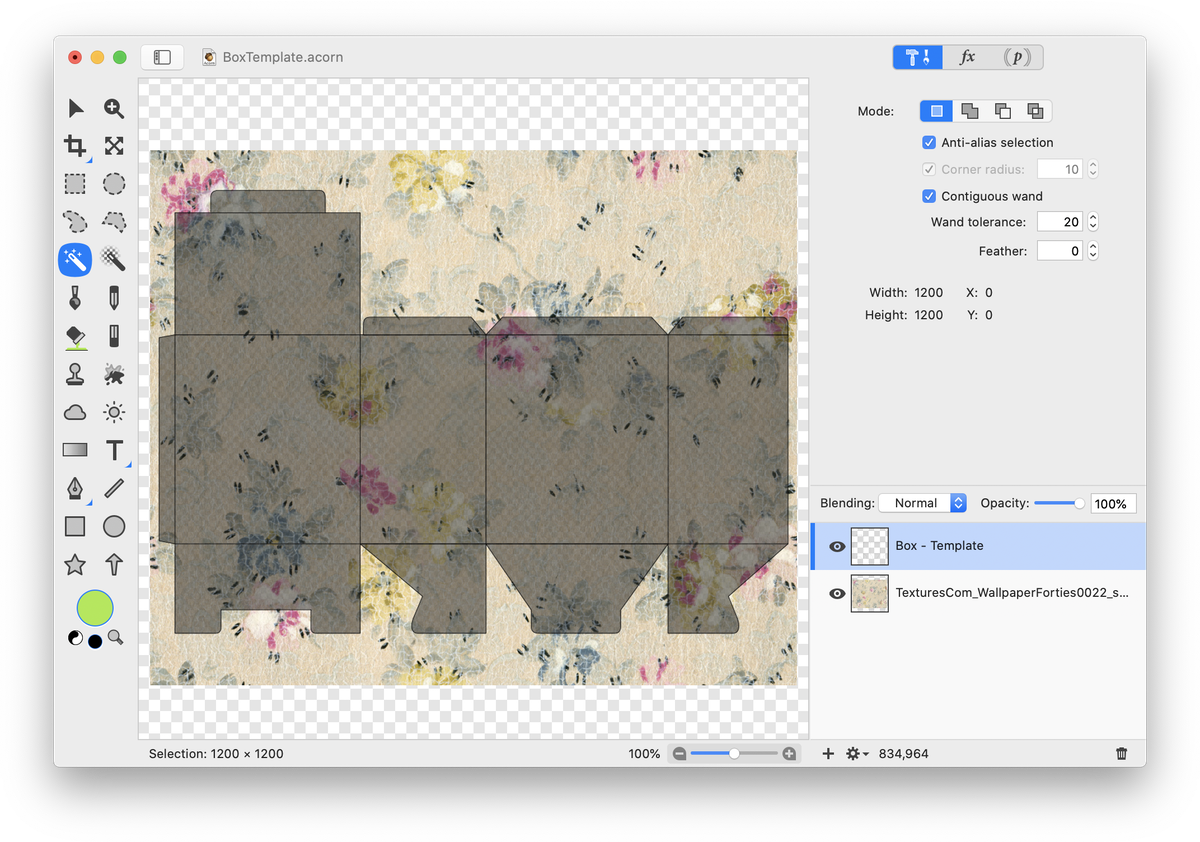
Click on the wrapping paper layer in the layers list and hit the delete key. Remove your selection, Select ▸ Clear Selection (⌘D).
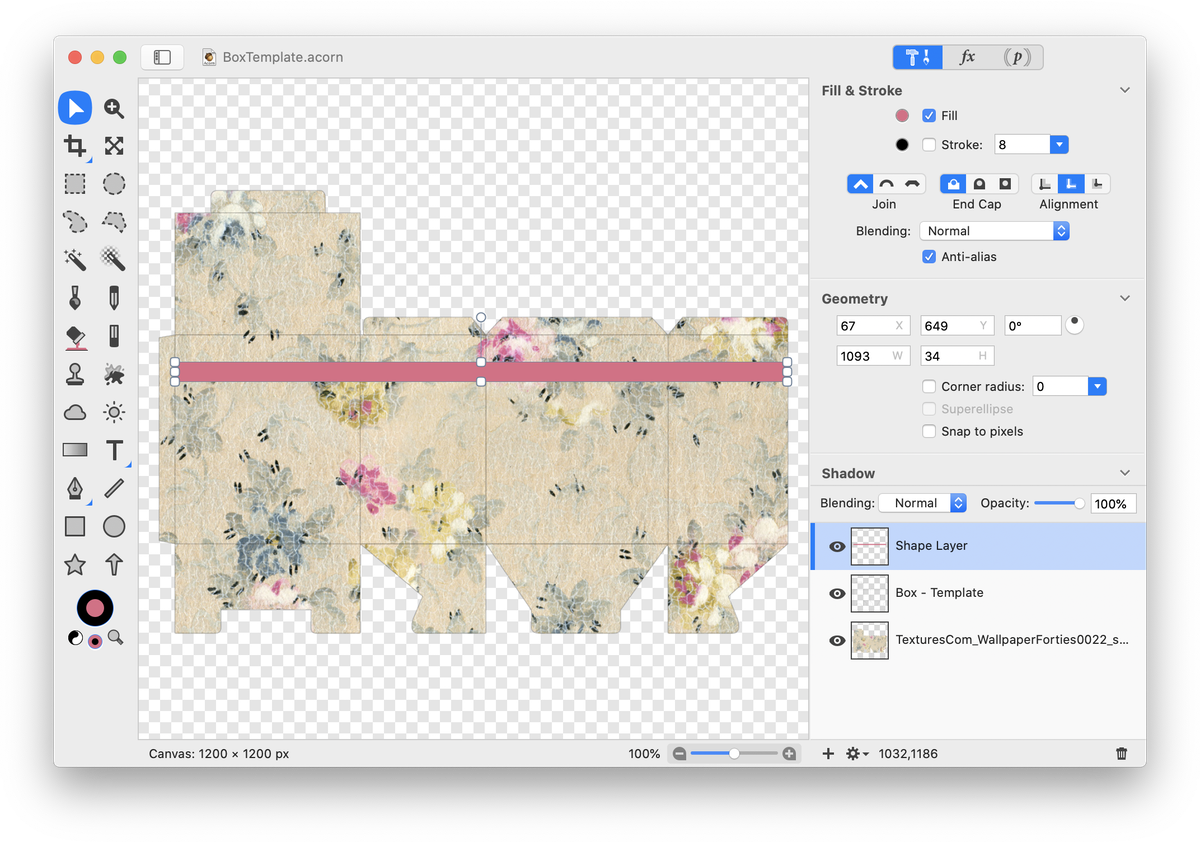
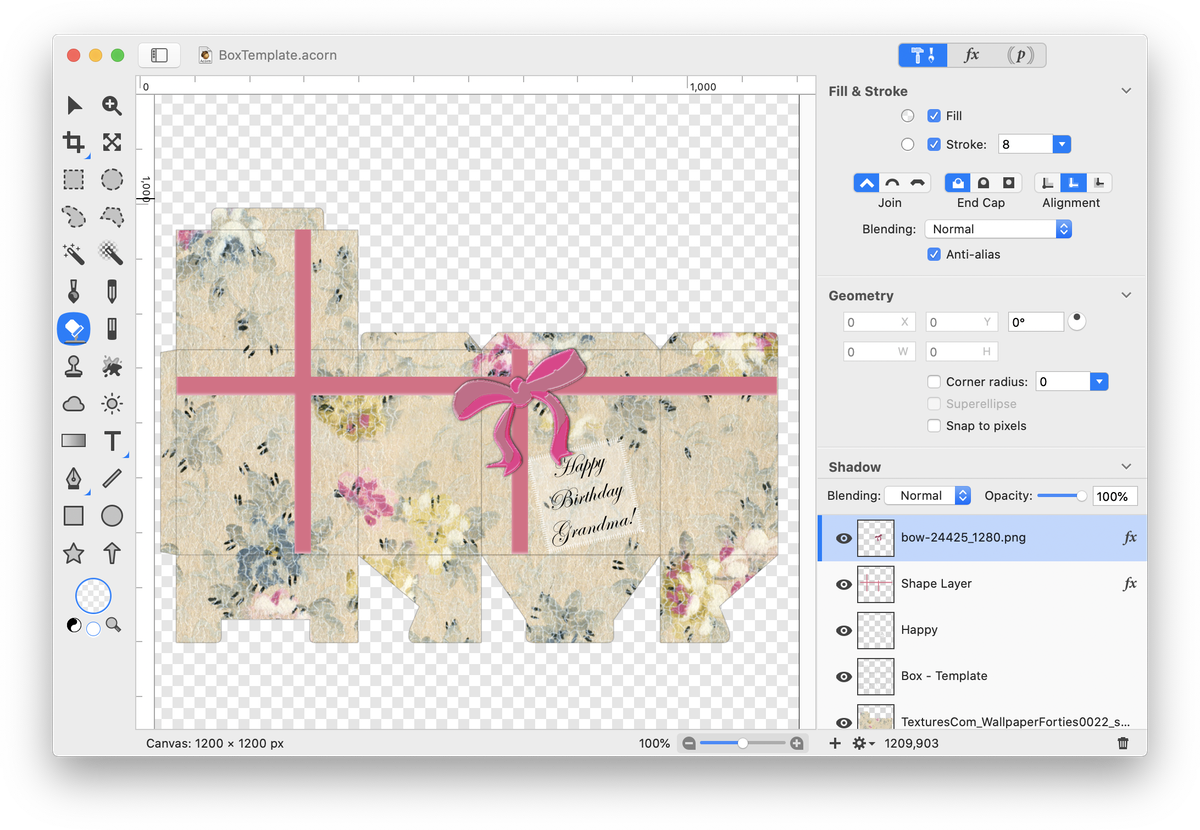
Decrease the opacity of the box template layer slightly so the template isn't so pronounced. The opacity here has been reduced to 30%.
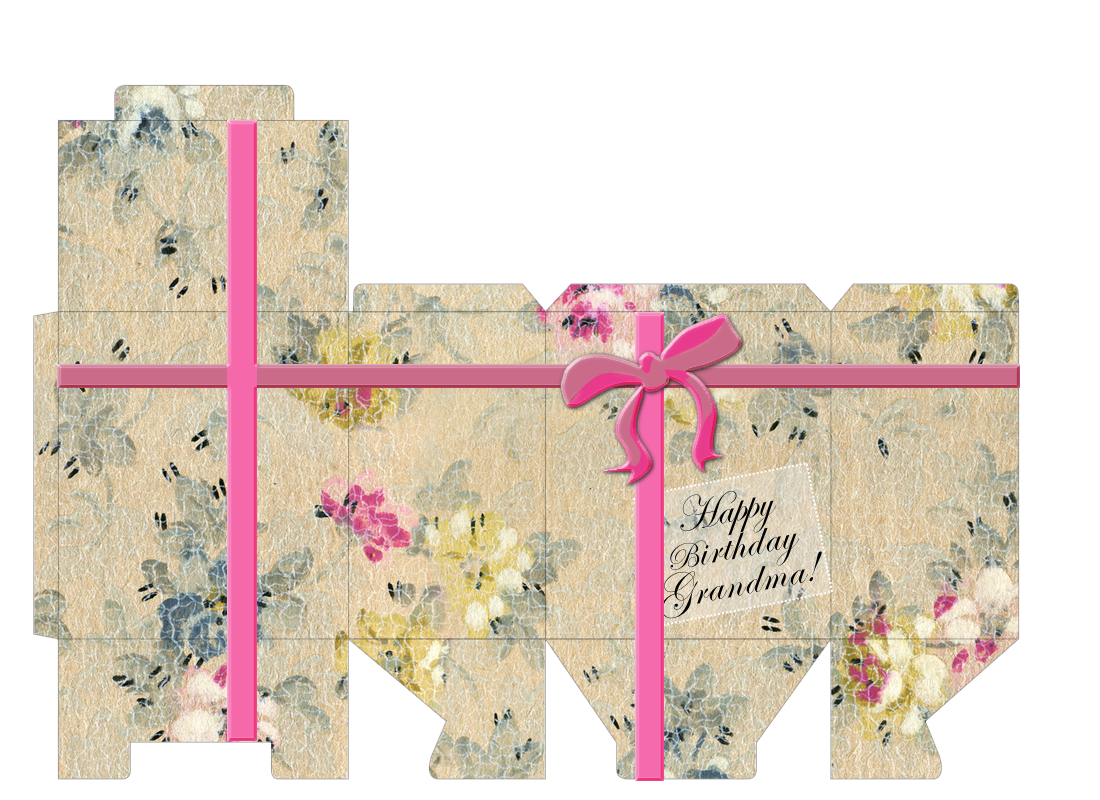
It's time to add some ribbon! Select the rectangle shape tool from the tools palette and make sure the 'Fill' box is checked but not the stroke. Set the color for your ribbon in the fill color well in the tools palette. Draw out the thickness of ribbon you want spanning the width of the box.
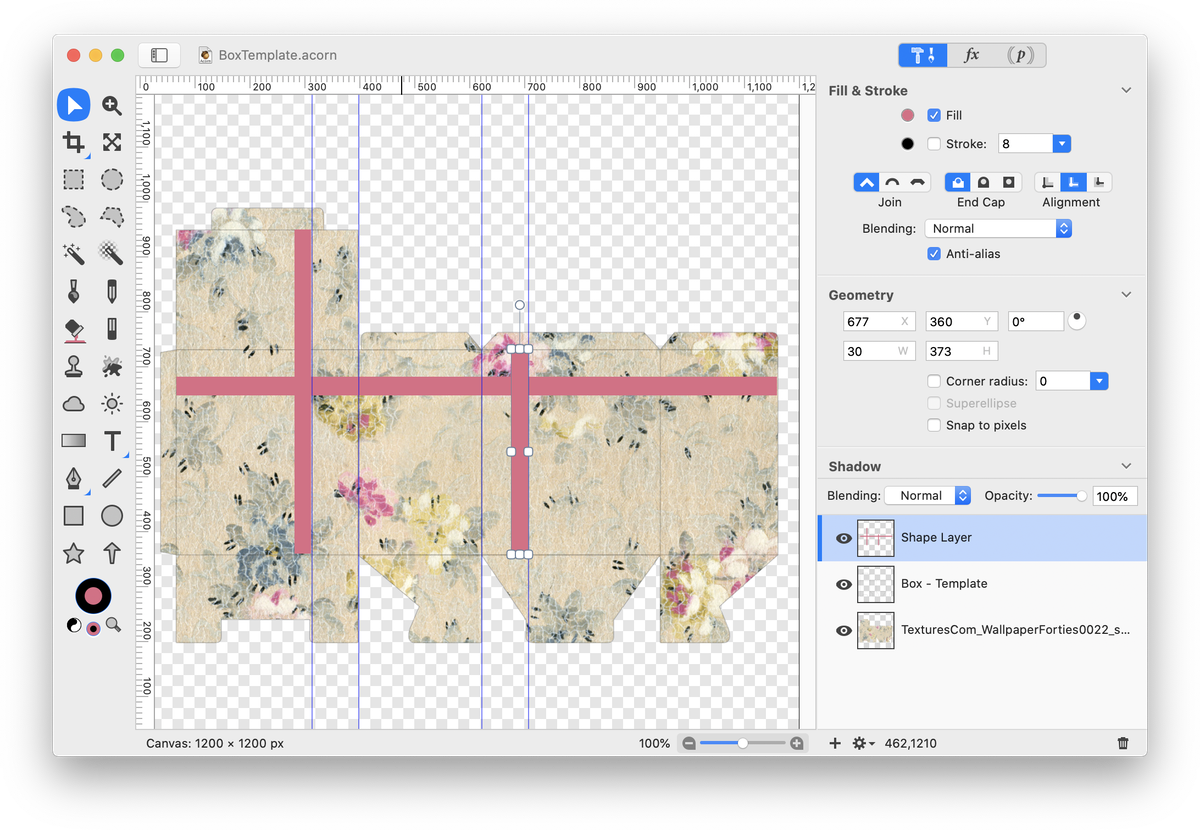
Draw out another ribbon spanning the height of the box. Vary the color and thickness if you want! To get the ribbon to line up exactly when your box is folded, use guides to help with the ribbon placement. Go to View ▸ Show Rulers. Click and drag on the vertical ruler to bring out a guide. Bring out a total of 4 guides and line up your vertical ribbons so they are equidistant from the box folds. Choose View ▸ Hide Ruler and View ▸ Guides ▸ Hide Guides when you are done.
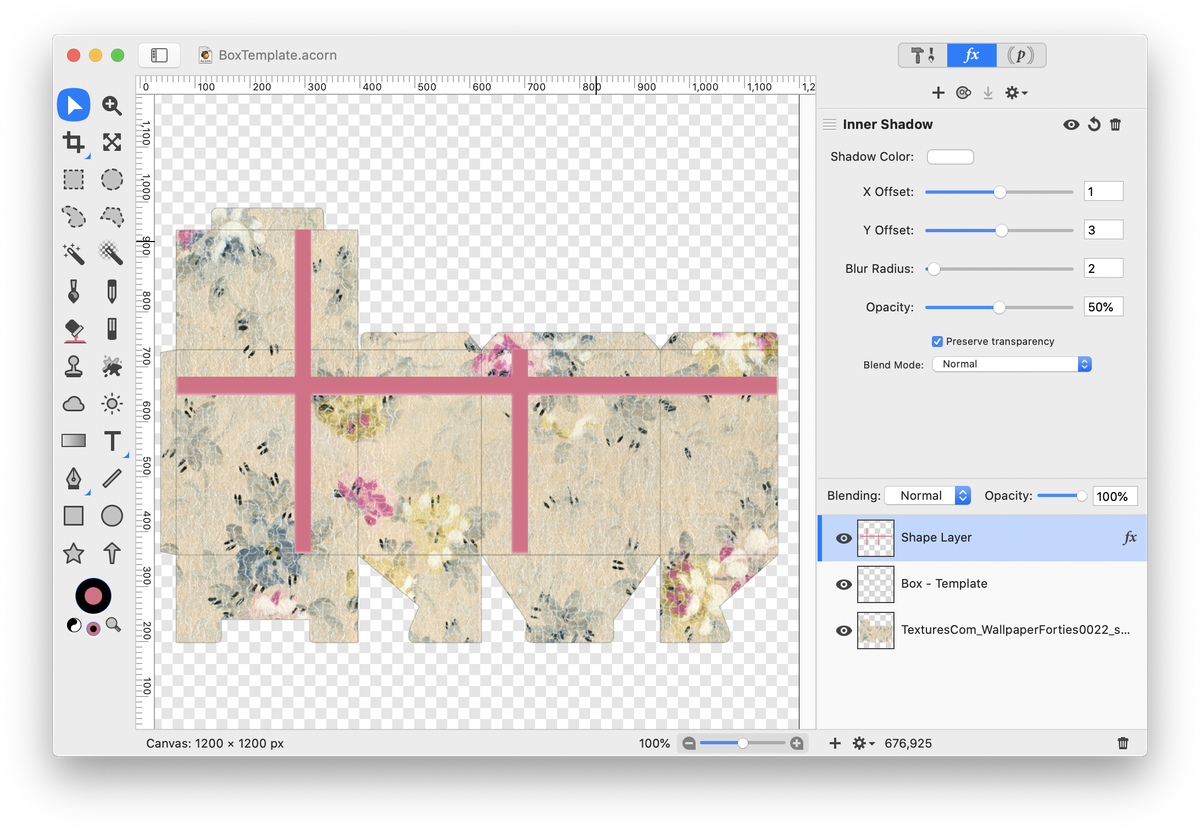
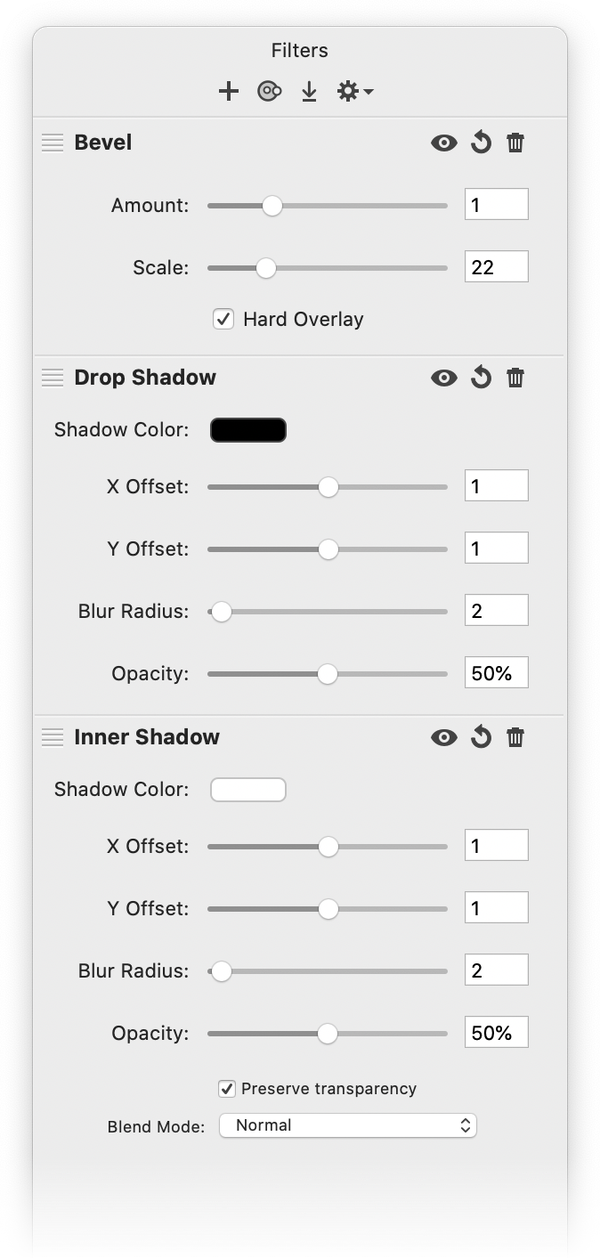
Give the ribbon some depth by adding an inner shadow filter. Click on the 'fx' at the bottom of the inspector palette and choose Stylize ▸ Inner Shadow. The settings used here can be found below.
Now use File ▸ Add Images to add the image of a bow. You can download this particular bow here. Use Layer ▸ Rotate and Transform ▸ Scale and Rotate to make the bow an appropriate size.
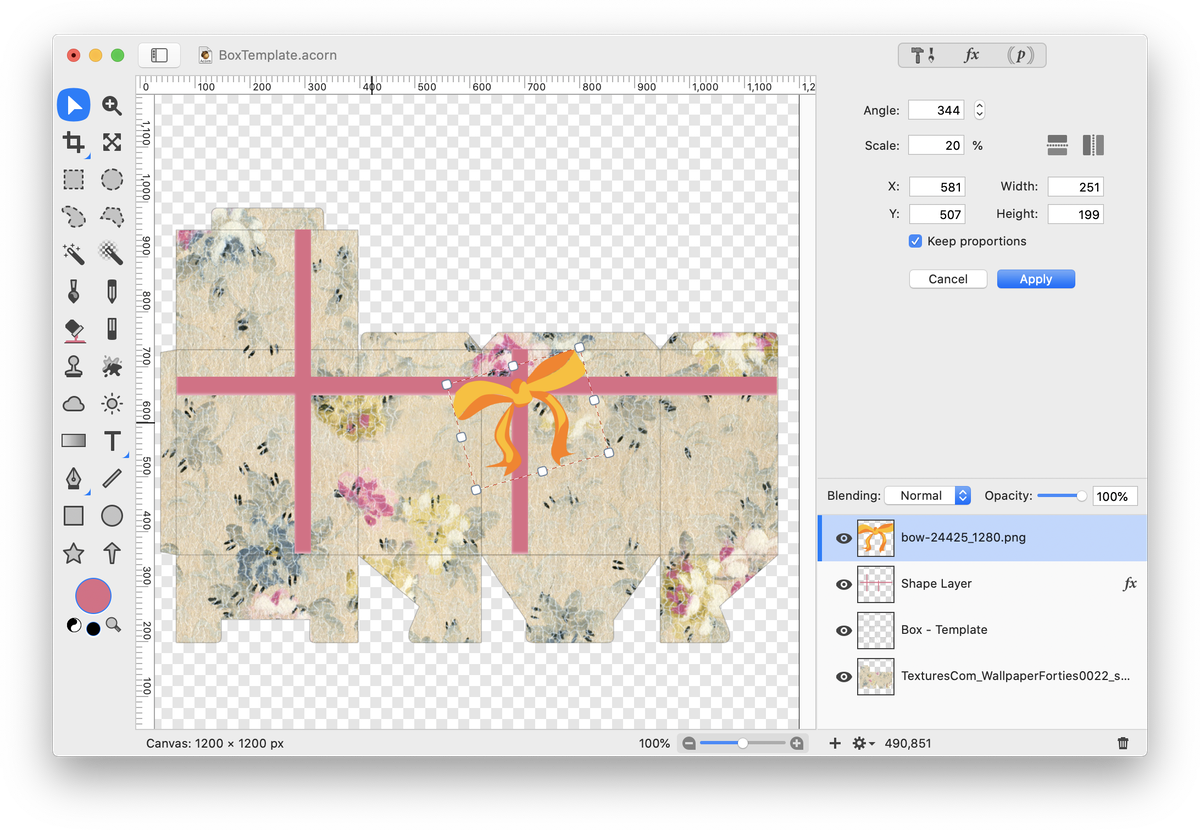
To change the color of the bow, click on the magic wand selection tool in the tools palette and select one of the bow colors. Make sure 'contiguous wand' is unchecked in the inspector palette. Choose the color you want to replace it with in the front color well. Click on the fill tool and fill the selection with the new color. Deselect (⌘D). Repeat for the other bow color.
Click on the 'fx' to apply some filters to the bow. Play around with giving the bow an inner shadow, drop shadow, and bevel to make it stand out from the box.
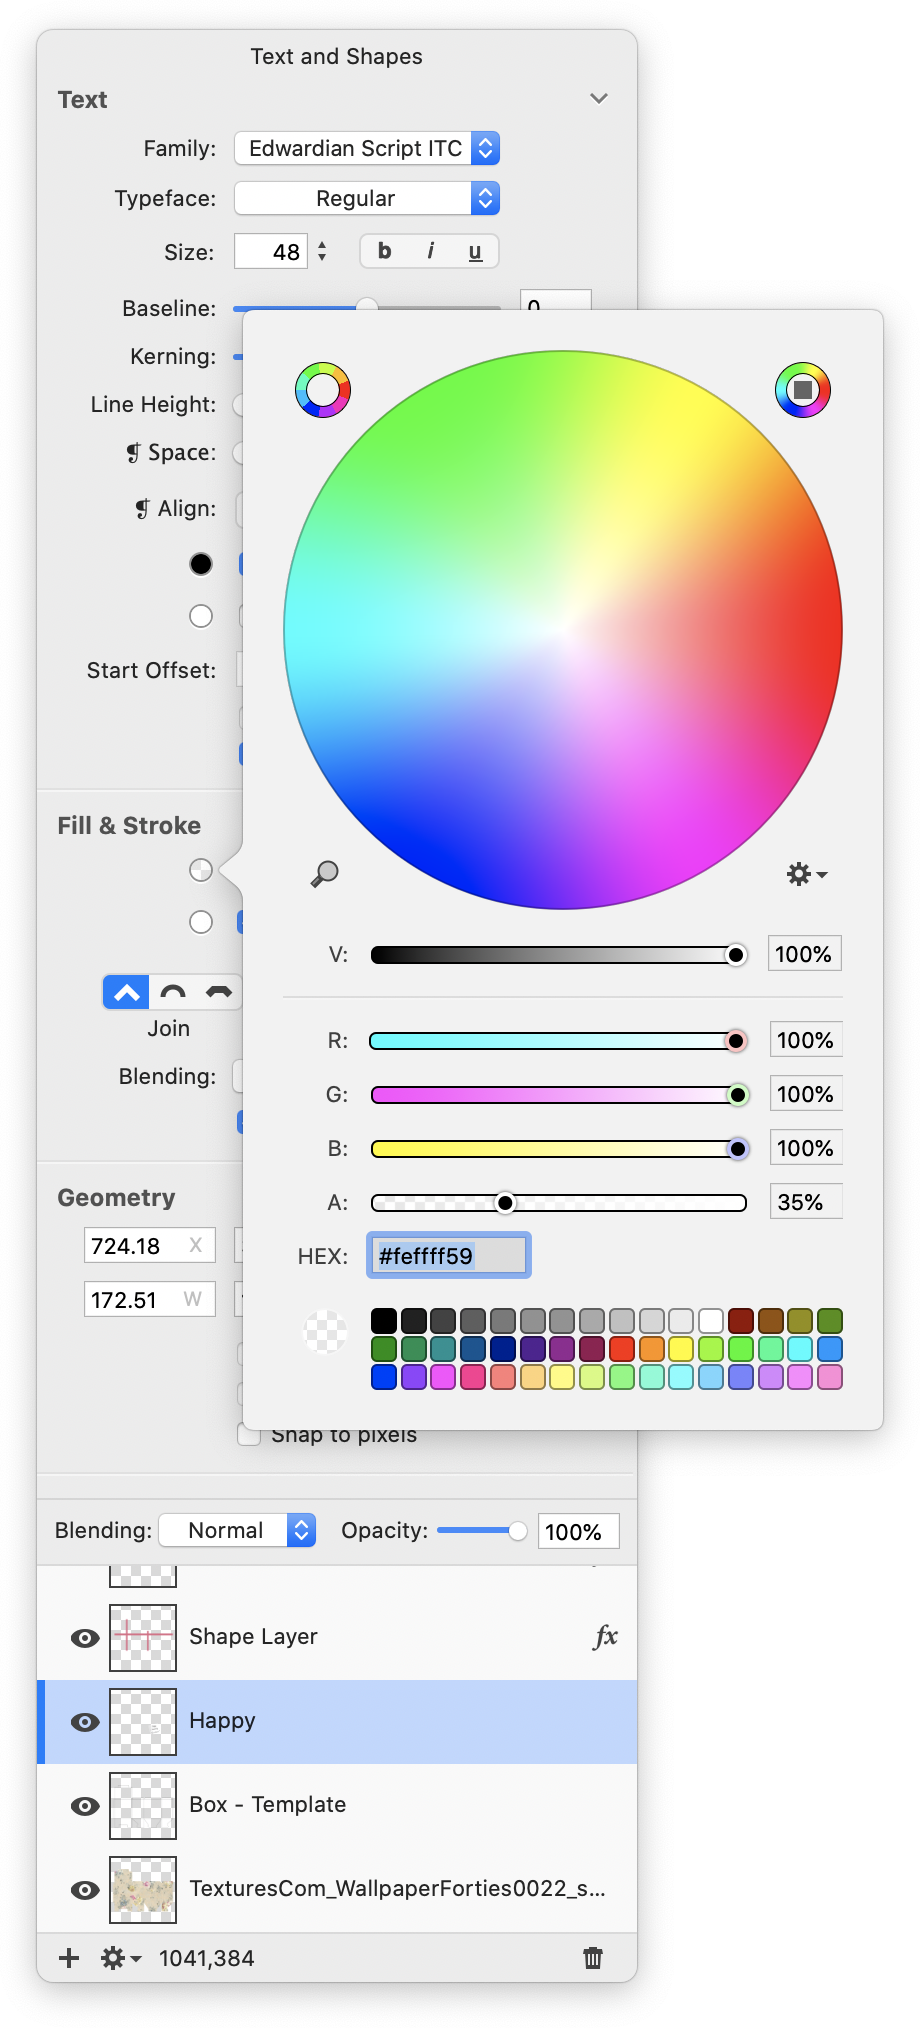
Now, add a note card. Click on the text tool and write out your text. Add white background color to the text box by modifying the fill and stroke values in the inspector palette. The text box rectangle used here has a white fill with an opacity of 35% and a dashed white stroke. You can modify the dash of the stroke under the ‘Dash’ section of the inspector.
Print out your creation in a landscape layout on card stock. Cut, fold, and paste your box to finish it up!
Tutorial Credit
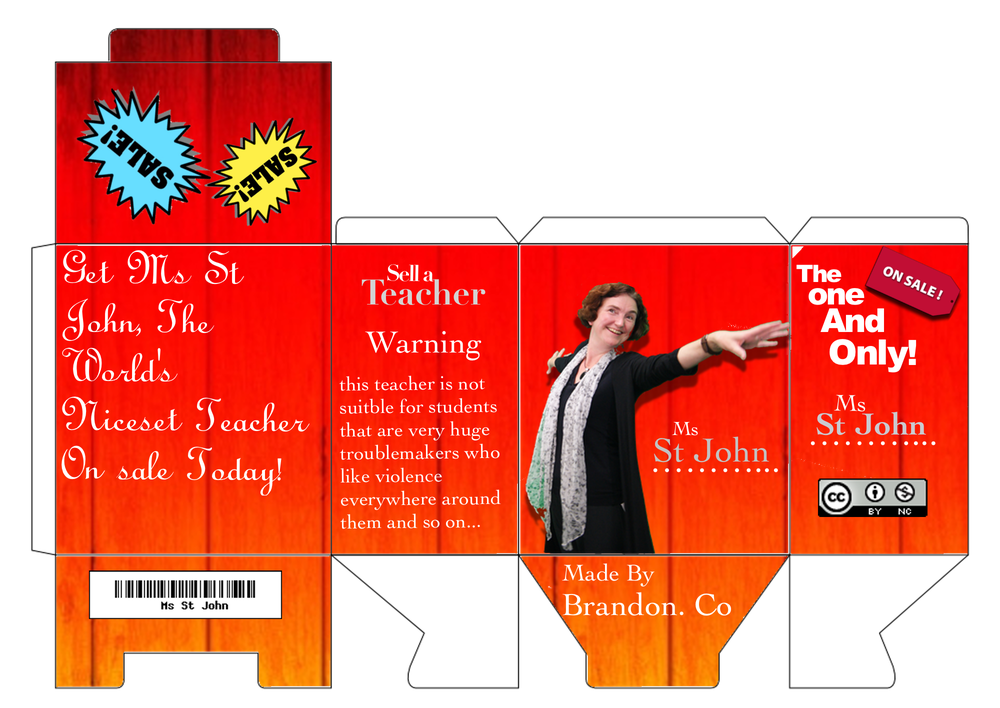
The original concept for this project and the blank box template are by Alan Dickson of Sha Tin College, Hong Kong. Thank you to the International College of Hong Kong, Mr. Parker, and his students for the inspiration for this tutorial. The students made 'Sell a Teacher' boxes using Acorn and one of their finished pieces can be seen below.